https://stargazerslounge.com/topic/143006-1100d-external-power-help/
1100d external power help
 Jovan Stosic
Jovan Stosic
Jovan Stosic
Jovan Stosic
Jovan Stosic
Jovan Stosic
Jovan Stosic
Jovan Stosic
Jovan Stosic
Jovan Stosic
Jovan Stosic
One of very common task working with webcam is to streaming it to web via HTTP. There are many ways to do it, and I will tell you how to do with VLC.
First is to make sure the webcam is connected and playing well, confirm it by,
$ vlc v4l2:///dev/video0
If you see the webcam playing on VLC, it works fine.
In VLC, to make an output stream, you will need to out –sout option with specified output module. Since we are trying to streaming out to HTTP, we will use std module with access option set to http, along with mpjpeg muxer. So, the command will be,
$ vlc v4l2:///dev/video0 --sout ‘#std{access=http,mux=mpjpeg,dst=IP:PORT}’
To confirm the output stream,
$ vlc http://IP:PORT
Well, up to this point, it just might work well for several cameras, not all. The reason is that default streaming output format from webcam often being YUYV as I mentioned in previous article.
To solve this, we can just apply the transcode module from VLC,
$ vlc v4l2:///dev/video0 --sout ‘#transcode{vcodec=mjpg}:std{access=http,mux=mpjpeg,dst=IP:PORT}’
Try to play the HTTP stream again, it should work. To make the output HTTP stream to be able to be played via web HTML5 video, MIME should be present,
$ vlc v4l2:///dev/video0 --sout ‘#transcode{vcodec=mjpg}:std{access=http{mime=multipart/x-mixed-replace;boundary=-7b3cc56e5f51db803f790dad720ed50a},mux=mpjpeg,dst=IP:PORT}’
To enable GPU (hardware-acceleration), use the chroma= option as I mentioned before.
$ vlc v4l2:///dev/video0:chroma=mjpg --sout ‘#std{access=http{mime=multipart/x-mixed-replace;boundary=-7b3cc56e5f51db803f790dad720ed50a},mux=mpjpeg,dst=IP:PORT}’
Have fun 🙂
Original post: http://blog.petehouston.com/2015/12/21/streaming-webcam-to-http-using-vlc/
For more tutorials, please visit: http://blog.petehouston.com/
Code / Design / Love @ https://petehouston.com
Dec 23, 2015
To force hardware-acceleration, which makes use of GPU, while playing or streaming from webcam, we need to add chroma= option to the input device. For example, if I want to force GPU for H264 codec on /dev/video0 device.
$ vlc v4l2:///dev/video0:chroma=h264
The value of chroma option is the codec, or pixelformat, supported by the webcam. So you need to check what output format supported by camera beforehand.
Original post: http://blog.petehouston.com/2015/12/21/force-hardware-acceleration-on-vlc-playing-from-webcam/
For more tutorials, please visit: http://blog.petehouston.com/
Dec 23, 2015
Streaming connected camera to RTSP using VLC is pretty much easy,
$ vlc v4l2:///dev/video0 --sout ‘#rtp{mux=ts,sdp=rtsp://IP:PORT/cam.sdp}’
Make sure to have camera plugged into the computer or host.
rtp — is the name of the VLC module we will use to stream to RTSP.
mux=ts — this is multiplex format, for live streaming, it should be ts.
sdp=rtsp://IP:PORT/cam.sdp — specify the output SDP on RTSP.
To play this RTSP stream,
$ vlc rtsp://IP:PORT/cam.sdp
Have fun 🙂
Original post: http://blog.petehouston.com/2015/12/21/streaming-camera-to-rtsp-using-vlc/
For more tutorials, please visit: http://blog.petehouston.com/
1
Dec 23, 2015
Sometimes, you don’t want to play audio from the input, you can disable it easily via command-line by adding the option –no-audio,
$ vlc video.mp4 — no-audio
Specifically, it is useful for playing from camera, you don’t need sound and want to make an output for streaming, such as RTSP…you will need to add acodec=none to the transcode module.
$ vlc v4l2:///dev/video0 --sout ‘#transcode{acodec=none,vcodec=h264}:rtp{mux=ts,sdp=rtsp://IP:PORT/cam.sdp}’
That’s it, VLC will remove audio stream while streaming.
Original post: http://blog.petehouston.com/2015/12/21/disable-audio-when-playing-or-streaming-video-with-vlc/
To view the camera connected to the computer, you can use VLC to play it with V4L2 driver.
$ vlc v4l2://
Since we don’t provide a explicit device name, VLC will look for the first available camera device, which is usually /dev/video0. If there are more connected devices, you should provide the device to play. Check the list of available device by issuing this command,
$ v4l2-ctl --list-devices
HD Pro Webcam C920 (usb-0000:00:1a.0–1.3):
 /dev/video0
and to play,
$ vlc v4l2:///dev/video0
While playing VLC will try to determine which is default supported format of camera, which is usually, YUYV. …
Read more · 1 min read
v4l-utils is a popular package that helps manipulate and control video device on Linux. Install this package on Debian-based distros is pretty much easy.
$ sudo apt-get update$ sudo apt-get install v4l-utils
After installation, some of v4l2 utilities should be available to use, you can confirm by issuing the following command,
$ v4l2-ctl General/Common options: — all display all information available -C, — get-ctrl=<ctrl>[,<ctrl>…] get the value of the controls [VIDIOC_G_EXT_CTRLS] -c, — set-ctrl=<ctrl>=<val>[,<ctrl>=<val>…] set the value of the controls [VIDIOC_S_EXT_CTRLS] -D, — info show driver info [VIDIOC_QUERYCAP] -d, — device=<dev> use device <dev> instead of /dev/video0 if <dev>…
Source: Streaming webcam to HTTP using VLC | by Pete Houston | Medium
Jovan Stosic
> /dev/null redirects standard output (stdout) to /dev/null, which discards it.
2>&1 redirects standard error (2) to standard output (1), which then discards it as well since standard output has already been redirected.
Jovan Stosic
This guide was based off the canon powershot s100.
It might work for other cameras but,
if it does not work for your camera visit
Prepare your SD card for more help and info.
Step 1
Download and run camera version 1.3 to get camera version.
http://chdk.setepontos.com/index.php?topic=4743.0
(ACID is good too by the way….I have both )
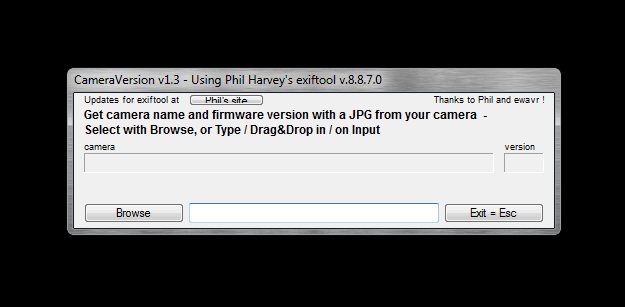
Camera Version 1.3
CameraVersion1.3
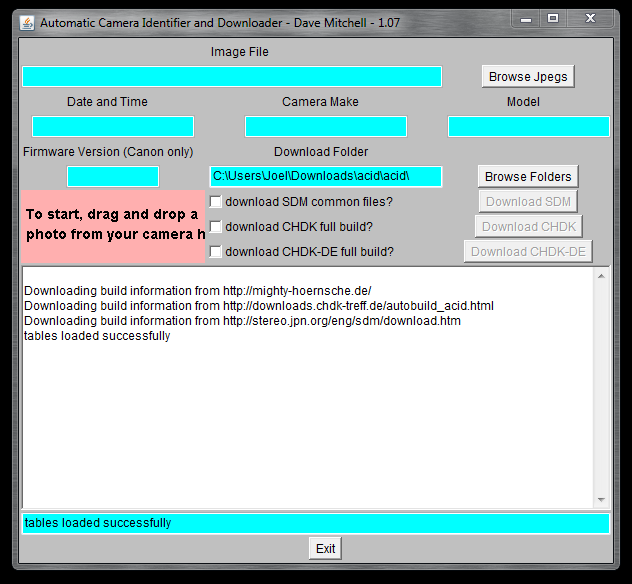
ACID
ACID
This one hangs for a bit sometimes
when you try to use it
Step 2
Browse your computer and then Open a picture taken with your
camera with the program to get your camera version number.
Step 3
Locate and download correct CHDK version from:
http://www.mighty-hoernsche.de/trunk/
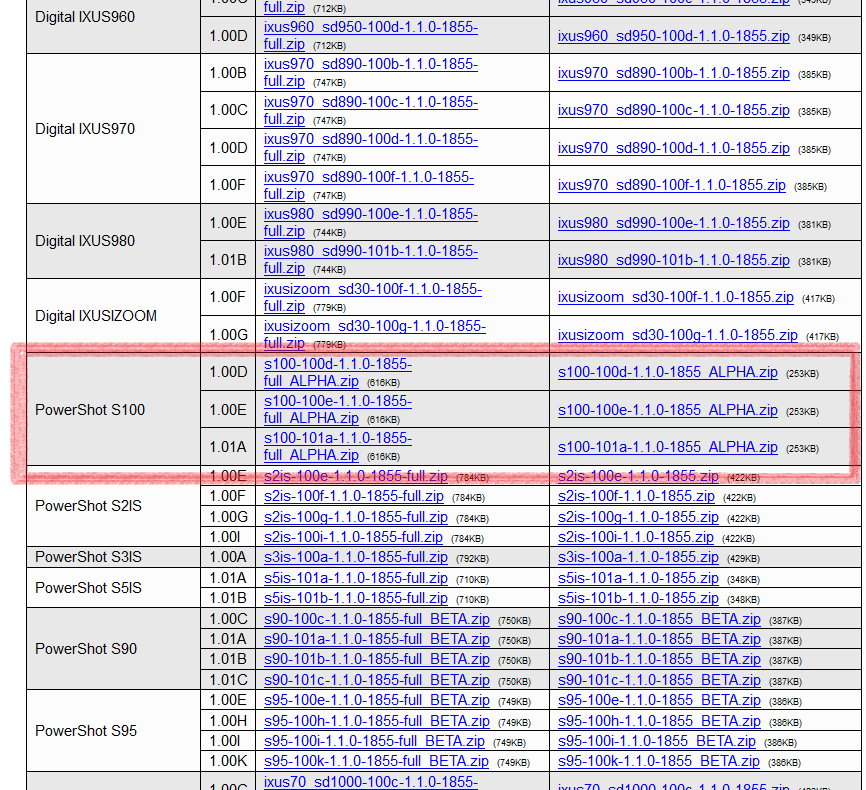
S100 trunk
Step 4
Unzip the files on your computer.
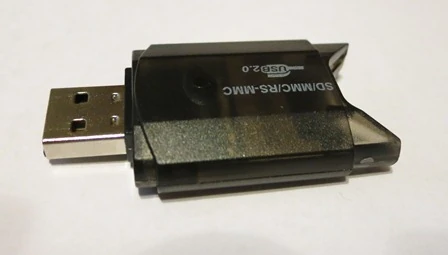
SD card reader
‘For the next’ few
‘steps you need’ an
SD card reader
step 5
make your sd card bootable
(I used EOScard 1.2, can be found here http://pel.hu/getpage.php?ac=2 or here http://pel.hu/down/)
(Press refresh, click on chdk, then hit save, and your done)
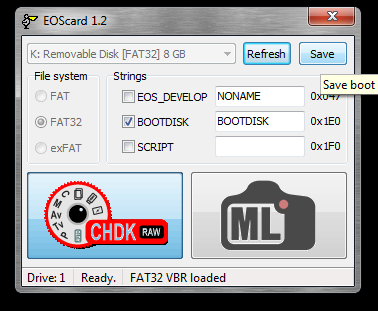
EOScard 1.2
Step 6
Place CHDK files on the root of the SD card.
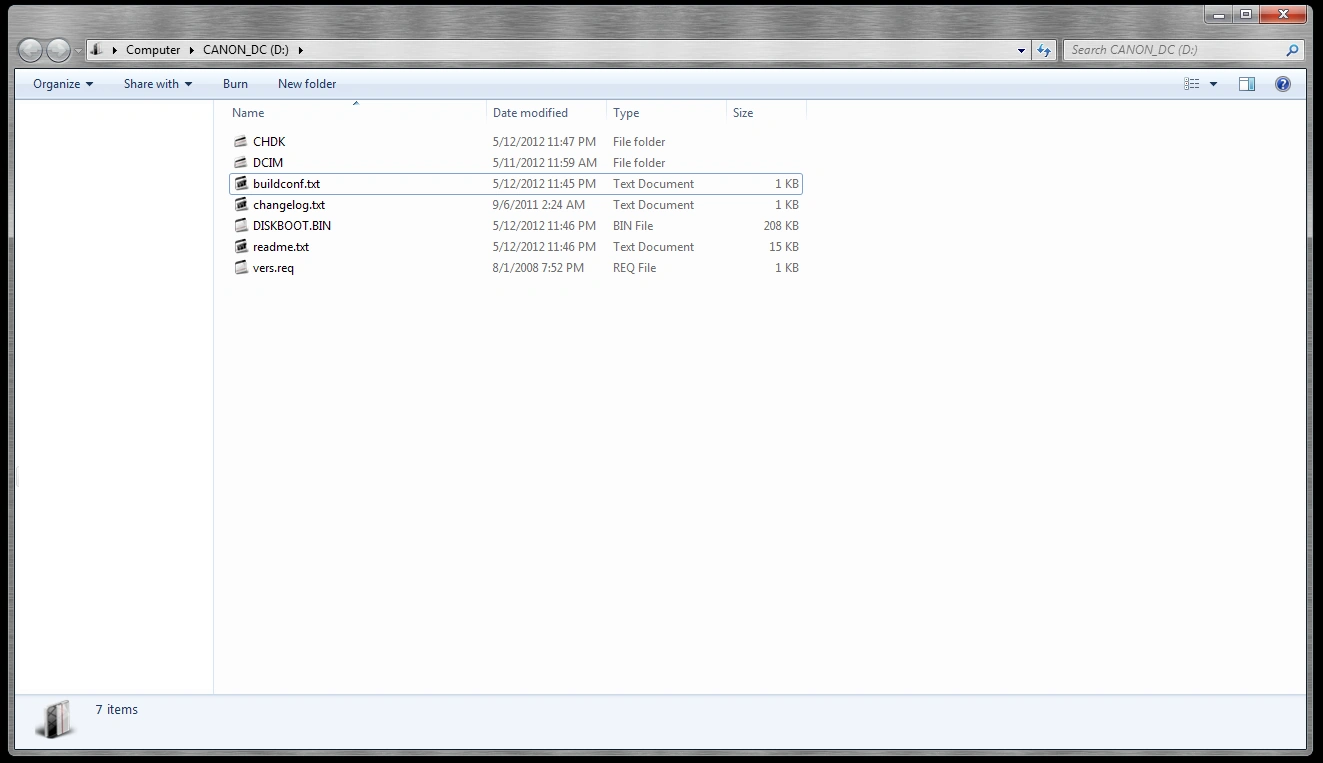
SD card root
Step 7
Lock the card by sliding the small switch and place the SD card in the camera.
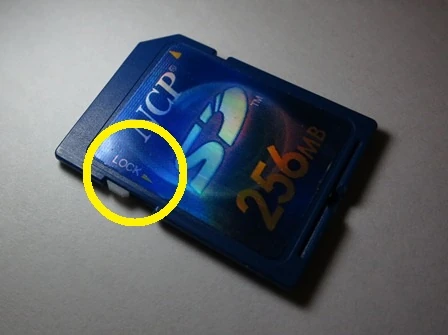
SD card Lock switch
Step 8
A.
To start CHDK in play mode:
Press and hold the play button until the CHDK logo appears.
B.
To start CHDK in Shooting mode (does not work on all cameras):
Press and hold on/off button until the CHDK logo appears.
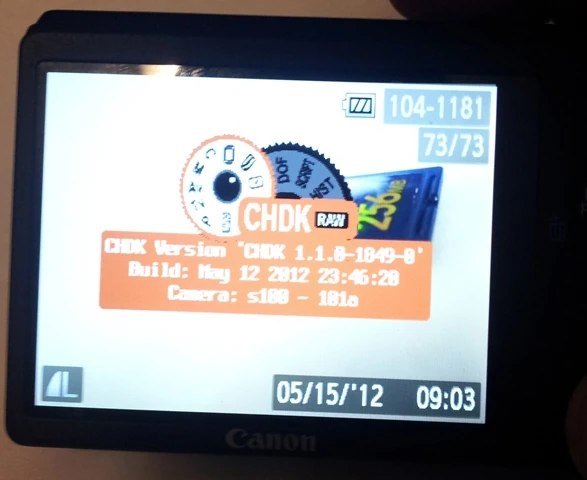
CHDK LOGO
Jovan Stosic
Additional uBASIC and Lua Scripting Commands
get_config_value
set_config_value
get_movie_status
get_video_recording
set_movie_status
get_video_button
get_display_mode
get_propset
get_zoom_steps
get_exp_count
get_drive_mode
get_flash_mode
get_flash_ready
get_IS_mode
get_orientation_sensor
get_min_av96
get_max_av96
get_nd_present
get_nd_value_ev96
get_nd_current_ev96
get_histo_range
shot_histo_enable
autostarted
get_shooting
get_ev
set_ev
get_autostart & set_autostart
get_temperature
select/case function
changed RANDOM command
playsound
print_screen
get_time
get_mode
get_quality
get_resolution
set_quality
set_resolution
get_platform_id
set_backlight()
set_lcd_display()
set_draw_title_line
get_draw_title_line
get_sd_over_modes
set_aflock
set_mf
set_aelock
set_record(state)
set_capture_mode_canon(value)
set_capture_mode(modenum)
is_capture_mode_valid(modenum)
get_capture_mode
set_console_layout
set_console_autoredraw
console_redraw
reboot([file])
restore
set_exit_key
set_yield
get_curve_file
set_curve_file
get_curve_state
set_curve_state
get_focus_mode
get_focus_state
get_focus_ok
get_focal_length
get_min_stack_dist
set_file_attributes
get_partitionInfo
swap_partitions
get_buildinfo
get_dofinfo
get_video_details
textbox
get_raw_support
get_digic
set_clock
set_focus_interlock_bypass
APEX96 Conversion Functions
iso_to_sv96
sv96_to_iso
iso_real_to_market
iso_market_to_real
sv96_real_to_market
sv96_market_to_real
aperture_to_av96
av96_to_aperture
usec_to_tv96
tv96_to_usec
seconds_to_tv96
APEX96 Example Lua Script
Live View Exposure Functions
get_imager_active
get_current_tv96
get_current_av96
Jovan Stosic
Jovan Stosic
Jovan Stosic
Jovan Stosic
Don’t you hate it when people use your computer without your permission? Worst still, your laptop is stolen and you have no idea who stole it. If your laptop comes with a webcam, you can easily set up motion detection software to find out who is using your computer when you are not around. If you have a spare computer at home, you can also use it as a surveillance camera. We have shown you how to do so in Windows, and this article will show you how to set up a motion detection webcam in Ubuntu.
The software that we are using is Motion. This is one useful tool that can monitor the video signal from a webcam and take screenshots when it detects a motion (i.e. when a significant part of the picture has changed). While we are dealing with Ubuntu in this article, Motion will work for most Linux distro as well.
Motion is included in the Ubuntu repository, so you can install it by clicking here, via the Ubuntu Software Center, or by simply typing the following command in the terminal:
sudo apt-get install motion
Before we start configuring Motion, we need to copy the config file to our Home folder so that the master copy won’t be affected. Open a terminal and copy the configuration file to your Home folder.
mkdir .motion
sudo cp /etc/motion/motion.conf ~/.motion/motion.conf
Note: The above commands will create a hidden folder “.motion” in your Home directory.
Once you have done the copying, you can open the file for editing.
sudo nano ~/.motion/motion.conf
There are plenty of options that you can customize in the config file, but there are only a few things that we are interested in. Scroll down the list to find the following settings:
Daemon – Changing this to “on” will make it run in daemon mode. Applications in daemon mode will run in the background and start automatically when the computer starts. The default option is “off” where you need to start the application manually in terminal.

Width – This is the width of the images taken by the webcam. The default is 320, but you can set your own value here. Note that the width is limited by your webcam’s capability. My webcam is only capable of taking images up to 350px, so a value of 320 works fine for me.
Height – The height of the images taken by the webcam. Similarly, it is limited by your webcam’s capability.
framerate – how often you want the image to be captured per second. The default is 2 (2 frames/images taken per second). The higher value you set, the more computing resources it will require.
Motion detection thresold – the number of changed pixels in an image before it is captured. The default is 1500. If you want to make it more sensitive, set it to a lower value.

output_normal – This will determine whether it will save the motion to images. The default option is “on,” which means pictures will be saved as long as motion is detected. You can set it to “first,” “best,” “center” to get it to save only a limited number of images. This will prevent your folder from having an overwhelming number of images. If you just need the video streaming mode, you can set it to “off” to prevent it from saving any pictures.

target_dir – This is the directory where the images are saved. If you have installed Dropbox (or any other cloud storage service), you can set the target directory to be within your Dropbox folder so you can view the images from another location.
Note: There are plenty of other options that you can config, but we won’t be covering them here.
Once you are done with the configuration, press “Ctrl + o” to save the changes and “Ctrl + x” to exit.
In the terminal, type:
sudo motion
This will start the motion server. If everything goes well, you will start seeing pictures showing up in the target directory.

There is also a swf live streaming video that you can open in your media player. If you are accessing from a remote location, you can access the IP address of your computer (with port 8081) to view the video (or http://localhost:8081 in your local computer). The control center is accessible at port 8080.

As I mentioned earlier, the best way is to save the images into your Dropbox folder so you can access it anywhere you want. However, if you prefer to have the images uploaded to your own file server (via FTP), you can use the command wput to upload the images.
sudo apt-get install wput
In the config file, scroll down the list till you see a field “on_picture_save value“. Change it to:
on_picture_save wput ftp://user@password@server %f
where the “user”, “password” and “server” are details that you need to fill in.
If you like Motion to autostart every time you boot up your computer, all you have to do is to add an entry to the Startup Application.

While it may seems like a complicated task, setting up a motion detection webcam in Ubuntu is actually a very easy job. What other method do you use to set up your webcam as a surveillance camera? Let us know in the comments.