Month: March 2021
EasyEDA Full TUTORIAL + Create Component + TIPS – YouTube
Got an Old Canon Point-and-Shoot Camera? Hack It – IEEE Spectrum
A decade is a long time in technology—long enough for a technology to go from hot product to conspicuously obsolete to retro cool. In 2010, IEEE Spectrum’s David Schneider wrote about a hack to supplant the firmware in Canon point-and-shoot cameras and add new features, such as motion detection. As it turns out, at the time point-and-shoot cameras were near their zenith of popularity. Since then, while compact stand-alone digital cameras are still being made, their sales have shrunk dramatically. As the smartphone camera became the most ubiquitous type of camera on the planet, point-and-shoot cameras found themselves relegated to the back of the closet.
That was certainly the case with our Canon PowerShot S80. My wife bought it in 2008 primarily to document her paintings in between professional photo shoots, and a few years later we replaced it with a mirrorless Nikon 1 J-1 with interchangeable lenses. So when I found the S80 while decluttering recently, I wondered: Was it just e-waste now, or could it be combined with today’s technology to do interesting things?
I decided the perfect test case for my S80 was variable time-lapse photography. This is a task for which even an 11-year-old digital camera, with its larger optics, can compete with today’s smartphones on image quality. This scenario makes mobility a moot point, but the task also requires more sophistication than even CHDK—the open-source firmware replacement David Schneider wrote about in 2010—can easily offer alone.
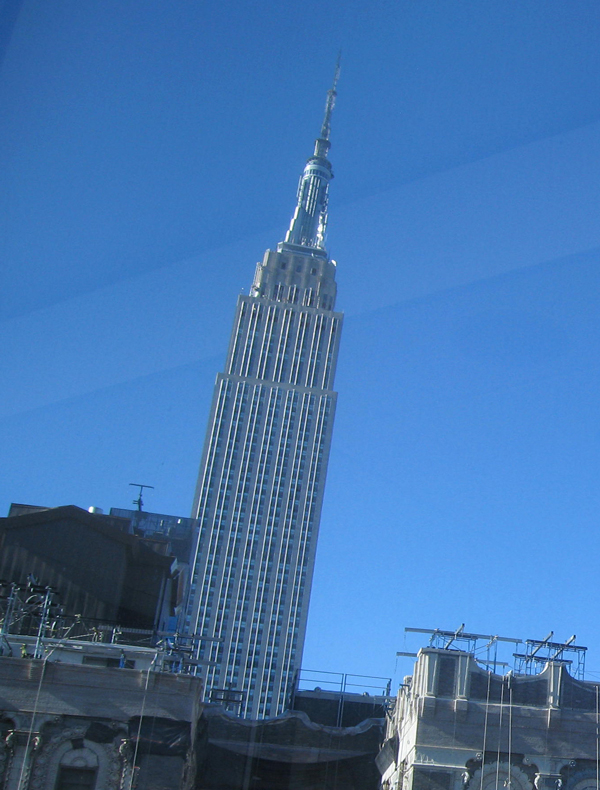
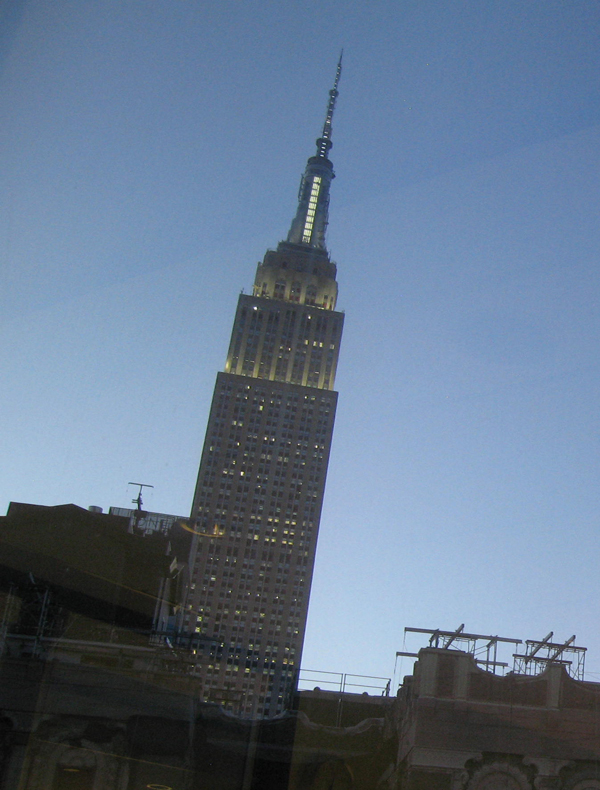
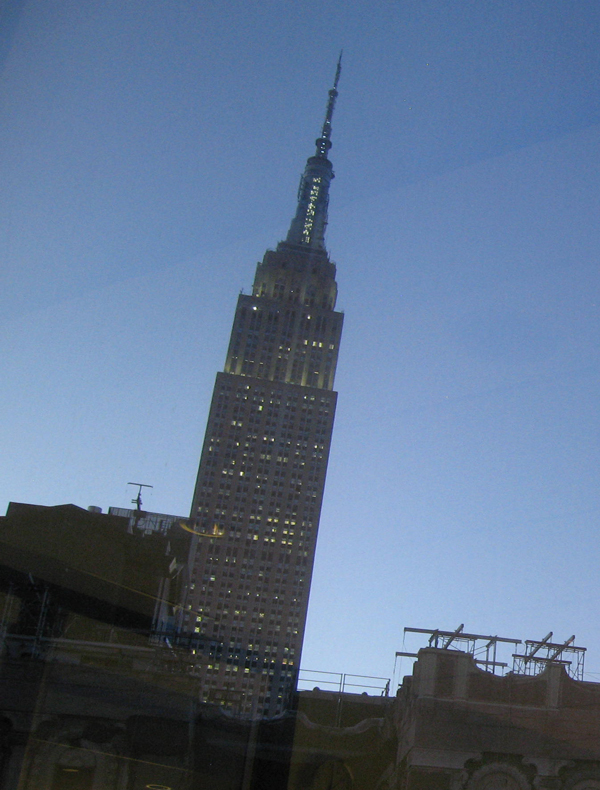
My S80’s original firmware had a function that would take a photograph at fixed intervals of between 1 and 60 minutes, in 1-minute increments. CHDK provides a script that allows a more fine-grained increment of 1 second, but I wanted to try time-lapse photography of the Empire State Building, which we happen to have a good view of from Spectrum’s New York office. During the day, the light changes slowly, so I wanted to shoot one photo every few minutes. At dusk, however, the lighting on and around the building changes more dramatically, so I wanted photos taken at a faster rate.
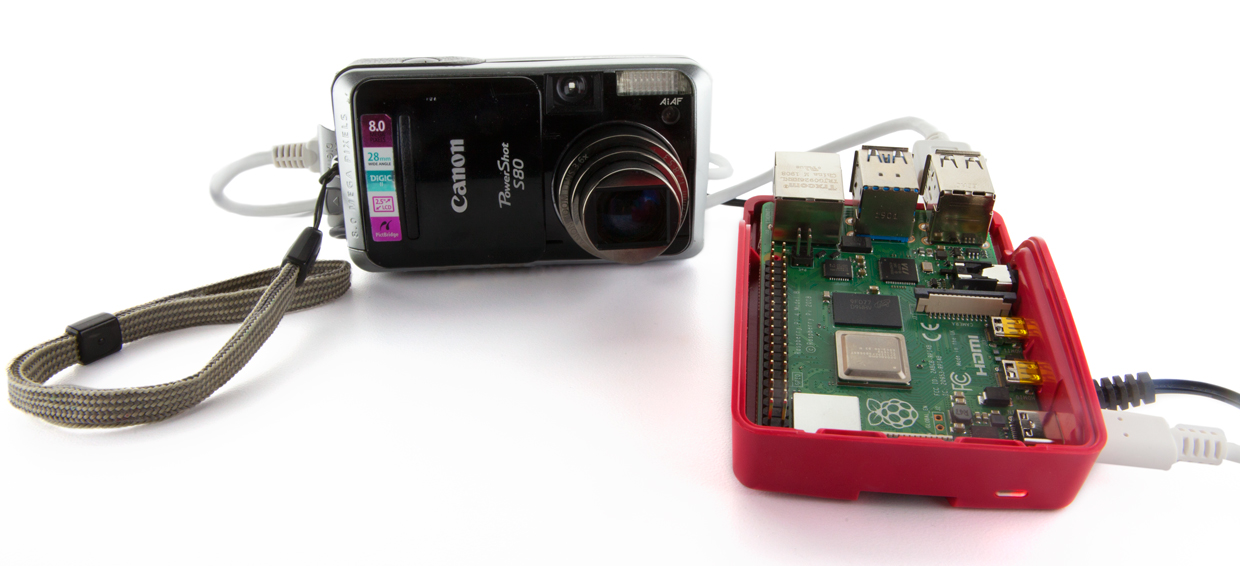
The first thing was to test my camera. It’s a credit to Canon that despite years of disuse, all the parts sprang to life. The only problem was on the battery side. I had three batteries, one of which refused to charge at all, and two others I no longer trusted for a long-duration experiment, so I found a DC adapter on eBay that powers the camera from a wall socket.
Then I installed CHDK. Fortunately, this is one of those rare pieces of open-source software for which the documentation is a comprehensive and intelligible wiki. Looking up the instructions for my S80, I determined its current firmware, which turned out to be 1.00f. Only the 1.00g version is compatible with CHDK, so I followed the instructions to upgrade the factory firmware, the biggest obstacle to which was finding the right utility software to open the 7z format that the firmware file was compressed with.
A cross-platform tool called Stick makes finishing the CHDK install easy: Drop a photo taken with a camera onto the tool’s interface and it analyzes the metadata and downloads the exact version of CHDK required onto a SD card. Launching CHDK on my camera just requires putting the prepared card in and pressing the S80’s “shortcut” button.
CHDK provides an interface for remote control of the camera via the USB link normally used to download photographs directly to a PC. A number of programs can use this PTP standard, including chdkptp, which offers both a command line version and a graphical user interface (GUI) version that lets you see what is being displayed in the viewfinder screen live. One of the nice things about chdkptp is that a precompiled binary, bundled with required supporting libraries, is available for the Raspberry Pi, thus eliminating dependency hell.
I ran into two problems, which were resolved after searches of CHDK’s user forums. The first was that chdkptp couldn’t connect to the S80—a helper process on the Pi was grabbing the connection, assuming I wanted to download photos. The simplest solution was to find the offending process using a “ps -ax | grep gphoto2” command, and “kill -9” it. (This works only on a per-session basis; if you want to permanently disable the helper, you’ll have to edit some deep configuration files.)
My camera and chdkptp could now connect, but I still couldn’t actually take a photo. This was solved by writing a script with some mode commands I found on a forum. CHDK runs the script when I press the camera’s shutter, and then it is happy to accept remote commands.
To implement my variable time-lapse schedule, I wrote a short Python program on the Pi. I looked up the time of the sunset and set the Python program to check the clock. Outside a half-hour window around sunset it would take a photo every 10 minutes, and one every 30 seconds inside the window. To control the S80, I just issued an OS call to the chdkptp command line tool that connected and triggered the shutter—that is, os.system(“./chdkptp.sh -c -eshoot”).
I left the system running from the early afternoon till dusk, and when I returned I had 113 images, which I dumped into iMovie to make a time-lapse video. Ta-da!
Now that I have my proof of concept, it would be a straightforward task to write a Python script that could download the times of sunrise and sunset and adjust itself automatically. I can also save images directly to the Pi. Then I could access and download these images remotely over a wireless network, allowing for the option of leaving the camera and Pi in place for long periods of time for truly epic time-lapse movies.
This article appears in the December 2019 print issue as “Hack Your Old Point-and-Shoot.”
Source: Got an Old Canon Point-and-Shoot Camera? Hack It – IEEE Spectrum
CHDK Dummies Guide 2nd Edition
CHDK : Quick Start
If you don’t want to read this short guide, or the somewhat longer official CHDK User Manual , here’s a quick list of what you need to do to load and run CHDK.
- Download and install the STICK utility from this link >: STICK
- Run STICK to configure your SD card and install CHDK.
- Put the SD card’s lock switch into the “locked” position and put the card into your camera.
- Start your camera normally. You should see the red CHDK logo appear for a few seconds.
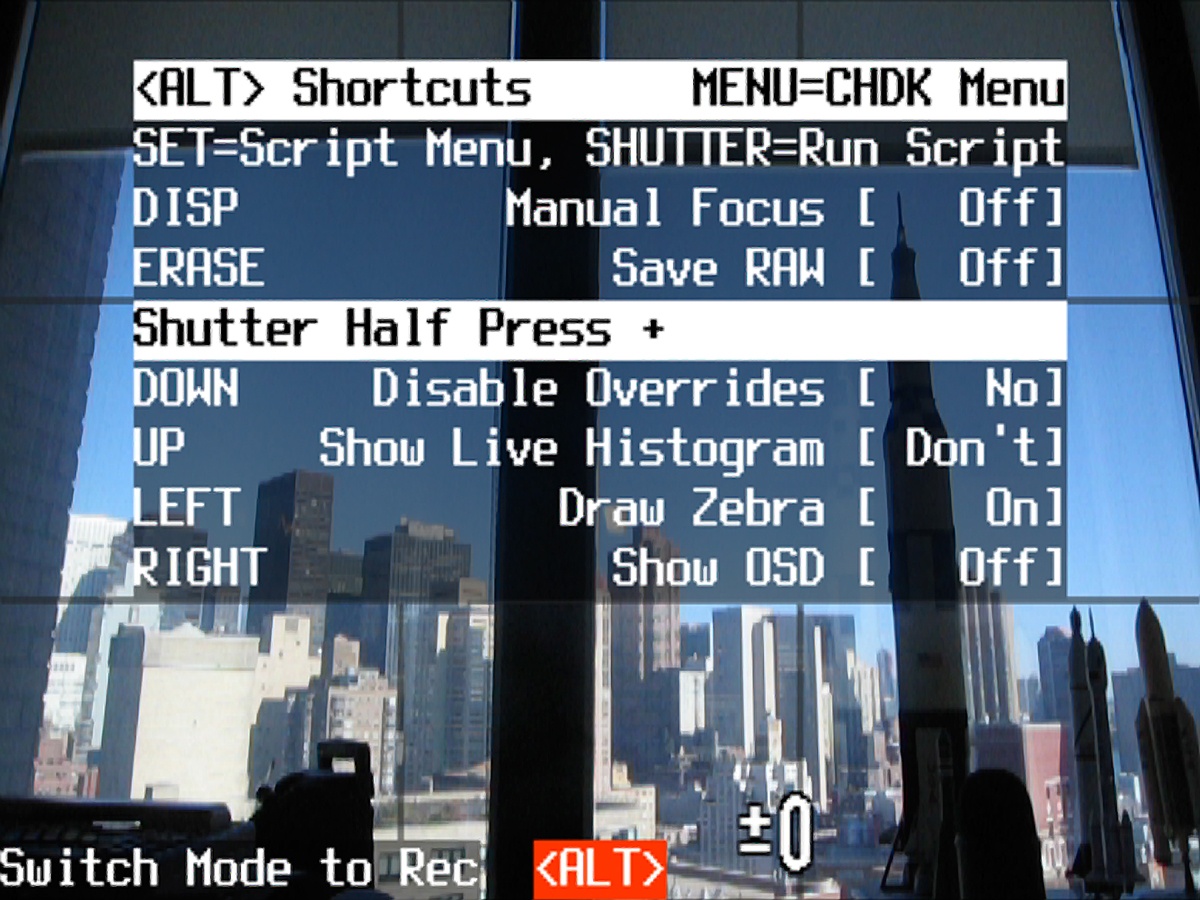
- Press the defined <ALT> key for your camera to enter CHDK mode. The <ALT> key is usually either the PRINT or PLAY button. However, some cameras use the DISP, VIDEO, HELP or FACE buttons so you might have to try different buttons to find the right one.
- Press the MENU button in <ALT> mode to access the CHDK configuration menus. Press the FUNC/SET button to bring up the scripting menu.
- Press the shutter button in <ALT> mode to run the currently loaded script.
- Exit <ALT> by pressing the <ALT> button again. Override settings and onscreen display option will now enabled while you are back in normal Canon mode.
Lust for Life (1956)
Normal People (TV Mini-Series 2020)

Unorthodox (TV Mini-Series 2020)

Your Honor (TV Series 2020–2021)
Ted Lasso (TV Series 2020– )

Ratched (TV Series 2020– )

Sonore – ISO2DSD – converts ISO files to DSD
How to Use Your DSLR Camera As a Webcam in Linux
How to Use Your DSLR Camera As a Webcam in Linux
If you desire a more professional looking image when video conferencing, it turns out that you can use a Digital SLR camera as your webcam. Using a DSLR provides a number of benefits over an off-the-shelf webcam, most notably higher image quality, ability to finely adjust the frame of an image (zoom, wide angle), and adjust the depth of field. The depth of field adjustment is what allows for a nice, smooth, blurred background. It’s straightforward to get setup within Linux, this is the guide for how it’s done.
This article was originally published at Cracked the Code. Head over there for the latest updates and an improved reading experience.
Hardware Needed:
- A camera supported by gPhoto, with Liveview capabilities
- Ability to connect your camera to your Linux-based PC through a USB cable
- Ideally some way to power your camera through a power supply. You can run from your camera’s battery, but run time will be limited
Software Needed:
- gPhoto
- v4l2loopback
- ffmpeg
- VLC (Optional, used for testing)
Before Getting Started:
The configuration as detailed here works very well for most people. There are however a few important limitations to be aware of before you get started:
- You will not capture the full resolution of your camera’s image sensor.
This guide uses the gPhoto2 application and associated libraries, which enables you to control your camera through terminal commands. gPhoto2’s movie capture mode captures a series of preview frames from your camera and outputs them as a motion JPEG video format. The resolution of the preview frames captured from your camera varies, but will likely be less than 720p (1280×720).
It would be great to capture an HD quality image from a large, sophisticated and expensive camera, but in my experience the resolution doesn’t matter as much as you might think. The greatly enhanced optics, large image sensor, and depth of field provided by a DSLR camera contribute to a much better looking image.
2. Video capture and encoding is CPU intensive and your system may have performance issues.
I developed this guide on an AMD Ryzen 7 workstation which had the processing power to ingest and transcode the video stream from my camera with no issues. Make no mistake though, video transcoding (as we’re doing here) is CPU intensive, and some lower-powered computers will have performance issues. It’s hard to say what the minimum specs are for this guide, but an Intel i7 class processor is close to the minimum needed to use this effectively.
Software Setup:
Installing the required software can be accomplished through your distro’s package manager:
Debian/Ubuntu
$ sudo apt-get install gphoto2 v4l2loopback-utils v4l2loopback-dkms ffmpeg
Arch Linux
$ pacman -S gphoto2 v4l-utils v4l2loopback-dkms ffmpeg
Fedora
$ sudo dnf install gphoto2 v4l2loopback ffmpeg
Video4Linux Configuration
Once you’ve installed the required packages, connect your camera to your PC via USB and power on the camera. You can safely ignore any OS popup message which may appear.
Open your Terminal application, and enter the following command:
$ sudo modprobe v4l2loopback exclusive_caps=1 max_buffers=2
Loading this kernel module manually (through modprobe) means you will have to remember to modprobe every time you reboot. To ensure this module is enabled when your system is booted, you need to edit one config file /etc/modules, and create a new module config file /etc/modprobe.d/dslr-webcam.conf:
Add dslr-webcam as a new line at the end of /etc/modules. If you have nothing but comments in this file, just add dslr-webcam as the last line in this file.
$ sudo vi /etc/modules# /etc/modules: kernel modules to load at boot time.
#
# This file contains the names of kernel modules that should be loaded
# at boot time, one per line. Lines beginning with "#" are ignored.dslr-webcam
- Using
sudocreate a new file/etc/modprobe.d/dslr-webcam.conf. Add the following content to this file, and save:
# Module options for Video4Linux, needed for our DSLR Webcamalias dslr-webcam v4l2loopback
options v4l2loopback exclusive_caps=1 max_buffers=2
Note: We’re using the alias functionality of modprobe.d to provide an alternate and more descriptive name (dslr-webcam) for our Video4Linux kernel module.
gPhoto2 DSLR Testing
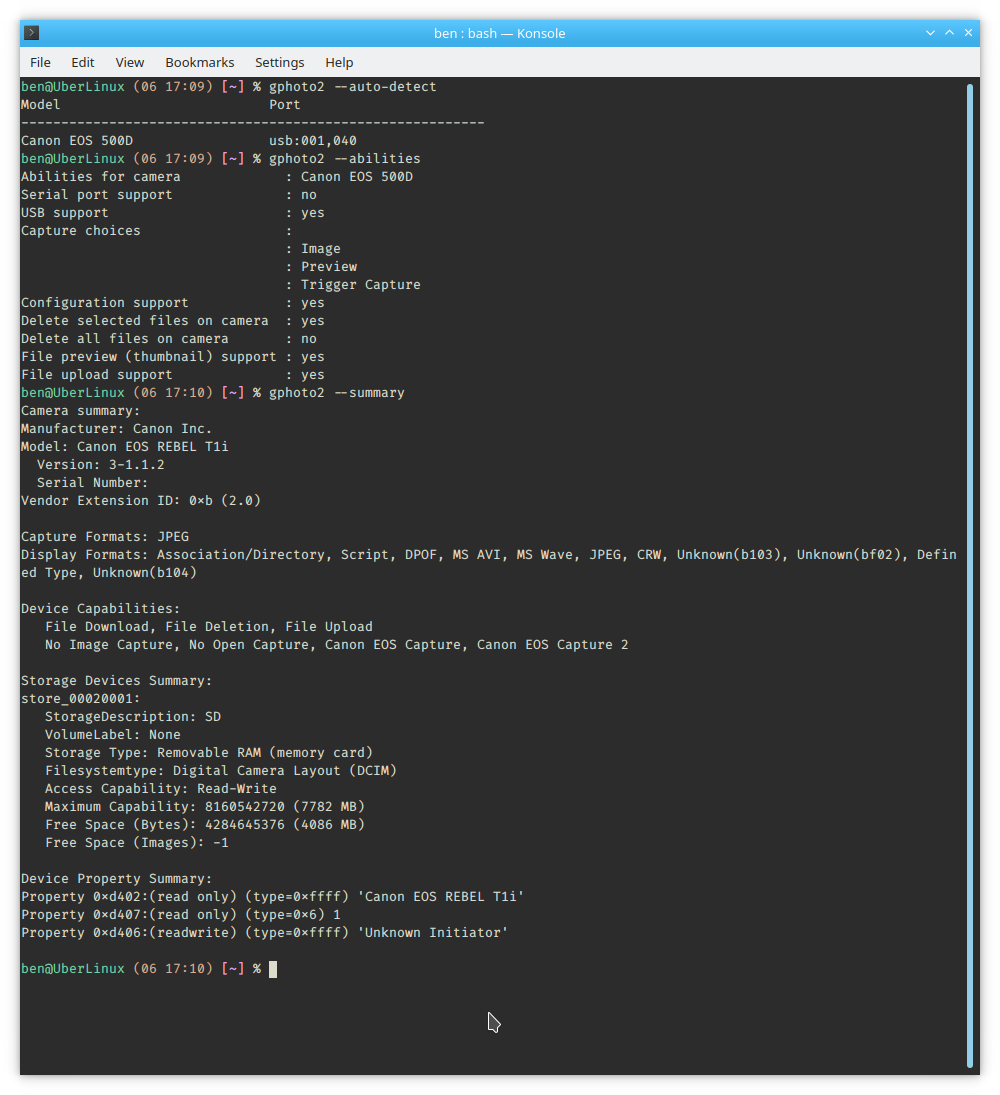
At this point, you should have everything configured to start testing. Still within your terminal, validate that gPhoto can see and interact with your camera:
gphoto2 --auto-detect: List auto-detected cameras and the ports to which they are connected.gphoto2 --summary: Summary of camera status.gphoto2 --abilities: Display the camera and driver abilities specified in the libgphoto2 database. Use--summaryto query an overview of the camera.
You should now see the correct camera and gPhoto is able to report on it’s capabilities:
DSLR Webcam Video Testing
Still within the terminal let’s start with something simple, capturing a single photograph. This command will take a single photograph using the settings defined on your camera, and save it to your PC:
$ gphoto2 --capture-image-and-download
Assuming that was successful, let’s try to stream video from the camera:
$ gphoto2 --stdout --capture-movie | ffmpeg -i - -vcodec rawvideo -pix_fmt yuv420p -threads 0 -f v4l2 /dev/video0
With this command, we’re:
- Capturing date from the camera’s image sensor with
gphoto2 - Piping that data into
ffmpeg, which is taking the mjpeg stream fromghoto2and exposing it to the Video4Linux loopback device
Note: If you have a build of ffmpeg which supports GPU-based encoding, you can offload the decoding of the gphoto output to your GPU to reduce the CPU load associated with this process.
You can verify if you have capability for GPU offload by running ffmpeg -hide_banner -decoders |grep mjpeg_cuvid. If this command returns V..... mjpeg_cuvid Nvidia CUVID MJPEG decoder (codec mjpeg) (or something similar), you’re all set.
For GPU-based decoding you’ll want to pass-hwaccel nvdec -c:v mjpeg_cuvid into your ffmpeg command:
$ gphoto2 --stdout --capture-movie | ffmpeg -hwaccel nvdec -c:v mjpeg_cuvid -i - -vcodec rawvideo -pix_fmt yuv420p -threads 0 -f v4l2 /dev/video0
You should see the verbose output from ffmpeg, with the last line providing detail on encoding status:

Now, open the VLC application, select the Media Menu -> Capture Device (Ctrl+c). Enter /dev/video0 as the “Video Device Name”, and click the “Play” button.

You should now see a live stream from your DSLR camera!

Video Conferencing with a DSLR Webcam
You now have all the components working, allowing your DSLR to be used as a webcam in Linux. Ensure that you have the gphoto2 --stdout --capture-moviecommand running before starting your video conferencing application. Google Meet, Zoom, Microsoft Teams, WebEx, BlueJeans all work well with this setup.

Effectively using gPhoto
The capabilities of gPhoto are impressive — providing a unified interface to programmatically control hundreds of different physical cameras. With this broad capability comes some complexity — but once you understand the basics it’s not nearly as intimidating.
Three gPhoto Commands you need to know
gphoto2 --list-config
--list-config will produce a listing of all configuration entries specific to and available for your camera.
2. gphoto2 --get-config [config]
--get-config will list the type, the current value and the available options of a configuration value. As an example:
$ gphoto2 --get-config whitebalance
    Label: WhiteBalance
    Readonly: 0
    Type: RADIO
    Current: Auto
    Choice: 0 Auto
    Choice: 1 Daylight
    Choice: 2 Shadow
    Choice: 3 Cloudy
    Choice: 4 Tungsten
    Choice: 5 Fluorescent
    Choice: 6 Flash
    Choice: 7 Manual
3. gphoto2 --set-config-value [config]
--set-config-value will set the specified configuration entry by specifying its new value. The output of — get-config will provide the values which are possible to set. Another example:
$ gphoto2 --set-config-value whitebalance="Daylight"
You can also chain multiple --set-config-value commands, to get the exact setup you’re looking for:
$ gphoto2 --set-config-value whitebalance="Daylight" --set-config-value aperture="3.5"
gPhoto Shell
gPhoto also provides an interactive shell, which is very useful for testing out various configurations:
$ gphoto2 --shell
gphoto2: {/home/ben} /> get-config whitebalance
Label: WhiteBalance
Readonly: 0
Type: RADIO
Current: Auto
Choice: 0 Auto
Choice: 1 Daylight
Choice: 2 Shadow
Choice: 3 Cloudy
Choice: 4 Tungsten
Choice: 5 Fluorescent
Choice: 6 Flash
Choice: 7 Manual
END
gphoto2: {/home/ben} /> set-config whitebalance=4
https://medium.com/nerdery/dslr-webcam-setup-for-linux-9b6d1b79ae22