In order to use full futures of the home automation server (hauser) solution an online registration of your product is required. If you don't want to register your product you can
use it in the AP (Access Point) mode which is default functioning mode after you connect the product to power.
If you would like to use all futures of your product you can register it on:
In order to start the registration process, please find the QR code on the back of your hauser. If you choose to use the web registration, in order to get registration
code please install from Google Play Market a QR code reader application. Run the application and by pointing the camera to the back of the hauser the application will acquire
the registration number. Please copy and paste the registration ID in the corresponding field on the registration web page, acknowledge your email address in
the the following two fields and press Submit. After pressing the submit button the control dashboard for your hauser will be opened. If your product is already registered
another page will be opened in which you'll be informed that the product is already registered. Please click on the proposed link from which you can access the control dashboard
and save it in the favourites of your web browser for future quick access. If you would prefer more secure approach by using a user registration please refer to the section 2.
If you choose to register by android app, after you have downloaded the application please enable the check box named: Unknown sources in the security settings of your
android phone. This will allow installation of apps from sources other than the Google Play Store. Then find the downloaded hauser_vX.Y.apk file and install it. The X.Y in
the name of the application designates the current version of the application. After the installation please start the application. Point your camera to the back of the
hauser and click on the scan QR button. Please fine tune the markers to match with the QR code edges. After the successful scan the registration ID will be added to
device's clipboard. Click on button "Register", paste the registration ID from the clipboard and enter and confirm your e-mail address. After pressing the button submit
your product will be registered. After the successful registration please press the button "Add". In the first field please put the friendly name for your product
(e.g. Location). In the second field, please paste the registration ID from clipboard. By pressing the "Add" button you can add up to 10 products and easily access
to their control dashboard by pressing the corresponding buttons designated by their names. Other actions are self explanatory.
Initial configuration
After you power up your hauser it will boot in AP mode. In order to connect to it please find ssid in your device WiFi settings with name hauserXYZW. The last
four letters "XYZW" from the name of the ssid are unique to your hauser and are identical to the last 2 bytes of hauser's MAC address.
Please connect to "hauserXYZW" AP by providing password: hauser123. After you have connected to the AP please open a web browser and enter address: 192.168.1.1. The
"Local Hauser Control and Basic Configuration" page will open. From this page you can turn on and off your electromagnetic valves connected to the terminals 1 and 2.
Moreover, on this page you can enter ssid and password of your Access Point from which you connect to Internet. In order to use full futures of the hauser please enter those
ssid and password. After you enter them the hauser will restart and try to connect to the AP which is identified with provided ssid and password. You can check whether the
hauser is online by opening the web page with the control dashboard that you have saved in the favourites of your browser during the registration process or you can access it
via the android application by pressing the button designated with the friendly name of your hauser. If it is still off line, please restart the hauser by power cycling. If it
is still off-line you probably provided wrong ssid and password. Since the hauser is off-line it automaticaly boots in AP mode. Hence, please access it by choosing hauserXYZW
in WiFi settings of your device. Enter the password: hauser123 and in the web browser enter 192.168.1.1. The familiar "Local Hauser Control and Basic Configuration" page will
display. Now enter carefully ssid and password of your AP from which you access Internet. Afterwards power cycle the hauser and check whether it is on-line after a minute.
If it is still off-line please repeat the above steps.
Hauser with user mail registration
There are two approaches for managing your hauser. In case of singe hauser you may choose the approach without user registration and direct product registration. This approach
is very simple but it is not secure. In case of where you need to manage more hausers from single dashboard and when your application is requiring more stringent security then
you can opt for the approach with user registration.
User registration
In order to register the user please go to:
User registration.
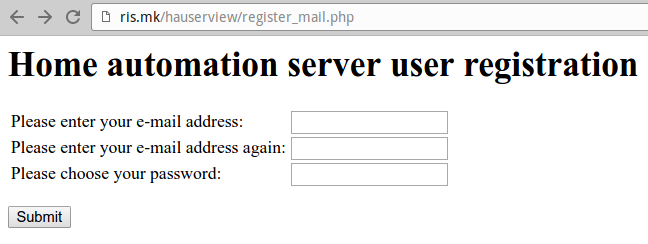
You will get a form as shown on the figure 2.1.
Figure 2.1 Home automation server user registration form.
In the form please enter your email address, choose your password and press the button "Submit". After you've pressed the button "Submit" automated email will be sent to
your email address.
User e-mail confirmation and hauser login
Open your favourite e-mail reader and find an e-mail form a sender: hauser@ris.mk. Please open the email and click on the provided link in the body of the email.
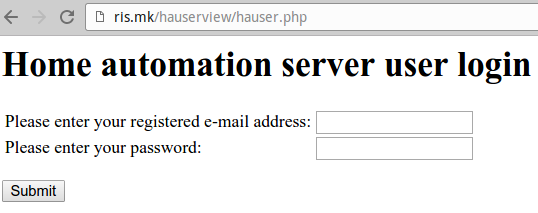
If the confirmation is successful the hauser login screen will be shown as given on the figure 2.2.
Figure 2.2 Home automation server user login form.
In the form please enter your email address, choose your password and press the button "Submit". After you've pressed the button "Submit" hauserview dashboard will be opened
ass shown on figure 2.3.
Figure 2.3 Home automation server user's initial dashboard.
From the dashboard you can register a new hauser product, add an already registered product or remove already added one from the dashboard.
Registering a new hauser in hauserview dashboard
In order to get registration code please install from Google Play Market a QR code reader application. Run the application and by pointing the camera to the back of the
hauser the application will acquire the registration number. The registration ID is 23 digit number. The registration ID consists from serial number which occupies
first 16 digits, product ID which occupies next 4 digits (digits 17-20) and firmware version (digits 21-23). Please press Register button on the main hauserview page.
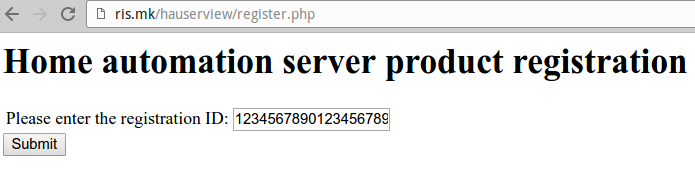
Figure 2.4 Product registration page.
The newly opened page as shown on figure 2.4 will ask you to enter the registration ID. Please copy and paste the registration ID in the corresponding field on the registration web page and press Submit. You will get acknowlegment page stating that Product is
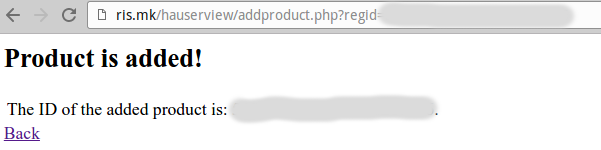
added as shown on Fig. 2.5.
Figure 2.4 Product is added page.
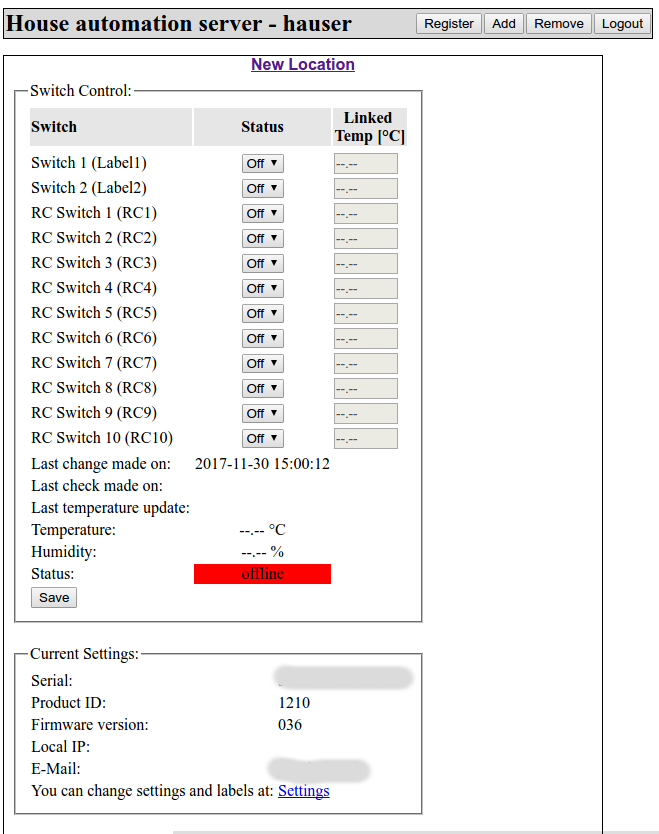
After you press on the back button new tab will be added in the hauser dashboard.
The new tab will be possitioned as last in the row of already added tabs with name "New Location" as shown on the figure 2.6.
Figure 2.4 Product is added page.
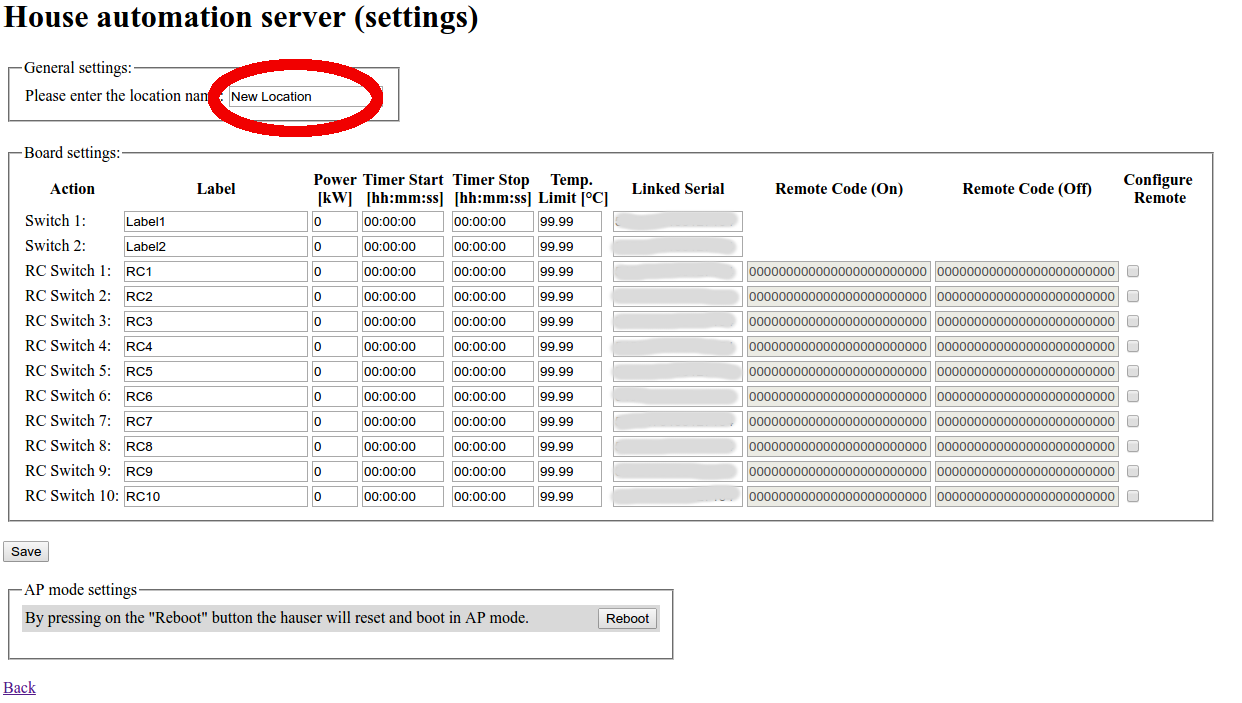
If you press a Settings button a new page will open (Figure 2.7) in which you can tune various settings for the selected hauser. For example you can change the location name
by entering a friendly name in the text box designated with red ellipse. For example, we can name it "First hauser".
Fig2.7 Hauser settings page
Adding already registered hauser in hauserview dashboard