Configure LDAP Client on Ubuntu 20.04|18.04|16.04 | ComputingForGeeks

Configure LDAP Client on Ubuntu 20.04|18.04|16.04

62725
2
You can support us by downloading this article as PDF from the Link below.Download the guide as PDF

This is a guide on how to configure an Ubuntu 20.04|18.04 & Ubuntu 16.04 LTS servers to authenticate against an LDAP directory server. LDAP is a lightweight client-server protocol for accessing directory services, specifically X.500-based directory services.

I expect you already have a running LDAP server, if not, use our guides below to set it up:

How to Install and configure OpenLDAP on Ubuntu LTS

Once you have LDAP server configured and user accounts added, you can proceed to install and configure LDAP client.

Install and Configure LDAP Client on Ubuntu 20.04|18.04 & Ubuntu 16.04 LTS

Add LDAP server address to /etc/hosts file if you don’t have an active DNS server in your network.

$ sudo vim /etc/hosts
192.168.18.50 ldap.example.com

Install LDAP client utilities on your Ubuntu system:

sudo apt -y install libnss-ldap libpam-ldap ldap-utils

Begin configuring the settings to look like below

1. Set LDAP URI- This can be IP address or hostname

ldap client ubuntu 18.04 add uri min

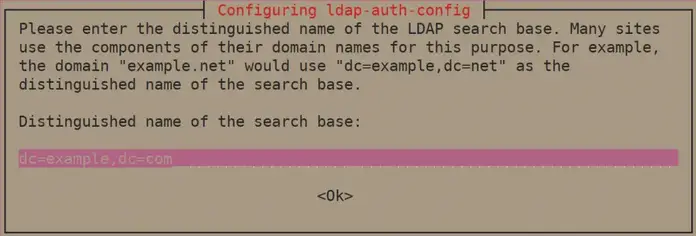
2. Set a Distinguished name of the search base

ldap client ubuntu 18.04 set search base distinguished name min

3. Select LDAP version 3

ldap client ubuntu 18.04 set ldap version min

4. Select Yes for Make local root Database admin

ldap client ubuntu 18.04 make local root database admin min

5. Answer No for Does the LDAP database require login?

ldap client ubuntu 18.04 does ldap require login no min

6. Set LDAP account for root, something like cn=admin,cd=example,cn=com

ldap client ubuntu 18.04 set admin ldap account min

7. Provide LDAP root account Password

ldap client ubuntu 18.04 enter ldap admin pass min

After the installation, edit /etc/nsswitch.confand add ldap authentication to passwd and group lines.

passwd: compat systemd ldap
group: compat systemd ldap
shadow: compat

Modify the file /etc/pam.d/common-password. Remove use_authtok on line 26 to look like below.

password [success=1 user_unknown=ignore default=die] pam_ldap.so try_first_pass

Enable creation of home directory on first login by adding the following line to the end of file /etc/pam.d/common-session

session optional pam_mkhomedir.so skel=/etc/skel umask=077

See below screenshot:

ldap client enable home creation min

Test by switching to a user account on LDAP

root@server1:~# su - jmutai
Creating directory '/home/jmutai'.
jmutai@server1:~$ id
uid=10000(jmutai) gid=10000(sysadmins) groups=10000(sysadmins)

That’s all. If you need advanced centralized user management platform, see

Source: Configure LDAP Client on Ubuntu 20.04|18.04|16.04 | ComputingForGeeks

Configure LDAP Client on Ubuntu 20.04|18.04|16.04 | ComputingForGeeks was last modified: April 24th, 2021 by Jovan Stosic

DNS not working after upgrade to 18.04

Usually systemd-resolved gets the DNS servers from the DHCP handshake. Does your DHCP server give out the DNS addresses?

Also you can edit /etc/systemd/resolved.conf and add the IP address(es) of your server(s) on the DNS and FallbackDNS lines.

Code:
[Resolve]
DNS=192.168.100.100
FallbackDNS=8.8.8.8
[etc.]

192.168.100.100 is a local server on my network. You need to run “sudo systemctl restart systemd-resolved” after making any changes.

Source: [SOLVED] DNS not working after upgrade to 18.04

DNS not working after upgrade to 18.04 was last modified: April 16th, 2021 by Jovan Stosic

yaml – Using Docker-Compose, how to execute multiple commands

command: bash -c "python manage.py migrate && python manage.py runserver 0.0.0.0:8000"

Same example in multilines:

command: >
    bash -c "python manage.py migrate
    && python manage.py runserver 0.0.0.0:8000"

Or:

command: bash -c "
    python manage.py migrate
    && python manage.py runserver 0.0.0.0:8000
  "


Source: yaml – Using Docker-Compose, how to execute multiple commands – Stack Overflow

yaml – Using Docker-Compose, how to execute multiple commands was last modified: December 3rd, 2020 by Jovan Stosic

PHP issue “Cannot send session cookie” – Stack Overflow

Have you checked for Byte Order Mark (BOM) ? It happens when your file is in UTF8 and you open it with Windows’ Notepad.exe. – Geoffroy Mar 12 ’13 at 16:47
  • How do i check for BOM? If this is causing the issue how do i get rid of it? – Kaya Suleyman Mar 12 ’13 at 16:50
  • Use an editor which is able to show you special chars. – Geoffroy Mar 12 ’13 at 16:51
  • What editor are you using? – Alexander M. Turek Mar 12 ’13 at 16:52
  • Microsoft Expression. I’m new to this stuff, how do i check for BOM, what does it look like and how do i get my code working again? – Kaya Suleyman Mar 12 ’13 at 16:54
    • Download Notepad++ and open the file there, delete all fancy characters before the <?PHP
    • Make sure there is no whitespace character like ” ” or tab or linebreak before the <?PHP.
      • In Notepad++ click Encoding and then UTF-8 without BOM to convert the file to UTF-8 without BOM, then save it.
    • Also add ob_start(); before session_start(); to be safe.

Source: PHP issue “Cannot send session cookie” – Stack Overflow

PHP issue “Cannot send session cookie” – Stack Overflow was last modified: December 1st, 2020 by Jovan Stosic

Set up a LAMP server with Docker – Linux Hint

Set up a LAMP server with Docker

In this article, I am going to show you how to use Docker Compose to create a LAMP server for PHP web development. So, let’s get started.

Requirements:

In order to follow this article, you must have Docker installed on your computer. LinuxHint has a lot of articles that you can follow to install Docker on your desired Linux distribution if you don’t have it installed already. So, be sure to check LinuxHint.com in case you’re having trouble installing Docker.

Installing Docker Compose:

You can download Docker Compose binary file very easily with the following command:

sudo curl -L “https://github.com/docker/compose/releases/download/1.24.1/
docker-compose-$(uname -s)$(uname -m)
 -o /usr/local/bin/docker-compose

NOTE: curl may not be installed on your Linux distribution. If that’s the case, you can install curl with the following command:

Ubuntu/Debian/Linux Mint:

sudo apt install curl -y

CentOS/RHEL/Fedora:

sudo dnf install curl -y

Once docker-compose binary file is downloaded, run the following command:

sudo chmod +x /usr/local/bin/docker-compose

Now, check whether docker-compose command is working as follows:

docker-compose version

It should print the version information as shown in the screenshot below.

Setting Up Docker Compose for the Project:

Now, create a project directory ~/docker/lamp (let’s say) and a html/ directory inside the project directory for keeping the website files (i.e. php, html, css, js etc.) as follows:

mkdir -p ~/docker/lamp/html

Now, navigate to the project directory ~/docker/lamp as follows:

cd ~/docker/lamp

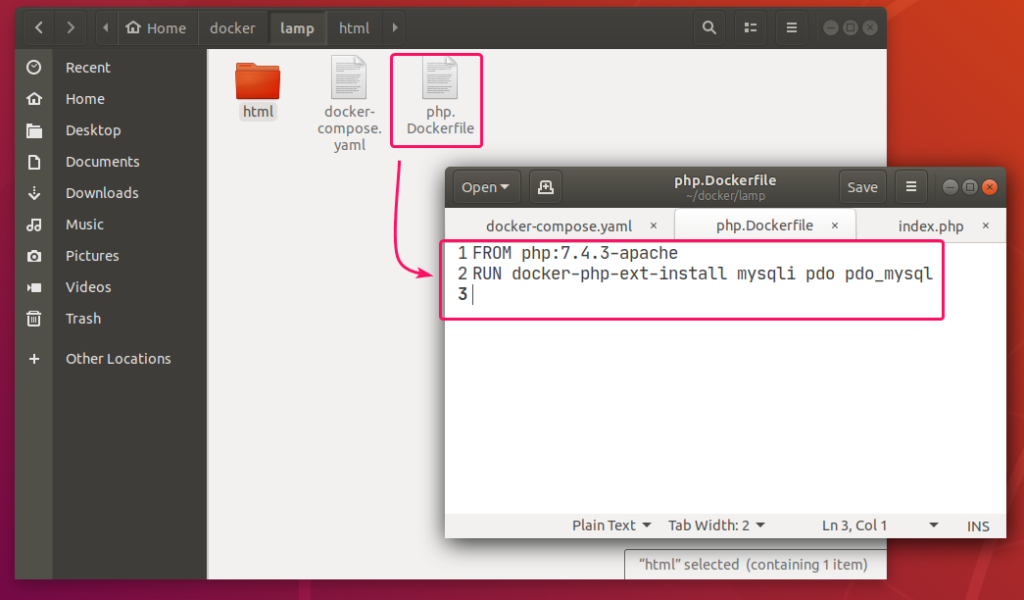
Create a php.Dockerfile in the project directory ~/docker/lamp. This is a Dockerfile which enables mysqli and PDO php extensions in the php:7.4.3-apache image from Docker Hub and builds a custom Docker image from it.

The contents of the php.Dockerfile is given below.

FROM php:7.4.3apache

RUN

dockerphpextinstall mysqli pdo pdo_mysql

Now, create a docker-compose.yaml file in the project directory ~/docker/lamp and type in the following lines in the docker-compose.yaml file.

version: “3.7”
services:
web-server:
build:
dockerfile: php.Dockerfile
context: .
restart: always
volumes:
– “./html/:/var/www/html/”
ports:
– “8080:80”
mysql-server:
image: mysql:8.0.19
restart: always
environment:
MYSQL_ROOT_PASSWORD: secret
volumes:
– mysql-data:/var/lib/mysql

phpmyadmin:
image: phpmyadmin/phpmyadmin:5.0.1
restart: always
environment:
PMA_HOST: mysql-server
PMA_USER: root
PMA_PASSWORD: secret
ports:
– “5000:80”
volumes:
mysql-data:

The docker-compose.yaml file should look as follows.
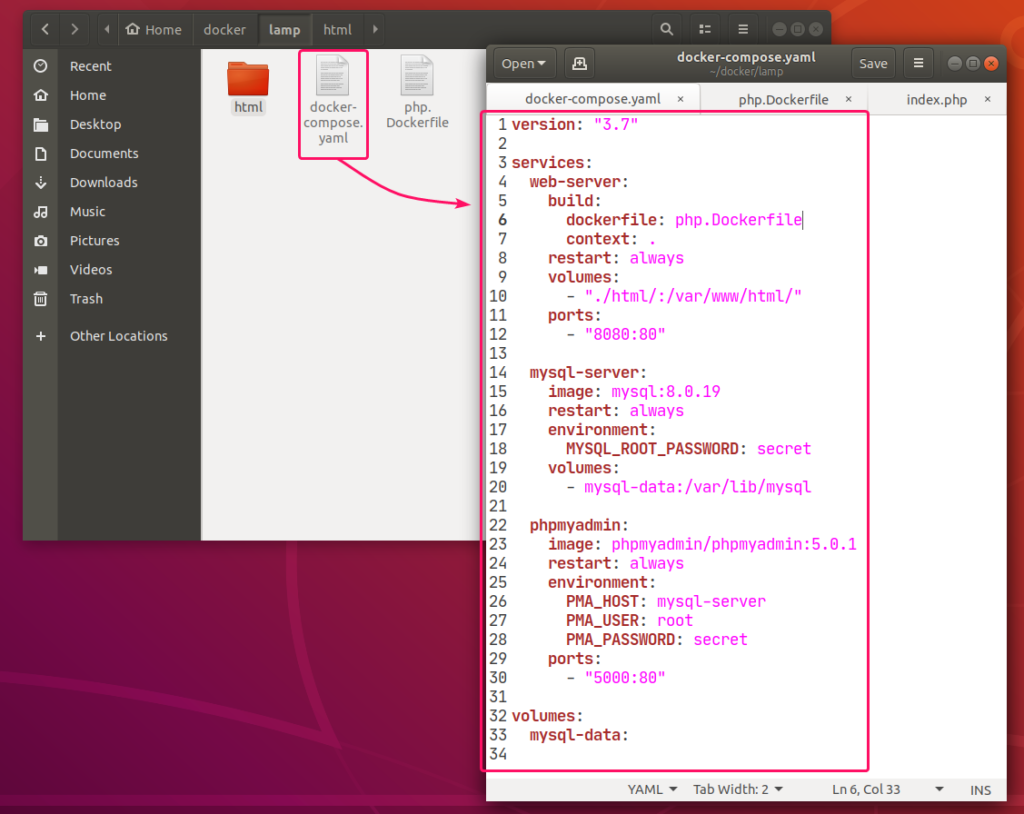
Here, I have created 3 services web-servermysql-server and phpmyadmin.

web-server service will run a custom-built Docker image as defined in php.Dockerfile.

mysql-server service will run the mysql:8.0.19 image (from DockerHub) in a Docker container.

phpmyadmin service will run the phpmyadmin/phpmyadmin:5.0.1 image (from DockerHub) in another Docker container.

In mysql-server service, the MYSQL_ROOT_PASSWORD environment variable is used to set the root password of MySQL.

In phpmyadmin service, the PMA_HOST, PMA_USER, PMA_PASSWORD environment variables are used to set the MySQL hostname, username and password respectively that phpMyAdmin will use to connect to the MySQL database server running as mysql-server service.

In mysql-server service, all the contents of the /var/lib/mysql directory will be saved permanently in the mysql-data volume.’

In the web-server service, the container port 80 (right) is mapped to the Docker host port 8080 (left).’

In the phpmyadmin service, the container port 5000 (right) is mapped to the Docker host port 80 (left).

Also, create a index.php file in the html/ directory for testing the LAMP server.

The contents of the index.php file in my case,

<?php
$host = “mysql-server”;
$user = “root”;
$pass = “secret”;
$db = “app1”;
try {
$conn = new PDO(“mysql:host=$host;dbname=$db, $user, $pass);
$conn->setAttribute(PDO::ATTR_ERRMODE, PDO::ERRMODE_EXCEPTION);

echo “Connected successfully”;
} catch(PDOException $e) {
echo “Connection failed: “ . $e->getMessage();
}
?>
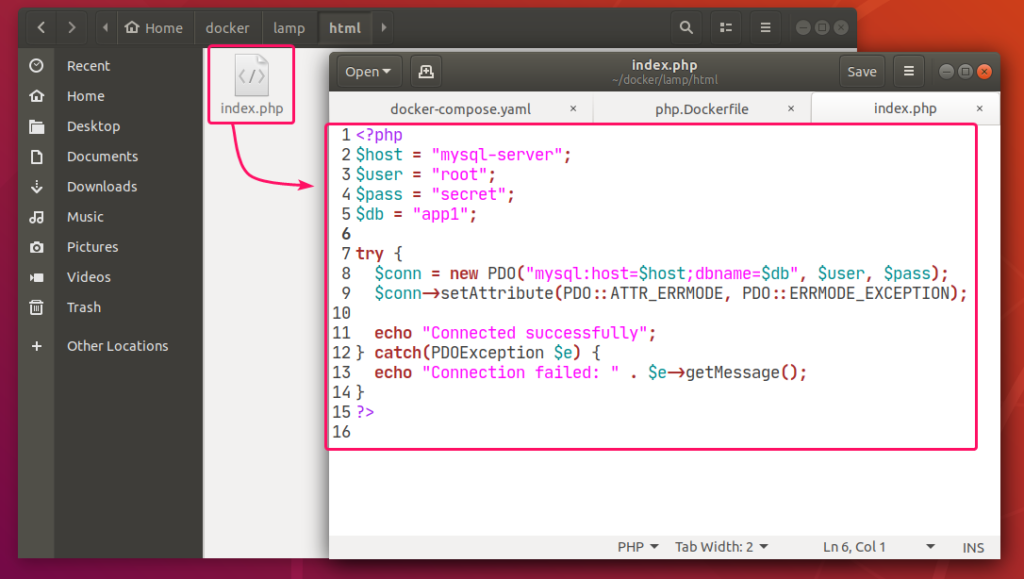
Finally, the project directory ~/docker/lamp should look as follows:

Starting the LAMP Server:

Now, to start the web-servermysql-server and phpmyadmin services, run the following command:

docker-compose up -d

All the services should start in the background.

To see how the ports are mapped, run the following command:

docker-compose ps

As you can see, for the web-server service, the Docker host port 8080 is mapped to the container TCP port 80.

For the phpmyadmin service, the Docker host port 5000 is mapped to the container TCP port 80.

Finding the IP Address of Docker Host:

If you want to access the LAMP server from other computers on your network, you must know the IP address of your Docker host.

To find the IP address of your Docker host, run the following command:

ip

In my case, the IP address of my Docker host 192.168.20.160. It will be different for you. So, make sure to replace it with yours from now on.

Testing the LAMP Server:

Now, you can access phpMyAdmin 5 and the web server from a web browser.

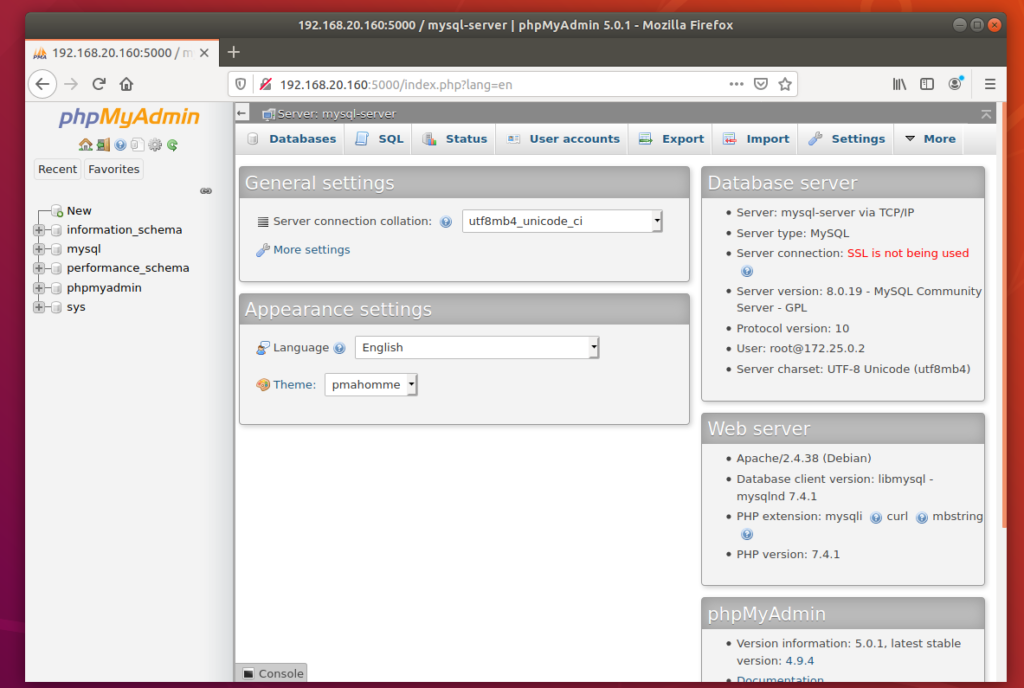
To access phpMyAdmin 5, open a web browser and visit http://localhost:5000 from your Docker host or visit http://192.168.20.160:5000 from any other computer on the network.

phpMyAdmin 5 should load in your web browser.
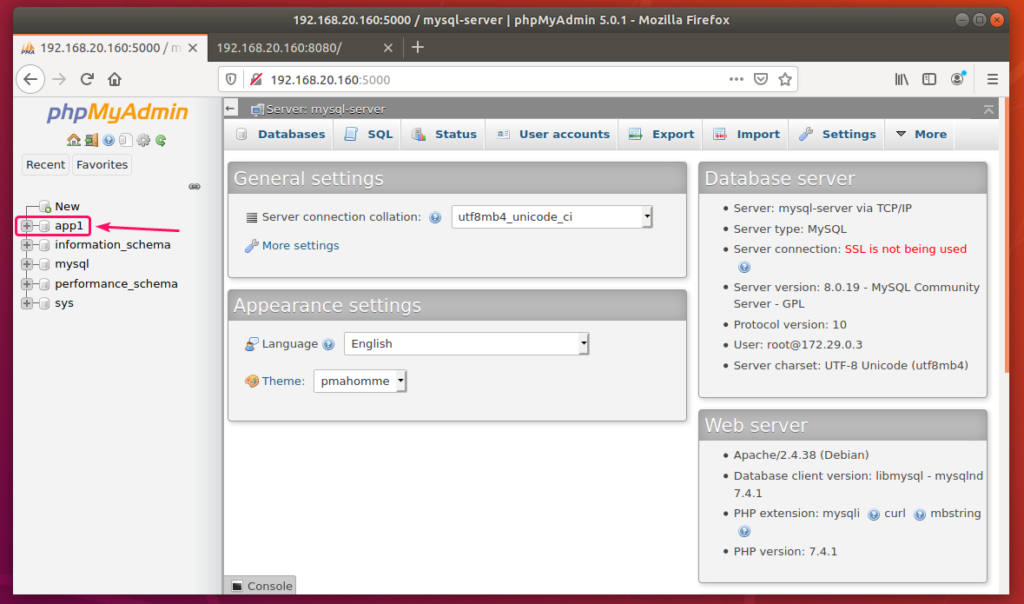
Now, create an app1 MySQL database from phpMyAdmin.
Now, visit http://localhost:8080 from your Docker host or http://192.168.20.160:8080 from any other computer on your network to access the web server.

You should see the Connected successfully message. It means, the PHP is working and the MySQL database server is accessible from the web-server container. So, technically, the LAMP server is fully functional.

Stopping the LAMP Server:

To stop the web-servermysql-server and phpmyadmin services, run the following command:

docker-compose down

The web-servermysql-server and phpmyadmin services should be stopped.


Cleaning Up MySQL Server Data:

If you want to remove all the MySQL database data and settings, you must remove the mysql-data volume.

You can find the actual name of the volume with the following command:

docker volume ls

You can remove the volume lamp_mysql-data with the following command:

docker volume rm lamp_mysql-data

So, that’s how you set up a LAMP server with Docker. Thanks for reading this article.

As you can see, the volume to remove is lamp_mysql-data.


Source: Set up a LAMP server with Docker – Linux Hint

Set up a LAMP server with Docker – Linux Hint was last modified: November 29th, 2020 by Jovan Stosic

JSON PHP

<?php
$myObj->name = “John”;
$myObj->age = 30;
$myObj->city = “New York”;

$myJSON = json_encode($myObj);

echo $myJSON;
?>

Source: JSON PHP

JSON PHP was last modified: August 12th, 2020 by Jovan Stosic

How To Install MySQL on Ubuntu 18.04

Step 3 — (Optional) Adjusting User Authentication and Privileges

In Ubuntu systems running MySQL 5.7 (and later versions), the root MySQL user is set to authenticate using the auth_socket plugin by default rather than with a password. This allows for some greater security and usability in many cases, but it can also complicate things when you need to allow an external program (e.g., phpMyAdmin) to access the user.

In order to use a password to connect to MySQL as root, you will need to switch its authentication method from auth_socket to mysql_native_password. To do this, open up the MySQL prompt from your terminal:

  • sudo mysql

Next, check which authentication method each of your MySQL user accounts use with the following command:

  • SELECT user,authentication_string,plugin,host FROM mysql.user;
Output
+------------------+-------------------------------------------+-----------------------+-----------+
| user             | authentication_string                     | plugin                | host      |
+------------------+-------------------------------------------+-----------------------+-----------+
| root             |                                           | auth_socket           | localhost |
| mysql.session    | *THISISNOTAVALIDPASSWORDTHATCANBEUSEDHERE | mysql_native_password | localhost |
| mysql.sys        | *THISISNOTAVALIDPASSWORDTHATCANBEUSEDHERE | mysql_native_password | localhost |
| debian-sys-maint | *CC744277A401A7D25BE1CA89AFF17BF607F876FF | mysql_native_password | localhost |
+------------------+-------------------------------------------+-----------------------+-----------+
4 rows in set (0.00 sec)

In this example, you can see that the root user does in fact authenticate using the auth_socket plugin. To configure the root account to authenticate with a password, run the following ALTER USER command. Be sure to change password to a strong password of your choosing, and note that this command will change the root password you set in Step 2:

  • ALTER USER ‘root’@’localhost’ IDENTIFIED WITH mysql_native_password BY ‘password‘;

Then, run FLUSH PRIVILEGES which tells the server to reload the grant tables and put your new changes into effect:

  • FLUSH PRIVILEGES;

Check the authentication methods employed by each of your users again to confirm that root no longer authenticates using the auth_socket plugin:

  • SELECT user,authentication_string,plugin,host FROM mysql.user;
Output
+------------------+-------------------------------------------+-----------------------+-----------+
| user             | authentication_string                     | plugin                | host      |
+------------------+-------------------------------------------+-----------------------+-----------+
| root             | *3636DACC8616D997782ADD0839F92C1571D6D78F | mysql_native_password | localhost |
| mysql.session    | *THISISNOTAVALIDPASSWORDTHATCANBEUSEDHERE | mysql_native_password | localhost |
| mysql.sys        | *THISISNOTAVALIDPASSWORDTHATCANBEUSEDHERE | mysql_native_password | localhost |
| debian-sys-maint | *CC744277A401A7D25BE1CA89AFF17BF607F876FF | mysql_native_password | localhost |
+------------------+-------------------------------------------+-----------------------+-----------+
4 rows in set (0.00 sec)

You can see in this example output that the root MySQL user now authenticates using a password. Once you confirm this on your own server, you can exit the MySQL shell:

  • exit

Alternatively, some may find that it better suits their workflow to connect to MySQL with a dedicated user. To create such a user, open up the MySQL shell once again:

  • sudo mysql

Note: If you have password authentication enabled for root, as described in the preceding paragraphs, you will need to use a different command to access the MySQL shell. The following will run your MySQL client with regular user privileges, and you will only gain administrator privileges within the database by authenticating:

  • mysql -u root -p

From there, create a new user and give it a strong password:

  • CREATE USER ‘sammy‘@’localhost’ IDENTIFIED BY ‘password‘;

Then, grant your new user the appropriate privileges. For example, you could grant the user privileges to all tables within the database, as well as the power to add, change, and remove user privileges, with this command:

  • GRANT ALL PRIVILEGES ON *.* TO ‘sammy‘@’localhost’ WITH GRANT OPTION;

Note that, at this point, you do not need to run the FLUSH PRIVILEGES command again. This command is only needed when you modify the grant tables using statements like INSERTUPDATE, or DELETE. Because you created a new user, instead of modifying an existing one, FLUSH PRIVILEGES is unnecessary here.

Following this, exit the MySQL shell:

  • exit

Finally, let’s test the MySQL installation.

Source: How To Install MySQL on Ubuntu 18.04 | DigitalOcean

How To Install MySQL on Ubuntu 18.04 was last modified: August 9th, 2020 by Jovan Stosic