CHDK : Quick Start
If you don’t want to read this short guide, or the somewhat longer official CHDK User Manual , here’s a quick list of what you need to do to load and run CHDK.
- Download and install the STICK utility from this link >: STICK
- Run STICK to configure your SD card and install CHDK.
- Put the SD card’s lock switch into the “locked” position and put the card into your camera.
- Start your camera normally. You should see the red CHDK logo appear for a few seconds.
- Press the defined <ALT> key for your camera to enter CHDK mode. The <ALT> key is usually either the PRINT or PLAY button. However, some cameras use the DISP, VIDEO, HELP or FACE buttons so you might have to try different buttons to find the right one.
- Press the MENU button in <ALT> mode to access the CHDK configuration menus. Press the FUNC/SET button to bring up the scripting menu.
- Press the shutter button in <ALT> mode to run the currently loaded script.
- Exit <ALT> by pressing the <ALT> button again. Override settings and onscreen display option will now enabled while you are back in normal Canon mode.
Photography & Image processing notes
The Right Lens Can Make All the Difference in IR Photography (Part 1)
The Infrared Photography Tutorial: A Guideline for Your Ideal IR Solution
Understanding Metering and Metering Modes
Understanding Metering and Metering Modes
Every modern DSLR has something called “Metering Mode”, also known as “Camera Metering”, “Exposure Metering” or simply “Metering”. Knowing how metering works and what each of the metering modes does is important in photography, because it helps photographers control their exposure with minimum effort and take better pictures in unusual lighting situations. In this understanding metering modes article, I will explain what metering is, how it works and how you can use it for your digital photography.
When I got my first DSLR (Nikon D80), one of my frustrations was that some images would come out too bright or too dark. I had no idea how to fix it, until one day, when I learned about camera metering modes.
1) What is Metering?
Metering is how your camera determines what the correct shutter speed and aperture should be, depending on the amount of light that goes into the camera and the sensitivity of the sensor. Back in the old days of photography, cameras were not equipped with a light “meter”, which is a sensor that measures the amount and intensity of light. Photographers had to use hand-held light meters to determine the optimal exposure. Obviously, because the work was shot on film, they could not preview or see the results immediately, which is why they religiously relied on those light meters.
Today, every DSLR has an integrated light meter that automatically measures the reflected light and determines the optimal exposure. The most common metering modes in digital cameras today are:
- Matrix Metering (Nikon), also known as Evaluative Metering (Canon)
- Center-weighted Metering
- Spot Metering
Some Canon EOS models also offer “Partial Metering”, which is similar to Spot Metering, except the covered area is larger (approximately 8% of the viewfinder area near the center vs 3.5% in Spot Metering).
You can see the camera meter in action when you shoot in Manual Mode – look inside the viewfinder and you will see bars going left or right, with a zero in the middle, as illustrated below.

If you point your camera at a very bright area, the bars will go to “+” side, indicating that there is too much light for the current exposure settings. If you point your camera at a very dark area, the bars will go to the “-” side, indicating that there is not enough light. You would then need to increase or decrease your shutter speed to get to “0”, which is the optimal exposure, according to your camera meter.
A camera meter is not only useful for just the Manual Mode – when you choose another mode such as Aperture Priority, Shutter Priority or Program Mode, the camera automatically adjusts the settings based on what it reads from the meter.
1.1) Problems with Metering
Camera meters work great when the scene is lit evenly. However, it gets problematic and challenging for light meters to determine the exposure, when there are objects with different light levels and intensities. For example, if you are taking a picture of the blue sky with no clouds or sun in the frame, the image will be correctly exposed, because there is just one light level to deal with. The job gets a little harder if you add a few clouds into the image – the meter now needs to evaluate the brightness of the clouds versus the brightness of the sky and try to determine the optimal exposure. As a result, the camera meter might brighten up the sky a little bit in order to properly expose the white clouds – otherwise, the clouds would look too white or “overexposed”.
What would happen if you added a big mountain into the scene? Now the camera meter would see that there is a large object that is much darker (relative to the clouds and the sky), and it would try to come up with something in the middle, so that the mountain is properly exposed as well. By default, the camera meter looks at the light levels in the entire frame and tries to come up with an exposure that balances the bright and the dark areas of the image.
2) Matrix / Evaluative Metering
Matrix Metering or Evaluative Metering mode is the default metering mode on most DSLRs. It works similarly to the above example by dividing the entire frame into multiple “zones”, which are then all analyzed on individual basis for light and dark tones. One of the key factors (in addition to color, distance, subjects, highlights, etc) that affects matrix metering, is where the camera focus point is set to. After reading information from all individual zones, the metering system looks at where you focused within the frame and marks it more important than all other zones. There are many other variables used in the equation, which differ from manufacturer to manufacturer. Nikon, for example, also compares image data to a database of thousands of pictures for exposure calculation.

You should use this mode for most of your photography, since it will generally do a pretty good job in determining the correct exposure. I leave my camera metering mode on matrix metering for most of my photography needs, including landscape and portrait photography.
3) Center-weighted Metering
Using the whole frame for determining the correct exposure is not always desirable. What if you are trying to take a headshot of a person with the sun behind? This is where center-weighted metering comes in handy. Center-weighted Metering evaluates the light in the middle of the frame and its surroundings and ignores the corners. Compared to Matrix Metering, Center-weighted Metering does not look at the focus point you select and only evaluates the middle area of the image.

Use this mode when you want the camera to prioritize the middle of the frame, which works great for close-up portraits and relatively large subjects that are in the middle of the frame. For example, if you were taking a headshot of a person with the sun behind him/her, then this mode would expose the face of the person correctly, even though everything else would probably get heavily overexposed.
4) Spot Metering
Spot Metering only evaluates the light around your focus point and ignores everything else. It evaluates a single zone/cell and calculates exposure based on that single area, nothing else. I personally use this mode a lot for my bird photography, because the birds mostly occupy a small area of the frame and I need to make sure that I expose them properly, whether the background is bright or dark. Because the light is evaluated where I place my focus point, I could get an accurate exposure on the bird even when the bird is in the corner of the frame. Also, if you were taking a picture of a person with the sun behind but they occupied a small part of the frame, it is best to use the spot metering mode instead. When your subjects do not take much of the space, using Matrix or Center-weighted metering modes would most likely result in a silhouette, if the subject was back-lit. Spot metering works great for back-lit subjects like that.

Another good example of using spot metering is when photographing the Moon. Because the moon would take up a small portion of the frame and the sky is completely dark around it, it is best to use Spot metering – that way, we are only looking at the light level coming from the moon and nothing else.
Some DSLRs like the Canon 1D/1Ds are capable of multi-spot metering, which basically allows choosing multiple spots to measure light and come up with an average value for a good exposure.
5) How to Change Camera Metering Mode
Unfortunately, this varies not only from manufacturer to manufacturer, but also from model to model. On the Nikon D5500, for example, it is done through the menu setting (Info button). On professional cameras such as the Nikon D810 and Nikon D5, there is a separate button on the top left dial for camera metering. Changing metering on Canon cameras also varies from model to model, but generally it is done through a key combination (“Set” button), camera menu or a dedicated metering button close to the top LCD.
Source: https://photographylife.com/understanding-metering-modes
Bokeh

In photography, bokeh (originally /ˈboʊkɛ/,[1] /ˈboʊkeɪ/ boh-kay — also sometimes pronounced as /ˈboʊkə/boh-kə,[2] Japanese: [boke]) is the aesthetic quality of the blur produced in the out-of-focus parts of an image produced by a lens.[3][4][5] Bokeh has been defined as “the way the lens renders out-of-focus points of light”.[6] Differences in lens aberrations and aperture shape cause some lens designs to blur the image in a way that is pleasing to the eye, while others produce blurring that is unpleasant or distracting—”good” and “bad” bokeh, respectively.[7] Bokeh occurs for parts of the scene that lie outside the depth of field. Photographers sometimes deliberately use a shallow focus technique to create images with prominent out-of-focus regions.
Bokeh is often most visible around small background highlights, such as specular reflections and light sources, which is why it is often associated with such areas.[7] However, bokeh is not limited to highlights; blur occurs in all out-of-focus regions of the image.
Source: Bokeh – Wikipedia
RawTherapee
RawTherapee is a cross-platform raw image processing program,[2] released under the GNU General Public License Version 3. It was originally written by Gábor Horváth of Budapest, Hungary, before being re-licensed as free and open-source software in January 2010.[3] It is written in C++, using a GTK+ front-end and a patched version of dcraw for reading raw files. It is notable for the advanced control it gives the user over the demosaicing and developing process. The name used to stand for “The Experimental R
Source: RawTherapee – Wikipedia
How to Resize and Make Images Larger without Losing Quality
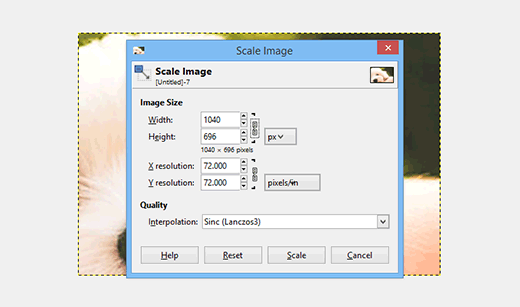
Ever wanted to enlarge an image without quality loss? Learn how to resize images to make them larger without losing quality in Photoshop and GIMP.
Source: How to Resize and Make Images Larger without Losing Quality
Mamiya
Mamiya
From Wikipedia, the free encyclopedia
This article needs additional citations for verification. (August 2012) (Learn how and when to remove this template message)
Mamiya Digital Imaging Co., Ltd. Camera and lens manufacturer Industry Digital imaging and photography Founded May 1940 Headquarters Tokyo, Japan Seiichi Mamiya, founder Products Cameras, Optical and other products 200 Parent Phase One Website Mamiya Japan
Mamiya LeafMamiya Digital Imaging Co., Ltd. (マミヤ・デジタル・イメージング マミヤ・デジタル・イメージング ー株式会社?, Mamiya Dejitaru Imejingu Kabushiki-gaisha)[needs IPA] is a Japanese company that manufactures high-end cameras and other related photographic and optical equipment. With headquarters in Tokyo, it has two manufacturing plants and a workforce of over 200 people. The company was founded in May 1940 by camera designer Seiichi Mamiya (間宮精一) and financial backer Tsunejiro Sugawara.
History[edit]

A Mamiya C3 twin lens reflex, from 1962.
Mamiya originally achieved fame for its professional medium-format film cameras such as the Mamiya Six and the Mamiya Press series. It later went on to develop the industry workhorse RB67 series, the RZ67 and the twin-lens reflex Mamiya C-series, used by advanced amateur and professional photographers.
Many Mamiya models over the past six decades have become collectors’ items. The earliest Mamiya Six medium-format folding camera, the 35 mm Mamiya-Sekor 1000DTL, the lightweight 35 mm Mamiya NC1000, the 6×6 cm medium-format C series of interchangeable-lens twin-lens reflex (TLR) cameras, and the press cameras of the Super/Universal series are highly valued. Mamiya also manufactured the last models in the Omega line of medium format cameras.
Mamiya entered other business markets over time by purchasing other companies.[1] Until 2000, it made fishing equipment such as fishing rods and fishing reels. In 2006, the Mamiya Op Co., Ltd., Inc. transferred the camera and optical business to Mamiya Digital Imaging Co., Ltd. The original company, doing business as Mamiya-OP, continues to exist and makes a variety of industrial and electronics products. It also makes golf clubs, golf club shafts and grips, and golf balls through its subsidiaries Kasco and USTMamiya.[2]
In 2009, Phase One, a medium format digital camera back manufacturer from Denmark, purchased a major stake in Mamiya. In 2012, Phase One combined Mamiya and another subsidiary, Leaf Imaging, created a new, worldwide Mamiya Leaf brand to integrate both companies’ product lines into one complete medium-format digital camera system offering. The re-branding offers a streamlined product development and establishment of a more efficient customer sales and support base.
135 film[edit]
Mamiya started manufacturing 135-film cameras in 1949, with 135-film point-and-shoot compact cameras being introduced later. The excellent Mamiya-35 series of rangefinder cameras was followed by the Mamiya Prismat SLR in 1961 and the Mamiya TL/DTL in the mid-to-late 1960s. The SX, XTL and NC1000 were other 135-film SLR camera models introduced by Mamiya. One of Mamiya’s last 135-film SLR designs was the Z-series. The original entry-level ZE model was an aperture-priority-only SLR; the ZE-2 added manual exposure; the ZE-X added shutter priority and full program automated mode, and (with a dedicated flash and an EF-series lens) focus-priority flash exposure). In these models the aperture ring had no direct connection to the diaphragm, allowing the camera body to override the set aperture, and the lenses could communicate a considerable amount of information to the camera body via electrical contacts on the mount.
The Mamiya ZM, introduced in 1982, was essentially an advanced version of the ZE-2, with some of the features of the ZE-X. It was the last Mamiya 135-film camera produced. It had an aperture-priority automatic time control, based on center-weighted TTL readings, an automatic shutter-speed range from 4 seconds to 1/1000, and a manual range from 2 seconds to 1/1000. Visual and audio signals indicated over- or under-exposure, pending battery failure, or excessive camera shake. Metering modes, shutter release, self-timer, manual time settings and the ergonomics of the camera body were also improved.
In 1984 Osawa, one of Mamiya’s major distributors, filed for the Japanese equivalent of bankruptcy and, soon after, Mamiya discontinued 135-film camera production to focus on the medium-format professional market.
Medium format[edit]
Mamiya made a series of square format twin lens reflex (TLR) throughout the middle of the twentieth century. These were developed into the C cameras (C2, C3 through to C330s) which have interchangeable lenses as well as bellows focus.
In 1970, Mamiya introduced the RB67 6×7 cm professional single lens reflex (SLR). The RB67, a large, heavy, medium-format camera with built-in closeup bellows was innovative and successful. Previous medium-format professional cameras used the square 6×6 cm format which did not require the camera to be rotated for photographs in portrait orientation, problematical with large and heavy cameras when tripod-mounted. The RB67 had a rotating back which enabled photographs to be taken in either landscape or portrait orientation without rotating the camera, at the expense of additional weight and bulk. The RB67 soon became widely used by professional studio photographers. The 6×7 frame was described as being ideal, as the 56mm x 67mm negatives required very little cropping to fit on standard 10″ x 8″ paper.
When comparing the RB67 to full frame 135 cameras there is a so-called “crop factor” of a half. That means the standard 35mm frame has “half” the diagonal of the 67 (though the ratio is different) but a quarter the area. This effects the focal length of lenses so that to get an equivalent field of view on a 35mm camera you need half the focal length. There is a similar effect on the depth of field of a particular aperture, so a 90mm f1:3.5 on the RB67 is equivalent to using a 45mm f1:1.8 on 35mm full frame.
In 1975 Mamiya started to offer the M645, a camera with 6×4.5 cm frame, allowing 15 shots on a standard 120 roll film becoming the first MF camera to offer that format size also known as the 645 format.
The RB67 was followed by the more advanced RZ67 6x7cm frame format camera in 1982. These cameras established Mamiya as a major medium-format professional camera manufacturer, together with Hasselblad, Rollei, Bronica and Pentax.
In 1989, Mamiya introduced the Mamiya 6 and Mamiya 7 (6x6cm and 6x7cm, respectively) rangefinder cameras, compact and quiet cameras which are reputed for the extremely high optical quality of their lenses.
In 1999, Mamiya presented the Mamiya 645AF, a 6X4.5 frame SLR camera with interchangeable lenses and film backs, auto focus and an integrated prism visor that would be the base platform for the Mamiya 645AFD film and digital back cameras.
Digital products[edit]
Mamiya introduced the Mamiya ZD, which was a compact medium-format camera, in 2004. Rather than taking the form of a digital back solution, it was all built into one unit, much like a 35mm camera. This camera utilized the Mamiya 645AF lenses and had a resolution of 22mp. The solution had technical difficulties and became delayed. At the same time, Mamiya also announced a ZD back which had the same specification but was intended to be used with the Mamiya 645AFDII / AFDIII. The ZD back was even more delayed and, once it was introduced, it was already outdated.
In 2009, the Mamiya M Series digital backs were released (M18, M22 and M31) all featuring high pixel counts with large CCDs and compatibility with the Mamiya 645AFD range and RZ/ RB series (via specially manufactured adapters). All the backs are compatible with 4×5 inch view cameras. In the final quarter of 2009, Mamiya released its Mamiya 645DF camera, the latest and digital-only version of the famed 6×4.5 format AF camera series. The Mamiya 645DF has many improved features including mirror-up delay, lack of shutter lag, AF preference with priority on speed or precision, and compatibility with the new leaf shutter lens range (Mamiya Sekor AF 80mm, 55mm and 110mm D lenses with in-built leaf shutters). With these lenses attached, flash synchronizations speeds of up to 1/1,600 of a second are achievable, although the camera can also be programmed to use the focal plane shutter even if a leaf shutter lens is attached. 2010 saw the release of 3 Mamiya DM Systems (Mamiya DM33 System, consisting of a 645DF camera body and 33MP digital back, the Mamiya DM28 System, consisting of a 645 AF III camera body and 28MP digital back, and the Mamiya DM22 System, consisting of a 645 AF III camera body and 22MP digital back. A new logo and webpage were also launched.[3]
Mamiya America Corporation[edit]
In the United States, the trademark for “Mamiya” is not owned by the original company in Japan but rather by a wholly separate entity called Mamiya America Corporation (“M.A.C.”). As such, All products that bear the name “Mamiya” are controlled by M.A.C. and has resulted in a considerable rise in retail pricing when comparing the same products to ones sold outside the United States. As of 2014 MAC group no longer manages the Mamiya brand in America, all sales, service and support was transferred to Phase One who already owned a large portion of Mamiya.
Products[edit]
For a detailed list of current and historical products, see List of Mamiya products.6×4.5 cm format[edit]
- The M645 (discontinued) was manufactured from 1975 to 1987. This was the first model to offer a 6×4.5 cm frame.
- The Mamiya 645 Super (discontinued) was manufactured from 1985 to 1993. This was a new camera with a moulded plastic shell on a diecast metal frame. Its features are as for the M645 1000s (indeed it is able to use the same lenses and film cartridges). It added removable film backs, whereby a dark-slide could be inserted and the back removed mid-roll.
- The Mamiya 645 Pro (discontinued) was manufactured from 1993 to 1998.
- The Mamiya 645 Pro-TL (discontinued) was first released in 1997.
- The Mamiya 645E (discontinued) was first released in 2000. Entry-level camera, non-interchangeable back, popular among beginners.
- Mamiya 645DF+ — modular DSLR medium-format camera; also available as the Phase One 645DF
6×7 cm format[edit]
- RB67 Pro-SD — mechanical 6 cm × 7 cm SLR medium-format camera
- RZ67 IID — electronic 6 cm × 7 cm SLR medium-format camera
- Mamiya 7II — electronic 6 cm × 7 cm rangefinder camera
35mm SLR Mamiya ZE
Mamiya 135 EE
Mamiya ZM


Source: Mamiya – Wikipedia
Back-illuminated sensor
Back-illuminated sensor
From Wikipedia, the free encyclopediaFor the lighting design practice, see Backlighting (lighting design). For backlights in liquid crystal displays, see backlight.A back-illuminated sensor, also known as backside illumination (BSI or BI) sensor, is a type of digital image sensor that uses a novel arrangement of the imaging elements to increase the amount of light captured and thereby improve low-light performance. The technique was used for some time in specialized roles like low-light security cameras and astronomy sensors, but was complex to build and required further refinement to become widely used. Sony was the first to reduce these problems and their costs sufficiently to introduce a 5-megapixel 1.75 µm BI CMOS sensor at general consumer prices in 2009.[1][2] BI sensors from OmniVision Technologies have since been used in consumer electronics from other manufacturers as in the HTC EVO 4G[3][4] Android smart phone, and as a major selling point for the camera in Apple’s iPhone 4.[5][6]
Description[edit]
A traditional, front-illuminated digital camera is constructed in a fashion similar to the human eye, with a lens at the front and photodetectors at the back. This traditional orientation of the sensor places the active matrix of the digital camera image sensor—a matrix of individual picture elements—on its front surface and simplifies manufacturing. The matrix and its wiring, however, reflect some of the light, and thus the photocathode layer can only receive the remainder of the incoming light; the reflection reduces the signal that is available to be captured.[1]
A back-illuminated sensor contains the same elements, but arranges the wiring behind the photocathode layer by flipping the silicon wafer during manufacturing and then thinning its reverse side so that light can strike the photocathode layer without passing through the wiring layer.[7] This change can improve the chance of an input photon being captured from about 60% to over 90%,[8] with the greatest difference realised when pixel size is small,[citation needed] as the light capture area gained in moving the wiring from the top (light incident) to bottom surface (paraphrasing the BSI design) is proportionately smaller for a larger pixel.[citation needed] BSI-CMOS sensors are most advantageous in partial sun and other low light conditions.[9] Placing the wiring behind the light sensors is similar to the difference between a cephalopod eye and a vertebrate eye. Orienting the active matrix transistors behind the photocathode layer can lead to a host of problems, such as cross-talk, which causes noise, dark current, and color mixing between adjacent pixels. Thinning also makes the silicon wafer more fragile. These problems could be solved through improved manufacturing processes, but only at the cost of lower yields, and consequently higher prices. Despite these issues, early BI sensors found uses in niche roles where their better low-light performance was important. Early uses included industrial sensors, security cameras, microscope cameras and astronomy systems.[8]
Industry observers[who?] noted that a back-illuminated sensor could theoretically cost less than a similar front-illuminated version. The ability to collect more light meant that a similarly sized sensor array could offer higher resolution without the drop in low-light performance otherwise associated with the megapixel race. Alternatively, the same resolution and low-light capability could be offered on a smaller chip, lowering costs. Key to attaining these advantages would be an improved process that addressed the yield problems, largely through improving the uniformity of an active layer on the front of the detectors.[8]
A major step in the adoption of BI sensors was made when OmniVision Technologies sampled their first sensors using the technique in 2007.[10]These sensors, however, did not see widespread use due to their high costs. Sony’s work on new photo diode materials and processes allowed them to introduce the first consumer back-illuminated sensor as their CMOS-based “Exmor R” in August 2009.[1] According to Sony, the new material offered +8 dB signaling and −2 dB noise. When combined with the new back-illuminated layout, the sensor improved low-light performance by as much as two times.[1]
Competitors followed suit, and by the end of the year most companies were offering a version in their high-end products. OmniVision has continued to push the technology down their product lines. By contrast, the iPhone 4s employs a sensor manufactured by Sony. Another example is the HTC EVO 4G[4][3] which equipped with an 8 megapixel, 1.4 µm pixel BSI sensor from OmniVision. In 2011, Sony implemented their Exmor R sensor in their flagship smartphone Sony Ericsson Xperia Arc.[11]
In January 2012 Sony developed the back-side illuminated sensor further with Stacked CMOS,[3] where the supporting circuitry is moved below the active pixel section, giving another 30% improvement to light capturing capability.[12] This was commercialized by Sony in August 2012 as Exmor RS with resolutions of 13 and 8 effective megapixels.[13]
In September 2014 Samsung announced the world’s first APS-C sensor to adopt back-side illuminated (BSI) pixel technology.[14][3] This 28-megapixels sensor (S5KVB2) was adopted by their new compact system camera, the NX1, and was showcased along with the camera at photokina 2014, held in Cologne, Germany, 16 to 21 September.
On 10 June 2015 Sony announced the first camera employing a back-side illuminated full frame sensor, the α7R II.[3]
w-
What is Composition in Photography?
What is Composition in Photography?
With the first article in our new Mastering Composition series, it is only fitting that we start off by discussing the very definition of our main topic. In this article for beginner photographers, I will outline the general meaning of the term “composition” in art. I will also briefly discuss the goal of composition, define what a good composition is and why it is such an important part of any work of art. At the end of the article I will provide you with a simple question that is also a hint on what is to come in future articles.
1) General Definition of the Term
The term “composition” applies not only to visual arts, but to music, dance, literature and virtually any other kind of art. In certain contexts, such as writing, this term may not be as widely used, but is just as valid nonetheless. In general, the term “composition” has two distinctive, yet related meanings.
First and foremost, “composition” describes placement of relative objects and elements in a work of art. Consequently, composition is a key aspect of a good work of art. There is hardly a way to overemphasize the importance of composition. Any aspiring artist ought to give composition of his work a lot of attention. A good composition is one that has just enough detail. Too few elements is bad because it robs the work of art of necessary detail that makes correct interpretation possible. It also ruins the balance of an image. And too many elements can be very distracting as well. Good composition requires good balance. It is best to make sure all the elements present are necessary for the idea or story you are trying to pass on.
In some cases, composition can mean the work of art itself and is a synonymous to that term. For example, when talking about a specific installation or dance, a phrase “This composition…” can be used. Such a definition also widely applies to music (creators of which are known as composers) and paintings.
2) What is Composition in Photography?
Now that we know the general definition of the term “composition”, it is not too hard to figure out its meaning in photography. Simply put, composing an image means arranging elements within it in a way that suits the core idea or goal of your work best. Arranging elements can be done by actually moving the objects or subjects. A good example for this case is portrait or still life photography. Street photography involves anticipation, since the photographer doesn’t usually have the choice of moving his subjects himself, but has to wait for them to take the most suitable position within the frame. Another way of arranging elements is by changing your own position. Such a way is appropriate in circumstances that do not allow the photographer to physically move anything, like landscape photography.
Composition is a way of guiding the viewer’s eye towards the most important elements of your work, sometimes – in a very specific order. A good composition can help make a masterpiece even out of the dullest objects and subjects in the plainest of environments. On the other hand, a bad composition can ruin a photograph completely, despite how interesting the subject may be. A poorly judged composition is also not something you can usually fix in post-processing, unlike simple and common exposure or white balance errors. Cropping can sometimes save an image, but only when tighter framing and removal of certain portions of the image is the correct solution. That is why giving your choice of composition plenty of thought before capturing an image is a step of utmost importance.
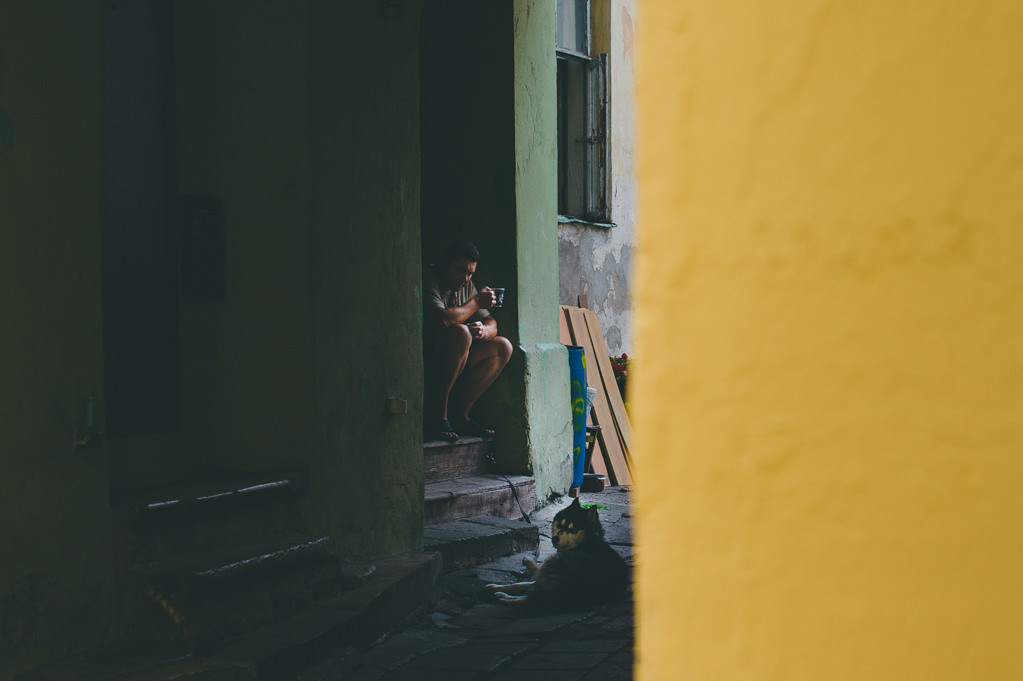
Focal length, aperture, angle at which you choose to position your camera relative to your subject also greatly affects composition. For example, choosing a wider aperture will blur the background and foreground, effectively lessening the importance of objects placed in there. It will also more often than not result in more noticeable corner shading (vignetting), which will help keep viewer’s eye inside the frame for longer. On the other hand, closing down the aperture will bring more objects into focus which, in turn, may result in better image balance. How so? Well, “sharper”, more in-focus objects may attract more attention than a blurry shape, but not always (see image sample below). An experienced photographer will use all the available means to achieve the desired result. It is worth noting that de-focusing objects in the foreground or background does not negate their contribution to overall composition of the image. Simple shapes, tones, shadows, highlights, colors are all strong elements of composition.
Take a look at the below image. Despite the fact that part of a wall showing in the foreground is completely out of focus, it is the most vivid part of the photograph as well as being quite bright. For this reason, it attracts our attention much more than the main subject (man with the tea cup and his Siberian Husky hiding in shadows). The bright yellow rectangle is the first thing you see when you glance at the photograph. A good and obvious way to fix this would be to reduce the vividness and luminance of yellow using Lightroom’s HSL panel (although I actually like the contrast between the two parts of the photograph):
We will discuss color, tone and other composition elements in more detail in upcoming Mastering Composition series articles.
Composing an image eventually becomes a very natural process. With enough practice – mind you, there can never be too much of such a thing – you will not even have to think about the placement of those elements. Your subconscious will do it for you. Your fingers will dial correct settings, your eye will guide the framing. Poor composition will instantly appear unnatural and just plain wrong to you. The more experience you have, the better choices you will make. Best way to grow as a photographer is not to rush your decisions and not trust your subconscious unquestionably, but to learn new ways of composing your image. Not that you shouldn’t trust your guts – you should, of course. But make sure to also give it some thought, experiment, take a few shots and analyze them during post-processing. See what works best, try to understand why and then experiment some more.
3) The Goal of Composition
One may assume that a good composition is one that is most pleasing to the eye. Consequently, the goal of good composition ought to be showing your subject or object in a flattering, aesthetically pleasing manner. But such opinion is a little superficial. Not every work of art is supposed to be pleasing or beautiful to the viewer. Some artists try to express different, stronger ideas and their subject, as well as composition choices help achieve that. For example, if an artist wants the viewer to feel uncomfortable or nervous, he will choose a composition that is least “natural” and come up with something unexpected and shocking. A good example of such work is war photography, where photographers often try to help the viewer feel how terrifying and destructive war is. On the other hand, an artist may portray war victims in a very flattering and disturbingly beautiful way. By doing so, he would emphasize war’s ugly nature in a grotesque and sarcastic manner. So, in the end, the goal of a good composition is to help express the idea of the artist by necessary means.
4) Assignment for Beginners
This simple assignment is for beginner photographers, who would like to actively learn along with other readers and participate in creation of these articles.
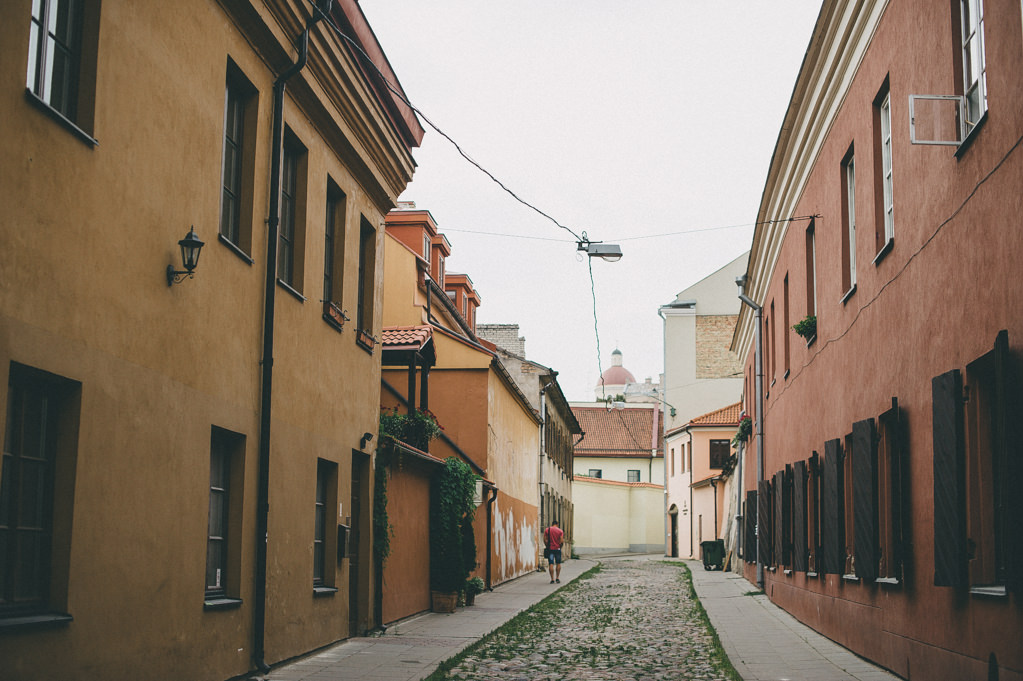
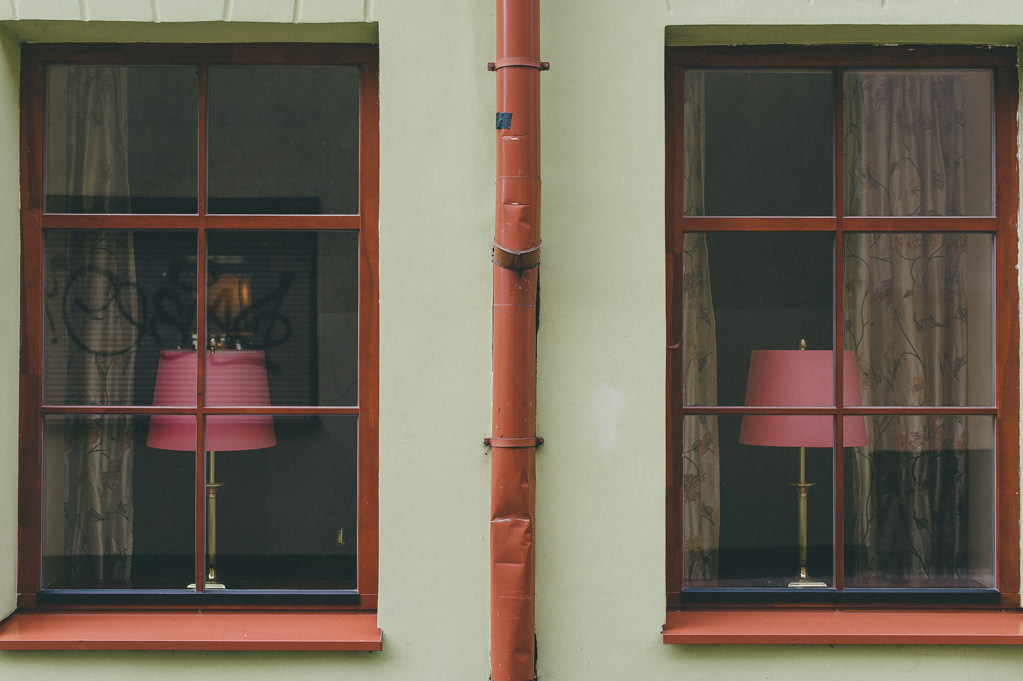
- Name basic varieties (or simply “types”) of composition you are familiar with. Make sure to list just one variety and try not to repeat those that have already been named by someone else. Best if you don’t use Google – test yourself and wait for the upcoming articles patiently 🙂 The following image is a hint for one of the most obvious basic compositions types.
Good luck!

How to Correct White Balance with GIMP
G
IMP is an open source project. Though GIMP has been around for several years I would suggest you treat it with the same caution you would with any other open source software. If you wish to try is out you can download the Mac , Linux and Windows installer from the GIMP website.It is relatively easy to correct white balance in GIMP using the Levels tool and a couple of other features to fine tune the result.AdsStart Download – View PDFwww.fromdoctopdf.comConvert From Doc to PDF, PDF to Doc Simply With The Free On-line App!Start Downloadwww.snapmyscreen.com1.Click Here to Download 2.Get Your Free Software 3.Enjoy!Download Nowmediaplayer10.comPlay Any Video With MediaPlayer10. Free To Install & Use Forever!Color BalancingPhoto CorrectionEditor PhotoColor CorrectionLightroom PhotographyModern digital cameras are remarkably clever and are able to select the best settings for most situations to ensure that the photos you take are as high quality as possible. However, in some cases they may have problems in selecting the correct white balance setting.Keeping things simple, the white balance of a digital camera affects how colors appear in photos. Most light appears white to the human eye, but in reality, different types of light, such as sunlight and tungsten light, have slightly different colors and digital cameras are sensitive to this. The result is that if a camera has its white balance set incorrectly for the type of light it is capturing, the resulting photo will have an unnatural color cast. You can see that in the left hand photo on this page, that has a warm yellow cast. The photo on the right shows it after the corrections that are demonstrated on the following pages.Serious photographers will proclaim that you should always shoot in RAW format because you are able to easily change the white balance of a photo during processing.If you want the best photos possible, then RAW is the way to go, but if you’re a less serious photographer, the necessity to also undertake the other steps in processing can make RAW more complicated and time consuming. That’s because when you shoot JPEGs, your camera automatically undertakes a lot of these processing steps for you, such as sharpening and noise reduction.Manually sharpening and reducing noise using GIMP and other image editors is relatively straight forward, however most users do not consider it so easy to correct the white balance of JPEGs. In the following few pages, I’ll show how a few simple features in GIMP will help you to correct white balance to achieve impressive results. These steps will also help you to understand how the Levels tool and Color Balance and Hue-Saturation features operate.
10 Reasons Why You Should Be Shooting RAW
10 Reasons Why You Should Be Shooting RAW
You’ve probably heard over and over that you should be shooting in RAW.
But do you know why it’s so important? And what it really means for your images? Let’s sort it out!
First off, what is RAW? RAW is a file format that captures all image data recorded by the sensor when you take a photo. When shooting in a format like JPEG image information is compressed and lost. Because no information is compressed with RAW you’re able to produce higher quality images, as well as correct problem images that would be unrecoverable if shot in the JPEG format.
And happily many many cameras these days shoot RAW, including point and shoots! So even if you’re using a little camera, you might still be able to take advantage of the RAW file format (just check your camera manual to see!).
So, the benefits of RAW. Let’s list ‘em out:
1. Get the Highest Level of Quality
This is one of the biggest benefits. When you shoot in RAW you record all of the data from the sensor. This gives the highest quality files. And when it comes to your awesome images, you want high quality.
Look at it this way: all cameras technically shoot RAW. Yes, it’s true.
The difference when you shoot in JPEG format is that the camera does it’s own processing to convert the RAW information into a JPEG.
However, your camera is nowhere near as smart as your brain, nor is it as powerful as your computer. When you shoot RAW, you’re able to do that processing yourself. You can make the decisions on how the image should look, and produce way better results.
2. Record Greater Levels of Brightness
Levels of brightness are the number of steps from black to white in an image. The more you have, the smoother the transitions of tones. Smooth is good.
JPEG records 256 levels of brightness, and RAW records between 4,096 to 16,384 levels! This is described with the term “bit”. JPEG captures in 8bit, and RAW is either 12bit or 14bit. That’s what that bit business means!
The effect this has on your images is huge. Those additional steps of brightness let you make more adjustments (expoosure, blacks, fill light, recovery, contrast, brightness) to your image without a significant reduction of quality, because there’s more levels to work with!
It’s also easier to avoid or correct posterization in your images when you shoot in RAW. Posterization is the banding that you often see in bright skies, which really doesn’t look good in prints!
3. Easily Correct Dramatically Over/Under Exposed Images
Obviously you want to get the best exposure in camera, but sometimes things move fast (especially with weddings!) and you wind up with a dramatically over or under exposed image.
With RAW you have additional information in the file, so it’s much easier to correct the image without a drastic reduction in quality. You can also recover more blown highlights and clipped shadows. Good stuff.
FREE PRESETS: Click here to unlock our FREE Lightroom Presets! Grab these color and black and white presets and start editing your raw files with one click!
4. Easily Adjust White Balance
When you shoot JPEG the white balance is applied to the image. You can’t just easily choose another option. With RAW the white balance is still recorded, but because you have way more data, it’s easy to adjust.
Great white balance and colour are essential to an awesome image, and shooting RAW lets you make the adjustments easier and faster, with better results.
5. Get Better Detail
When you shoot RAW you have access to sharpening and noise algorithms in a program like Lightroom that are way more powerful than those found in your camera.
Plus, these sharpening and noise algorithms are always improving, so in the future you’ll be able to re-visit your RAW files and take advantage of these improvements. And jetpacks.
6. Enjoy Non-Destructive Editing
When you make adjustments to a RAW file, you’re not actually doing anything to the original data. What you’re doing is creating a set of instructions for how the JPEG or TIFF (another file format) version should be saved.
The awesomness of this is that you never ever have to worry about ruining an image, accidentally saving over, or being unable to go back and make changes. You can always reset your adjustments, and start over again.
JPEG files lose quality every time you open them, make adjustments, and save again. True story. It’s what is known as a “lossy” file format. So if you’re making edits to JPEGs you always have to be duplicating the image and saving out a new version if you don’t want to lose file quality. Hassle.
7. Get Better Prints
Because of the finer gradation of tones and colours you’ll get better prints from RAW files. Even though more and more people are shooting digital, great prints are as important as ever (maybe even more so, due to their relative rarity!)
You’ll also get less banding, which is really yucky on a print.
8. Select Colour Space on Output
Colour space is a bit of a complex topic, but here’s a quick tip. With RAW you can choose from any colour space when you are exporting it out, so you can adjust depending on the situation!
Is the image going on to the web? Then output in the sRGB colour space to ensure maximum compatibility among web browsers.
Are the files heading to a client? Save it in the common Adobe RGB (1998) colour space.
Do you want the widest colour space possible? Use ProPhoto RGB.
Basically there are different colour spaces that work best for different situations, and when you shoot RAW you can export a single image in multiple spaces! Sweet!
9. Have an Efficient Workflow
It’s easier to work through large batches of images when you’re using a workflow centric program like Lightroom or Aperture. They’re designed to easily process groups of RAW images. Photoshop is not meant for that kind of thing, it’s built to handle one image at a time.
In order to take full advantage of all the benefits of Lightroom and Aperture you should be shooting RAW!
10. It’s the Pro Option
Professionals should be providing their clients with the highest quality possible. Issues like banding and blown h
ighlights are big deals when you’re offering your clients printed products. Achieving proper colour balance, and choosing the right colour space for the situation are critical as well.By shooting RAW you take control, and are able to manage these problems to create the best results possible.
Now that some point and shoots are capable of shooting RAW, hobbyists and amateurs can also take advantage of this pro level option, and get better files and prints! Good deal.
Downsides and Solutions
Now, there are always pros and cons to every option, and RAW does have a few downsides. We’ll chat about those, as well as some potential soluations!
NEED TO BE PROCESSED
A common argument against shooting RAW is that because the files need to be processed, it takes more time to shoot RAW than JPEG. If you don’t do any processing to your JPEGs that might be true.
However, most photographers do some level of processing to their JPEGs so already the argument is getting flimsy.
Then, when you add in the fact that adjustments like white balancing, and recovering highlights and shadows are way faster with RAW files, and it actually begins to looks like processing RAW can be faster than JPEG!!
Then, with RAW, you can easily export to JPEG, as well as convert to various sizes (like web res) at the same time. If you really wanted you could even shoot RAW + JPEG simultaneously!
RAW gives you way more options, and can be processed just as fast, if not faster, than JPEG.
TAKES UP MORE SPACE
Since RAW files have more uncompressed information they can be 2-3 times larger than JPEG files. This is definitely a concern for many shooters, especially those who create a lot of images.
But over the past few years, the cost of hard drives has really dropped, and they’re incredibly affordable!
Let’s consider a 3TB hard drive.
- A 3TB drive costs about $129
- If a large JPEG file is about 8MB, you’ll fit 375,000 images on the drive, at $0.000344/image
- If a RAW file is about 30MB, you’ll fit 100,000 images on the drive, at $0.00129/image
Obviously you can store fewer RAW files, but the number of images that you can cheaply store is so large for both formats that it’s not really an issue! It’s also probably a good idea to not place so many images on a single hard drive. Don’t put all your photographic eggs in one basket!
Memory cards are the same deal. They’re constantly dropping in price. Remember when a 2GB card was over $200?? Nowadays you can hardly even buy one that small, and 4GB is as cheap as $15. Madness!
Yes, RAW files are bigger and take up more space. But that’s because they’re of higher quality. Go with high quality for the extra $0.00121/image.
SLOWS THE CAMERA DOWN
RAW files are larger than JPEGs, so they’ll fill up the buffer of your camera faster. The camera will still shoot the same frames per second, regardless of whether it is RAW or JPEG, but you may have to wait for the camera to write to the memory card if the buffer fills up.
If shooting fast sequences if critical for you, and you want to shoot RAW, you can purchase faster memory cards, or a more expensive camera with a larger buffer.
IN A PROPRIETARY FORMAT
RAW files are often recorded in a proprietary format, which means that the camera manufacturers haven’t officially disclosed how the raw data can be converted. Companies like Adobe either need to license software to decode the RAW files or reverse engineer how the files should be converted. (For Canon cameras the RAW format looks like .CR2 and for Nikon it’s .NEF).
The problem here is that you can’t be certain that in 5, 10 or 20 years you’ll be able to easily open that RAW file if you don’t have the proper software to decode it!
A new open source RAW format has been developed in order to overcome this obstacle. It was developed by Adobe and is known as DNG (Digital Negative). Using a program like Lightroom, you can convert your proprietary RAW files into the open source DNG format. It’s an extra step, but it will ensure your files are readable far into the future!
Already the Leica M9 shoots in the DNG format, so look for more camera manufacturers to support this open source format in the future!
Wrap It UP!
Hopefully this look at RAW and it’s benefits has cleared things up a bit! Suggestions that RAW takes too long, or is too much work, don’t really hold water anymore.
These days, it’s super duper easy (and fast!) to process RAW files, and you’ll be able to get the absolute best quality out of those images that you put so much time, effort and love into!
UPDATE: Due to the overwhelming response to this blog post, and the questions many readers have had, we have created a followup blog post called 12 Answers To Your Burning Questions About Raw. Go check it out!