
Photography
Understanding Metering and Metering Modes
Understanding Metering and Metering Modes
Every modern DSLR has something called “Metering Mode”, also known as “Camera Metering”, “Exposure Metering” or simply “Metering”. Knowing how metering works and what each of the metering modes does is important in photography, because it helps photographers control their exposure with minimum effort and take better pictures in unusual lighting situations. In this understanding metering modes article, I will explain what metering is, how it works and how you can use it for your digital photography.
When I got my first DSLR (Nikon D80), one of my frustrations was that some images would come out too bright or too dark. I had no idea how to fix it, until one day, when I learned about camera metering modes.
1) What is Metering?
Metering is how your camera determines what the correct shutter speed and aperture should be, depending on the amount of light that goes into the camera and the sensitivity of the sensor. Back in the old days of photography, cameras were not equipped with a light “meter”, which is a sensor that measures the amount and intensity of light. Photographers had to use hand-held light meters to determine the optimal exposure. Obviously, because the work was shot on film, they could not preview or see the results immediately, which is why they religiously relied on those light meters.
Today, every DSLR has an integrated light meter that automatically measures the reflected light and determines the optimal exposure. The most common metering modes in digital cameras today are:
- Matrix Metering (Nikon), also known as Evaluative Metering (Canon)
- Center-weighted Metering
- Spot Metering
Some Canon EOS models also offer “Partial Metering”, which is similar to Spot Metering, except the covered area is larger (approximately 8% of the viewfinder area near the center vs 3.5% in Spot Metering).
You can see the camera meter in action when you shoot in Manual Mode – look inside the viewfinder and you will see bars going left or right, with a zero in the middle, as illustrated below.

If you point your camera at a very bright area, the bars will go to “+” side, indicating that there is too much light for the current exposure settings. If you point your camera at a very dark area, the bars will go to the “-” side, indicating that there is not enough light. You would then need to increase or decrease your shutter speed to get to “0”, which is the optimal exposure, according to your camera meter.
A camera meter is not only useful for just the Manual Mode – when you choose another mode such as Aperture Priority, Shutter Priority or Program Mode, the camera automatically adjusts the settings based on what it reads from the meter.
1.1) Problems with Metering
Camera meters work great when the scene is lit evenly. However, it gets problematic and challenging for light meters to determine the exposure, when there are objects with different light levels and intensities. For example, if you are taking a picture of the blue sky with no clouds or sun in the frame, the image will be correctly exposed, because there is just one light level to deal with. The job gets a little harder if you add a few clouds into the image – the meter now needs to evaluate the brightness of the clouds versus the brightness of the sky and try to determine the optimal exposure. As a result, the camera meter might brighten up the sky a little bit in order to properly expose the white clouds – otherwise, the clouds would look too white or “overexposed”.
What would happen if you added a big mountain into the scene? Now the camera meter would see that there is a large object that is much darker (relative to the clouds and the sky), and it would try to come up with something in the middle, so that the mountain is properly exposed as well. By default, the camera meter looks at the light levels in the entire frame and tries to come up with an exposure that balances the bright and the dark areas of the image.
2) Matrix / Evaluative Metering
Matrix Metering or Evaluative Metering mode is the default metering mode on most DSLRs. It works similarly to the above example by dividing the entire frame into multiple “zones”, which are then all analyzed on individual basis for light and dark tones. One of the key factors (in addition to color, distance, subjects, highlights, etc) that affects matrix metering, is where the camera focus point is set to. After reading information from all individual zones, the metering system looks at where you focused within the frame and marks it more important than all other zones. There are many other variables used in the equation, which differ from manufacturer to manufacturer. Nikon, for example, also compares image data to a database of thousands of pictures for exposure calculation.

You should use this mode for most of your photography, since it will generally do a pretty good job in determining the correct exposure. I leave my camera metering mode on matrix metering for most of my photography needs, including landscape and portrait photography.
3) Center-weighted Metering
Using the whole frame for determining the correct exposure is not always desirable. What if you are trying to take a headshot of a person with the sun behind? This is where center-weighted metering comes in handy. Center-weighted Metering evaluates the light in the middle of the frame and its surroundings and ignores the corners. Compared to Matrix Metering, Center-weighted Metering does not look at the focus point you select and only evaluates the middle area of the image.

Use this mode when you want the camera to prioritize the middle of the frame, which works great for close-up portraits and relatively large subjects that are in the middle of the frame. For example, if you were taking a headshot of a person with the sun behind him/her, then this mode would expose the face of the person correctly, even though everything else would probably get heavily overexposed.
4) Spot Metering
Spot Metering only evaluates the light around your focus point and ignores everything else. It evaluates a single zone/cell and calculates exposure based on that single area, nothing else. I personally use this mode a lot for my bird photography, because the birds mostly occupy a small area of the frame and I need to make sure that I expose them properly, whether the background is bright or dark. Because the light is evaluated where I place my focus point, I could get an accurate exposure on the bird even when the bird is in the corner of the frame. Also, if you were taking a picture of a person with the sun behind but they occupied a small part of the frame, it is best to use the spot metering mode instead. When your subjects do not take much of the space, using Matrix or Center-weighted metering modes would most likely result in a silhouette, if the subject was back-lit. Spot metering works great for back-lit subjects like that.

Another good example of using spot metering is when photographing the Moon. Because the moon would take up a small portion of the frame and the sky is completely dark around it, it is best to use Spot metering – that way, we are only looking at the light level coming from the moon and nothing else.
Some DSLRs like the Canon 1D/1Ds are capable of multi-spot metering, which basically allows choosing multiple spots to measure light and come up with an average value for a good exposure.
5) How to Change Camera Metering Mode
Unfortunately, this varies not only from manufacturer to manufacturer, but also from model to model. On the Nikon D5500, for example, it is done through the menu setting (Info button). On professional cameras such as the Nikon D810 and Nikon D5, there is a separate button on the top left dial for camera metering. Changing metering on Canon cameras also varies from model to model, but generally it is done through a key combination (“Set” button), camera menu or a dedicated metering button close to the top LCD.
Source: https://photographylife.com/understanding-metering-modes
Bokeh

In photography, bokeh (originally /ˈboʊkɛ/,[1] /ˈboʊkeɪ/ boh-kay — also sometimes pronounced as /ˈboʊkə/boh-kə,[2] Japanese: [boke]) is the aesthetic quality of the blur produced in the out-of-focus parts of an image produced by a lens.[3][4][5] Bokeh has been defined as “the way the lens renders out-of-focus points of light”.[6] Differences in lens aberrations and aperture shape cause some lens designs to blur the image in a way that is pleasing to the eye, while others produce blurring that is unpleasant or distracting—”good” and “bad” bokeh, respectively.[7] Bokeh occurs for parts of the scene that lie outside the depth of field. Photographers sometimes deliberately use a shallow focus technique to create images with prominent out-of-focus regions.
Bokeh is often most visible around small background highlights, such as specular reflections and light sources, which is why it is often associated with such areas.[7] However, bokeh is not limited to highlights; blur occurs in all out-of-focus regions of the image.
Source: Bokeh – Wikipedia
RawTherapee
RawTherapee is a cross-platform raw image processing program,[2] released under the GNU General Public License Version 3. It was originally written by Gábor Horváth of Budapest, Hungary, before being re-licensed as free and open-source software in January 2010.[3] It is written in C++, using a GTK+ front-end and a patched version of dcraw for reading raw files. It is notable for the advanced control it gives the user over the demosaicing and developing process. The name used to stand for “The Experimental R
Source: RawTherapee – Wikipedia
GIMP- What does “Add Alpha Channel” mean? – tutorial – YouTube
Remove Timestamps Using Gimp – YouTube
Correcting Underexposure With Gimp 2.6 – YouTube
Drone Nerds Academy: Phantom 3 Standard vs Advanced – YouTube

How to make a transparent background using GIMP – YouTube
RawTherapee Tutorial – YouTube
2. Туторијал на youtube
2.1 Ако стиснеш „i“ ќе ти прикаже EXIF податоци за сликата
2.2 Exposure
– Exposure compensation е исто со зголемување на ISO. Ако го зголемиш на 1 тоа значи дека 1 stop нагоре (ако било ISO100 одиш на ISO200).
– Black и White ги сетира со користење на Tone Curve 1 (Control Cage). Белото е десно црното е лево. Гледаш на хистограмот само да ги допре y-оската за црно лево, а за бело десно.
Кривата обично изгледа приближно како буквата S. Пази ги гаси дифолтно предожените вредности за црно и бело. Не пипа контраст, lightnest ниту сатурација. Ги чепка
Highlight compression (не над 100) i Highlight Comression threshold
2.3 Whithe balance
Ова е многу важно. Ја бира пипетата и бира неутрален регион каде што имаш јако сиво или јако бело. Со тоа автоматски се мести на добра white balance. Вика понекогаш
може да го чепнеш Vibrance но не и другите параметри
2.4 Sharpening. Бира само Sharpen only edges. Инаку на небото ќе му се јави шум. Изоштрувањето го прави со промена на радиус. Обично го држи под 1 максимум 0.8.
Температурата ја чепка, ретко Tint, но не Blu/Red equalizer
2.5 Noice Reduction
– На tutorialot на youtube виика дека ако имаш големо ISO тогаш со noice reduction – Luminance треба да бидеш во опсег од 10-15 (rule of thumb). Се користи method: L*a*b
– noice reduction – Chrominance го остава на Auto. Ако избереш соодветен профил (пр. Difault ISO High или Default ISO Medium) тој ќе аплицира автоматски соодветен
noice reduction.
2.6 Save to JPG
Вика дека во избор на JPEG quality тешко можеш да видиш разлика меѓу 94 и 100%. Веројатно 94 е тамам. За Subsampling избира Balance. Вика дека тоа е добра опција.
How to Resize and Make Images Larger without Losing Quality
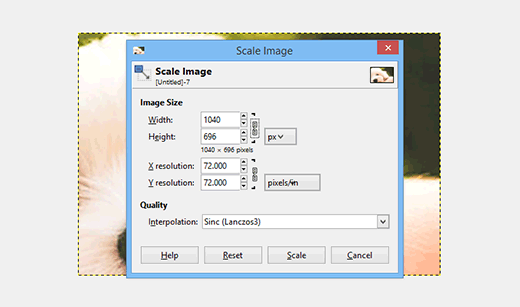
Ever wanted to enlarge an image without quality loss? Learn how to resize images to make them larger without losing quality in Photoshop and GIMP.
Source: How to Resize and Make Images Larger without Losing Quality
Mamiya
Mamiya
From Wikipedia, the free encyclopedia
This article needs additional citations for verification. (August 2012) (Learn how and when to remove this template message)
Mamiya Digital Imaging Co., Ltd. Camera and lens manufacturer Industry Digital imaging and photography Founded May 1940 Headquarters Tokyo, Japan Seiichi Mamiya, founder Products Cameras, Optical and other products 200 Parent Phase One Website Mamiya Japan
Mamiya LeafMamiya Digital Imaging Co., Ltd. (マミヤ・デジタル・イメージング マミヤ・デジタル・イメージング ー株式会社?, Mamiya Dejitaru Imejingu Kabushiki-gaisha)[needs IPA] is a Japanese company that manufactures high-end cameras and other related photographic and optical equipment. With headquarters in Tokyo, it has two manufacturing plants and a workforce of over 200 people. The company was founded in May 1940 by camera designer Seiichi Mamiya (間宮精一) and financial backer Tsunejiro Sugawara.
History[edit]

A Mamiya C3 twin lens reflex, from 1962.
Mamiya originally achieved fame for its professional medium-format film cameras such as the Mamiya Six and the Mamiya Press series. It later went on to develop the industry workhorse RB67 series, the RZ67 and the twin-lens reflex Mamiya C-series, used by advanced amateur and professional photographers.
Many Mamiya models over the past six decades have become collectors’ items. The earliest Mamiya Six medium-format folding camera, the 35 mm Mamiya-Sekor 1000DTL, the lightweight 35 mm Mamiya NC1000, the 6×6 cm medium-format C series of interchangeable-lens twin-lens reflex (TLR) cameras, and the press cameras of the Super/Universal series are highly valued. Mamiya also manufactured the last models in the Omega line of medium format cameras.
Mamiya entered other business markets over time by purchasing other companies.[1] Until 2000, it made fishing equipment such as fishing rods and fishing reels. In 2006, the Mamiya Op Co., Ltd., Inc. transferred the camera and optical business to Mamiya Digital Imaging Co., Ltd. The original company, doing business as Mamiya-OP, continues to exist and makes a variety of industrial and electronics products. It also makes golf clubs, golf club shafts and grips, and golf balls through its subsidiaries Kasco and USTMamiya.[2]
In 2009, Phase One, a medium format digital camera back manufacturer from Denmark, purchased a major stake in Mamiya. In 2012, Phase One combined Mamiya and another subsidiary, Leaf Imaging, created a new, worldwide Mamiya Leaf brand to integrate both companies’ product lines into one complete medium-format digital camera system offering. The re-branding offers a streamlined product development and establishment of a more efficient customer sales and support base.
135 film[edit]
Mamiya started manufacturing 135-film cameras in 1949, with 135-film point-and-shoot compact cameras being introduced later. The excellent Mamiya-35 series of rangefinder cameras was followed by the Mamiya Prismat SLR in 1961 and the Mamiya TL/DTL in the mid-to-late 1960s. The SX, XTL and NC1000 were other 135-film SLR camera models introduced by Mamiya. One of Mamiya’s last 135-film SLR designs was the Z-series. The original entry-level ZE model was an aperture-priority-only SLR; the ZE-2 added manual exposure; the ZE-X added shutter priority and full program automated mode, and (with a dedicated flash and an EF-series lens) focus-priority flash exposure). In these models the aperture ring had no direct connection to the diaphragm, allowing the camera body to override the set aperture, and the lenses could communicate a considerable amount of information to the camera body via electrical contacts on the mount.
The Mamiya ZM, introduced in 1982, was essentially an advanced version of the ZE-2, with some of the features of the ZE-X. It was the last Mamiya 135-film camera produced. It had an aperture-priority automatic time control, based on center-weighted TTL readings, an automatic shutter-speed range from 4 seconds to 1/1000, and a manual range from 2 seconds to 1/1000. Visual and audio signals indicated over- or under-exposure, pending battery failure, or excessive camera shake. Metering modes, shutter release, self-timer, manual time settings and the ergonomics of the camera body were also improved.
In 1984 Osawa, one of Mamiya’s major distributors, filed for the Japanese equivalent of bankruptcy and, soon after, Mamiya discontinued 135-film camera production to focus on the medium-format professional market.
Medium format[edit]
Mamiya made a series of square format twin lens reflex (TLR) throughout the middle of the twentieth century. These were developed into the C cameras (C2, C3 through to C330s) which have interchangeable lenses as well as bellows focus.
In 1970, Mamiya introduced the RB67 6×7 cm professional single lens reflex (SLR). The RB67, a large, heavy, medium-format camera with built-in closeup bellows was innovative and successful. Previous medium-format professional cameras used the square 6×6 cm format which did not require the camera to be rotated for photographs in portrait orientation, problematical with large and heavy cameras when tripod-mounted. The RB67 had a rotating back which enabled photographs to be taken in either landscape or portrait orientation without rotating the camera, at the expense of additional weight and bulk. The RB67 soon became widely used by professional studio photographers. The 6×7 frame was described as being ideal, as the 56mm x 67mm negatives required very little cropping to fit on standard 10″ x 8″ paper.
When comparing the RB67 to full frame 135 cameras there is a so-called “crop factor” of a half. That means the standard 35mm frame has “half” the diagonal of the 67 (though the ratio is different) but a quarter the area. This effects the focal length of lenses so that to get an equivalent field of view on a 35mm camera you need half the focal length. There is a similar effect on the depth of field of a particular aperture, so a 90mm f1:3.5 on the RB67 is equivalent to using a 45mm f1:1.8 on 35mm full frame.
In 1975 Mamiya started to offer the M645, a camera with 6×4.5 cm frame, allowing 15 shots on a standard 120 roll film becoming the first MF camera to offer that format size also known as the 645 format.
The RB67 was followed by the more advanced RZ67 6x7cm frame format camera in 1982. These cameras established Mamiya as a major medium-format professional camera manufacturer, together with Hasselblad, Rollei, Bronica and Pentax.
In 1989, Mamiya introduced the Mamiya 6 and Mamiya 7 (6x6cm and 6x7cm, respectively) rangefinder cameras, compact and quiet cameras which are reputed for the extremely high optical quality of their lenses.
In 1999, Mamiya presented the Mamiya 645AF, a 6X4.5 frame SLR camera with interchangeable lenses and film backs, auto focus and an integrated prism visor that would be the base platform for the Mamiya 645AFD film and digital back cameras.
Digital products[edit]
Mamiya introduced the Mamiya ZD, which was a compact medium-format camera, in 2004. Rather than taking the form of a digital back solution, it was all built into one unit, much like a 35mm camera. This camera utilized the Mamiya 645AF lenses and had a resolution of 22mp. The solution had technical difficulties and became delayed. At the same time, Mamiya also announced a ZD back which had the same specification but was intended to be used with the Mamiya 645AFDII / AFDIII. The ZD back was even more delayed and, once it was introduced, it was already outdated.
In 2009, the Mamiya M Series digital backs were released (M18, M22 and M31) all featuring high pixel counts with large CCDs and compatibility with the Mamiya 645AFD range and RZ/ RB series (via specially manufactured adapters). All the backs are compatible with 4×5 inch view cameras. In the final quarter of 2009, Mamiya released its Mamiya 645DF camera, the latest and digital-only version of the famed 6×4.5 format AF camera series. The Mamiya 645DF has many improved features including mirror-up delay, lack of shutter lag, AF preference with priority on speed or precision, and compatibility with the new leaf shutter lens range (Mamiya Sekor AF 80mm, 55mm and 110mm D lenses with in-built leaf shutters). With these lenses attached, flash synchronizations speeds of up to 1/1,600 of a second are achievable, although the camera can also be programmed to use the focal plane shutter even if a leaf shutter lens is attached. 2010 saw the release of 3 Mamiya DM Systems (Mamiya DM33 System, consisting of a 645DF camera body and 33MP digital back, the Mamiya DM28 System, consisting of a 645 AF III camera body and 28MP digital back, and the Mamiya DM22 System, consisting of a 645 AF III camera body and 22MP digital back. A new logo and webpage were also launched.[3]
Mamiya America Corporation[edit]
In the United States, the trademark for “Mamiya” is not owned by the original company in Japan but rather by a wholly separate entity called Mamiya America Corporation (“M.A.C.”). As such, All products that bear the name “Mamiya” are controlled by M.A.C. and has resulted in a considerable rise in retail pricing when comparing the same products to ones sold outside the United States. As of 2014 MAC group no longer manages the Mamiya brand in America, all sales, service and support was transferred to Phase One who already owned a large portion of Mamiya.
Products[edit]
For a detailed list of current and historical products, see List of Mamiya products.6×4.5 cm format[edit]
- The M645 (discontinued) was manufactured from 1975 to 1987. This was the first model to offer a 6×4.5 cm frame.
- The Mamiya 645 Super (discontinued) was manufactured from 1985 to 1993. This was a new camera with a moulded plastic shell on a diecast metal frame. Its features are as for the M645 1000s (indeed it is able to use the same lenses and film cartridges). It added removable film backs, whereby a dark-slide could be inserted and the back removed mid-roll.
- The Mamiya 645 Pro (discontinued) was manufactured from 1993 to 1998.
- The Mamiya 645 Pro-TL (discontinued) was first released in 1997.
- The Mamiya 645E (discontinued) was first released in 2000. Entry-level camera, non-interchangeable back, popular among beginners.
- Mamiya 645DF+ — modular DSLR medium-format camera; also available as the Phase One 645DF
6×7 cm format[edit]
- RB67 Pro-SD — mechanical 6 cm × 7 cm SLR medium-format camera
- RZ67 IID — electronic 6 cm × 7 cm SLR medium-format camera
- Mamiya 7II — electronic 6 cm × 7 cm rangefinder camera
35mm SLR Mamiya ZE
Mamiya 135 EE
Mamiya ZM


Source: Mamiya – Wikipedia