Raspberry Pi • View topic – Access Point (AP) for TP-Link TL-WN725N V2

Hi all, I have successfully configured the TP-Link TL-WN725N V2 WiFi module (chipset RTL8188EU) as an AP (access point). Have tried many tutorials out there, but none worked for me (hostapd failures with bad wifi driver). This tutorial is based upon these sources (with some exceptions): RPI-Wireless-Hotspot Wifi-hotspot-with-edimax-nano-usb Since I used the module to control a robot through WiFi, I didn’t setup a bridge to share internet connection (hotspot). If you want to share/access internet through

Source: Raspberry Pi • View topic – Access Point (AP) for TP-Link TL-WN725N V2

How-To: Raspberry Pi multiple WiFi setup through the command line

Quickly setup multiple wifi connections on your raspberry pi through the command lineStep by step illustrated guide showing you how to setup your wireless connection if you only have access to the terminalSetting it up using just the /etc/network/interfaces files can work but you will run into issues when you need multiple connections or if you ever do access the desktop environment.  Setting it up using wpa supplicant will be more reliable in the long run

Source: How-To: Raspberry Pi multiple WiFi setup through the command line

Icecast

Icecast is a streaming media project released as free software maintained by the Xiph.org Foundation. It also refers specifically to the server program which is part of the project. Icecast was created in December 1998/January 1999 by Jack Moffitt[2][3] and Barath Raghavan[3] to provide an open source audio streaming server that anyone could modify, use, and tinker with. Version 2 was started in 2001, a ground-up rewrite aimed at multi-format support (initially targeting Ogg Vorbis) and scalability; this r

Source: Icecast – Wikipedia

Setting WiFi up via the command line – Raspberry Pi Documentation

This method is suitable if you don’t have access to the graphical user interface normally used to set up WiFi on the Raspberry Pi. It’s especially suitable for use with a serial console cable if you don’t have access to a screen or wired Ethernet network. Note also that no additional software is required; everything you need is already included on the Raspberry Pi. GETTING WIFI NETWORK DETAILS To scan for WiFi networks, use the command sudo iwlist wlan0 scan. This will list all available WiFi networks, al

Source: Setting WiFi up via the command line – Raspberry Pi Documentation

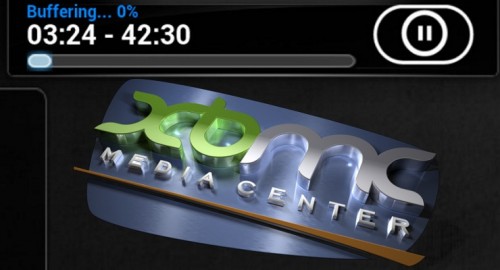
Strategies to fix XBMC buffering issues on Raspberry Pi

XBMC buffering issues can be an annoyance while trying to watch a video on your HTPC. The problem amplifies if the video is of HD quality or if your HTPC has less available resources. Raspberry Pi, with only 512 MB of RAM and modest CPU power is prone to slow buffering. In this post, I will show you some ways to fix slow buffering on XBMC running on Raspberry Pi. These fixes should solve XBMC buffering problems in OpenELEC, Xbian, Raspbmc or a full-scale HTPC running XBMC. Note that some of the fixes for XBMC buffering issues listed below require XBMC 13 Gotham.

Source: Strategies to fix XBMC buffering issues on Raspberry Pi

OpenELEC Mediacenter – OpenELEC Forum – Stutter problem with DOLBY TRUE HD, DTS-HD MA (1/1)

Stutter problem in video with lossless audio DOLBY TRUE HD, DTS-HD MAHi, I can’t play smoothly and happily all videos with an audio lossless trackexample:www.demo-world.eu/download-2d-trailers/?file=hd_thx_terminator_2_lossless-DWEU.m2ts&pic=hd_thx_terminator_2.jpgthe same video in this lossy version plays perfect:www.demo-world.eu/download-2d-trailers/?file=hd_thx_terminator_2-DWEU.m2ts&pic=hd_thx_terminator_2.jpgI tried with overclock, change file location, passthrough ON/OFF, video licences purchased and activated, etc but the video stutters every 5 – 6 seconds. And i see the buffer going down with O button. (P(aq %” Start to be 100%, then go rapidly to 0%, then the movie stops, the buffer goes to 100% and the movie restarts… How to keep that buffer full? or not at 0%?My OC now is at MEDIUMmode ‘Medium’ : 900 | 333 | 450 | 2need to be TURBO?I have the files on NAS, on sd card and on usb stick but nothing changes.. it’s the same.any hints ti solve the problem?I know the track is perfectly useless because RPI doesn’t support lossless audio passthrough, but if I have a file with different audio track it is impossible to play it.None of these videos with lossless track plays without stuttering..www.demo-world.eu/2d-demo-trailers-hd/It’s obvious all my BD lossless rips with HD audio tracks have the same problem…thanks in advanceI use openelec 5.0.3 on my raspi B version.

Source: OpenELEC Mediacenter – OpenELEC Forum – Stutter problem with DOLBY TRUE HD, DTS-HD MA (1/1)

Raspberry Pi • View topic – Create SD card image on windows

Hey guys! I want to know if there is any program I can use to create an image of my Raspi SD Card in Windows so I can keep a backup of a configuration that already works flawlessly. I would like to create an image that I could later burn to my SD card with the Windows program mentioned on the instructions in case I mess something up. Thanks!

Source: Raspberry Pi • View topic – Create SD card image on windows

APC Smart-UPS Dead – Spiceworks

I have an APC Smart-UPS RT 3000VA. It has been disconnected from power for about 12 months. I have now reconnected the UPS and it is stone dead. No lights. No fans turn. I cannot find a Circuit breaher of a fuse which may have tripped or blown. I have left the UPS connected to power for 3 days now and still no life out if it. Can anyone shed some light on this?

Source: APC Smart-UPS Dead – Spiceworks

GitHub – scheckmedia/CameraControllerApi

CameraControllerApi

The CameraControlerApi is an attempt to control a DSLR via REST functionality. At the moment is it possible to change the camera settings (ISO, aperture, time), take pictures and stream the live view of the camera (only tested with a Nikon D90).

Web-Interface

http://device_ip:port/webif/

Demonstration

a demonstration for the CameraControlerApi

How to use

You will get all valid data for a command from the “list” action.

Settings

List the configuration with validate values

http://device_ip:port/settings?action=list

ISO

http://device_ip:port/settings?action=iso&value=200

Aperture

http://device_ip:port/settings?action=aperture&value=f/22

Shutter Speed

http://device_ip:port/settings?action=speed&value=1/1000

Whitebalance

http://device_ip:port/settings?action=whitebalance&value=Cloudy

Capture

take a picture

http://device_ip:port/capture?action=shot

autofocus

http://device_ip:port/capture?action=autofocus

File system

list of the available images on camera

http://device_ip:port/fs?action=list

get an image

http://device_ip:port/fs?action=get&value=filename.jpg&path=/path/to/file

Each method will response with a JSON file. If you want a XML response you have to put the command “&type=xml” on the end of the upper commands

Live View

live view will be generated as mjpeg-stream. you can easy implement this stream in html inside an image tag e.g:

<!DOCTYPE html>
<html>
<head>
<meta charset="UTF-8">
<title>Live View</title>
</head>

<body>
<img src="https://localhost:8888/liveview" />
</body>

</html>

Dependencies

apt-get install libboost-dev libboost-system-dev libmicrohttpd-dev libgphoto2-dev libexiv2-dev

  • libgphoto
  • libboost
  • libboost-system
  • libmicrohttpd
  • libexiv2

Source: GitHub – scheckmedia/CameraControllerApi