With the first article in our new Mastering Composition series, it is only fitting that we start off by discussing the very definition of our main topic. In this article for beginner photographers, I will outline the general meaning of the term “composition” in art. I will also briefly discuss the goal of composition, define what a good composition is and why it is such an important part of any work of art. At the end of the article I will provide you with a simple question that is also a hint on what is to come in future articles.
1) General Definition of the Term
The term “composition” applies not only to visual arts, but to music, dance, literature and virtually any other kind of art. In certain contexts, such as writing, this term may not be as widely used, but is just as valid nonetheless. In general, the term “composition” has two distinctive, yet related meanings.
First and foremost, “composition” describes placement of relative objects and elements in a work of art. Consequently, composition is a key aspect of a good work of art. There is hardly a way to overemphasize the importance of composition. Any aspiring artist ought to give composition of his work a lot of attention. A good composition is one that has just enough detail. Too few elements is bad because it robs the work of art of necessary detail that makes correct interpretation possible. It also ruins the balance of an image. And too many elements can be very distracting as well. Good composition requires good balance. It is best to make sure all the elements present are necessary for the idea or story you are trying to pass on.
In some cases, composition can mean the work of art itself and is a synonymous to that term. For example, when talking about a specific installation or dance, a phrase “This composition…” can be used. Such a definition also widely applies to music (creators of which are known as composers) and paintings.
2) What is Composition in Photography?
Now that we know the general definition of the term “composition”, it is not too hard to figure out its meaning in photography. Simply put, composing an image means arranging elements within it in a way that suits the core idea or goal of your work best. Arranging elements can be done by actually moving the objects or subjects. A good example for this case is portrait or still life photography. Street photography involves anticipation, since the photographer doesn’t usually have the choice of moving his subjects himself, but has to wait for them to take the most suitable position within the frame. Another way of arranging elements is by changing your own position. Such a way is appropriate in circumstances that do not allow the photographer to physically move anything, like landscape photography.
Composition is a way of guiding the viewer’s eye towards the most important elements of your work, sometimes – in a very specific order. A good composition can help make a masterpiece even out of the dullest objects and subjects in the plainest of environments. On the other hand, a bad composition can ruin a photograph completely, despite how interesting the subject may be. A poorly judged composition is also not something you can usually fix in post-processing, unlike simple and common exposure or white balance errors. Cropping can sometimes save an image, but only when tighter framing and removal of certain portions of the image is the correct solution. That is why giving your choice of composition plenty of thought before capturing an image is a step of utmost importance.
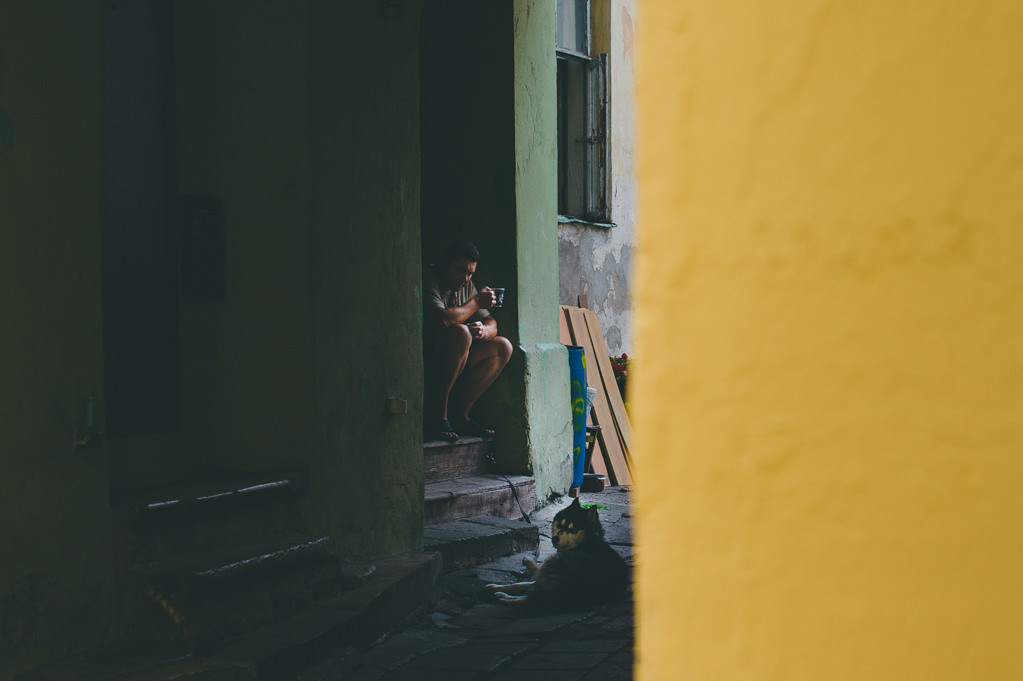
Focal length, aperture, angle at which you choose to position your camera relative to your subject also greatly affects composition. For example, choosing a wider aperture will blur the background and foreground, effectively lessening the importance of objects placed in there. It will also more often than not result in more noticeable corner shading (vignetting), which will help keep viewer’s eye inside the frame for longer. On the other hand, closing down the aperture will bring more objects into focus which, in turn, may result in better image balance. How so? Well, “sharper”, more in-focus objects may attract more attention than a blurry shape, but not always (see image sample below). An experienced photographer will use all the available means to achieve the desired result. It is worth noting that de-focusing objects in the foreground or background does not negate their contribution to overall composition of the image. Simple shapes, tones, shadows, highlights, colors are all strong elements of composition.
Take a look at the below image. Despite the fact that part of a wall showing in the foreground is completely out of focus, it is the most vivid part of the photograph as well as being quite bright. For this reason, it attracts our attention much more than the main subject (man with the tea cup and his Siberian Husky hiding in shadows). The bright yellow rectangle is the first thing you see when you glance at the photograph. A good and obvious way to fix this would be to reduce the vividness and luminance of yellow using Lightroom’s HSL panel (although I actually like the contrast between the two parts of the photograph):
We will discuss color, tone and other composition elements in more detail in upcoming Mastering Composition series articles.
Composing an image eventually becomes a very natural process. With enough practice – mind you, there can never be too much of such a thing – you will not even have to think about the placement of those elements. Your subconscious will do it for you. Your fingers will dial correct settings, your eye will guide the framing. Poor composition will instantly appear unnatural and just plain wrong to you. The more experience you have, the better choices you will make. Best way to grow as a photographer is not to rush your decisions and not trust your subconscious unquestionably, but to learn new ways of composing your image. Not that you shouldn’t trust your guts – you should, of course. But make sure to also give it some thought, experiment, take a few shots and analyze them during post-processing. See what works best, try to understand why and then experiment some more.
3) The Goal of Composition
One may assume that a good composition is one that is most pleasing to the eye. Consequently, the goal of good composition ought to be showing your subject or object in a flattering, aesthetically pleasing manner. But such opinion is a little superficial. Not every work of art is supposed to be pleasing or beautiful to the viewer. Some artists try to express different, stronger ideas and their subject, as well as composition choices help achieve that. For example, if an artist wants the viewer to feel uncomfortable or nervous, he will choose a composition that is least “natural” and come up with something unexpected and shocking. A good example of such work is war photography, where photographers often try to help the viewer feel how terrifying and destructive war is. On the other hand, an artist may portray war victims in a very flattering and disturbingly beautiful way. By doing so, he would emphasize war’s ugly nature in a grotesque and sarcastic manner. So, in the end, the goal of a good composition is to help express the idea of the artist by necessary means.
4) Assignment for Beginners
This simple assignment is for beginner photographers, who would like to actively learn along with other readers and participate in creation of these articles.
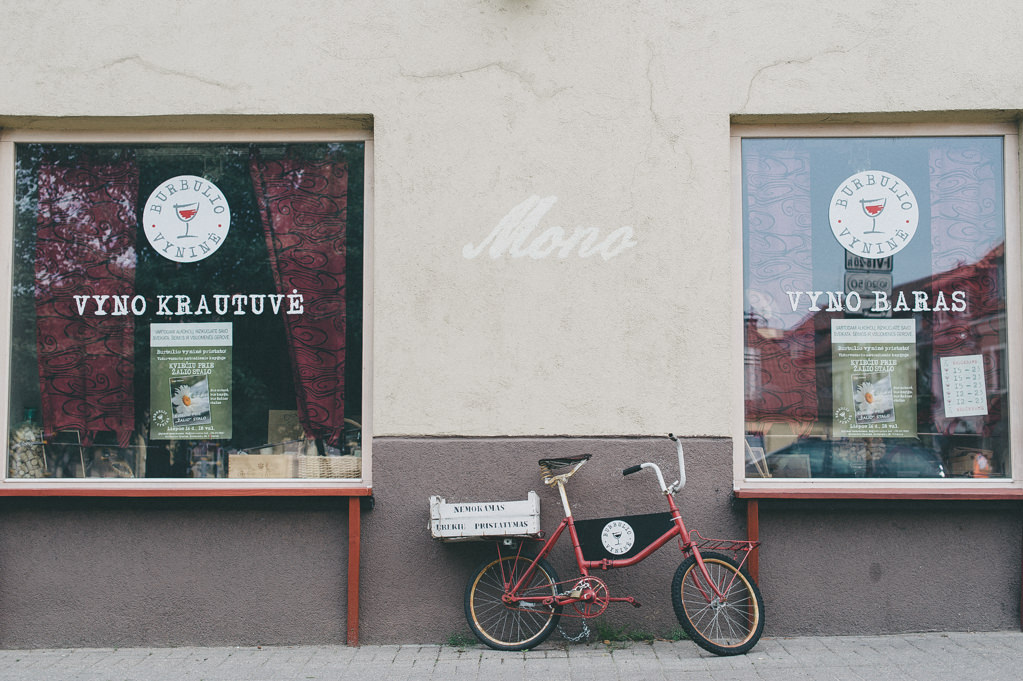
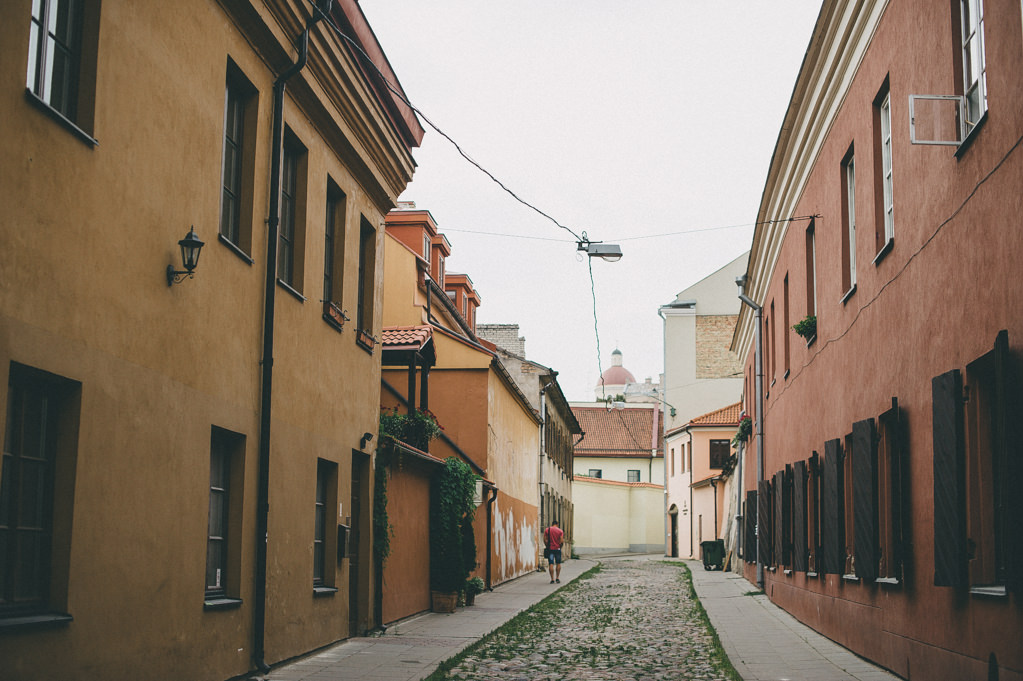
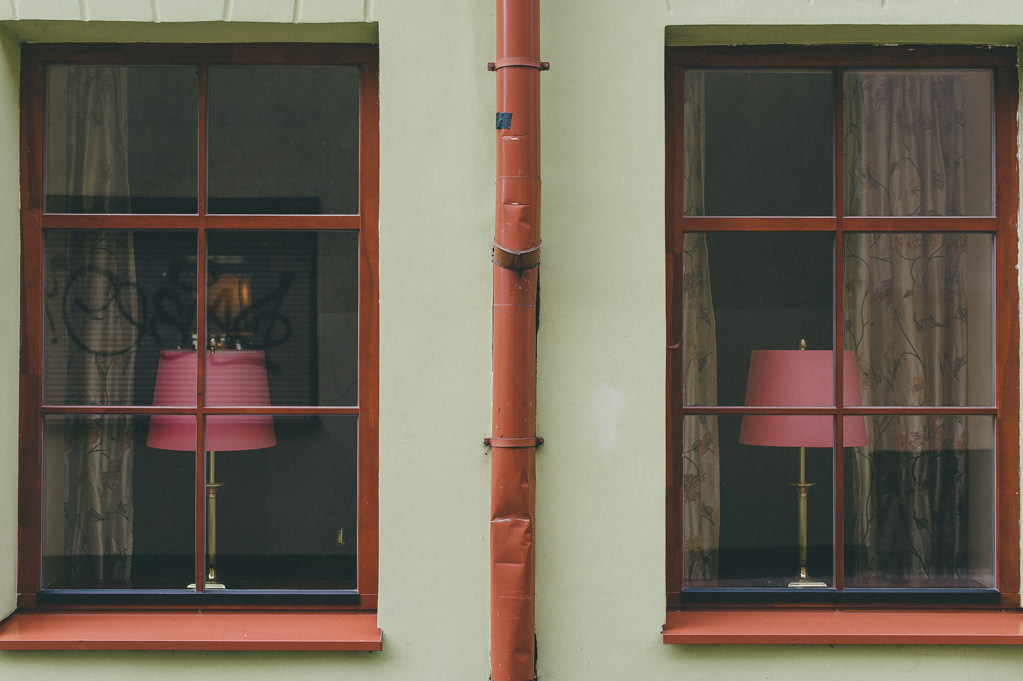
Name basic varieties (or simply “types”) of composition you are familiar with. Make sure to list just one variety and try not to repeat those that have already been named by someone else. Best if you don’t use Google – test yourself and wait for the upcoming articles patiently 🙂 The following image is a hint for one of the most obvious basic compositions types.
GIMP is an open source project. Though GIMP has been around for several years I would suggest you treat it with the same caution you would with any other open source software. If you wish to try is out you can download the Mac , Linux and Windows installer from the GIMP website.It is relatively easy to correct white balance in GIMP using the Levels tool and a couple of other features to fine tune the result.AdsStart Download – View PDFwww.fromdoctopdf.comConvert From Doc to PDF, PDF to Doc Simply With The Free On-line App!Start Downloadwww.snapmyscreen.com1.Click Here to Download 2.Get Your Free Software 3.Enjoy!Download Nowmediaplayer10.comPlay Any Video With MediaPlayer10. Free To Install & Use Forever!Color BalancingPhoto CorrectionEditor PhotoColor CorrectionLightroom PhotographyModern digital cameras are remarkably clever and are able to select the best settings for most situations to ensure that the photos you take are as high quality as possible. However, in some cases they may have problems in selecting the correct white balance setting.Keeping things simple, the white balance of a digital camera affects how colors appear in photos. Most light appears white to the human eye, but in reality, different types of light, such as sunlight and tungsten light, have slightly different colors and digital cameras are sensitive to this. The result is that if a camera has its white balance set incorrectly for the type of light it is capturing, the resulting photo will have an unnatural color cast. You can see that in the left hand photo on this page, that has a warm yellow cast. The photo on the right shows it after the corrections that are demonstrated on the following pages.Serious photographers will proclaim that you should always shoot in RAW format because you are able to easily change the white balance of a photo during processing.If you want the best photos possible, then RAW is the way to go, but if you’re a less serious photographer, the necessity to also undertake the other steps in processing can make RAW more complicated and time consuming. That’s because when you shoot JPEGs, your camera automatically undertakes a lot of these processing steps for you, such as sharpening and noise reduction.Manually sharpening and reducing noise using GIMP and other image editors is relatively straight forward, however most users do not consider it so easy to correct the white balance of JPEGs. In the following few pages, I’ll show how a few simple features in GIMP will help you to correct white balance to achieve impressive results. These steps will also help you to understand how the Levels tool and Color Balance and Hue-Saturation features operate.
You’ve probably heard over and over that you should be shooting in RAW.
But do you know why it’s so important? And what it really means for your images? Let’s sort it out!
First off, what is RAW? RAW is a file format that captures all image data recorded by the sensor when you take a photo. When shooting in a format like JPEG image information is compressed and lost. Because no information is compressed with RAW you’re able to produce higher quality images, as well as correct problem images that would be unrecoverable if shot in the JPEG format.
And happily many many cameras these days shoot RAW, including point and shoots! So even if you’re using a little camera, you might still be able to take advantage of the RAW file format (just check your camera manual to see!).
So, the benefits of RAW. Let’s list ‘em out:
1. Get the Highest Level of Quality
This is one of the biggest benefits. When you shoot in RAW you record all of the data from the sensor. This gives the highest quality files. And when it comes to your awesome images, you want high quality.
Look at it this way: all cameras technically shoot RAW. Yes, it’s true.
The difference when you shoot in JPEG format is that the camera does it’s own processing to convert the RAW information into a JPEG.
However, your camera is nowhere near as smart as your brain, nor is it as powerful as your computer. When you shoot RAW, you’re able to do that processing yourself. You can make the decisions on how the image should look, and produce way better results.
2. Record Greater Levels of Brightness
Levels of brightness are the number of steps from black to white in an image. The more you have, the smoother the transitions of tones. Smooth is good.
JPEG records 256 levels of brightness, and RAW records between 4,096 to 16,384 levels! This is described with the term “bit”. JPEG captures in 8bit, and RAW is either 12bit or 14bit. That’s what that bit business means!
The effect this has on your images is huge. Those additional steps of brightness let you make more adjustments (expoosure, blacks, fill light, recovery, contrast, brightness) to your image without a significant reduction of quality, because there’s more levels to work with!
It’s also easier to avoid or correct posterization in your images when you shoot in RAW. Posterization is the banding that you often see in bright skies, which really doesn’t look good in prints!
Obviously you want to get the best exposure in camera, but sometimes things move fast (especially with weddings!) and you wind up with a dramatically over or under exposed image.
With RAW you have additional information in the file, so it’s much easier to correct the image without a drastic reduction in quality. You can also recover more blown highlights and clipped shadows. Good stuff.
When you shoot JPEG the white balance is applied to the image. You can’t just easily choose another option. With RAW the white balance is still recorded, but because you have way more data, it’s easy to adjust.
Great white balance and colour are essential to an awesome image, and shooting RAW lets you make the adjustments easier and faster, with better results.
5. Get Better Detail
When you shoot RAW you have access to sharpening and noise algorithms in a program like Lightroom that are way more powerful than those found in your camera.
Plus, these sharpening and noise algorithms are always improving, so in the future you’ll be able to re-visit your RAW files and take advantage of these improvements. And jetpacks.
6. Enjoy Non-Destructive Editing
When you make adjustments to a RAW file, you’re not actually doing anything to the original data. What you’re doing is creating a set of instructions for how the JPEG or TIFF (another file format) version should be saved.
The awesomness of this is that you never ever have to worry about ruining an image, accidentally saving over, or being unable to go back and make changes. You can always reset your adjustments, and start over again.
JPEG files lose quality every time you open them, make adjustments, and save again. True story. It’s what is known as a “lossy” file format. So if you’re making edits to JPEGs you always have to be duplicating the image and saving out a new version if you don’t want to lose file quality. Hassle.
7. Get Better Prints
Because of the finer gradation of tones and colours you’ll get better prints from RAW files. Even though more and more people are shooting digital, great prints are as important as ever (maybe even more so, due to their relative rarity!)
You’ll also get less banding, which is really yucky on a print.
8. Select Colour Space on Output
Colour space is a bit of a complex topic, but here’s a quick tip. With RAW you can choose from any colour space when you are exporting it out, so you can adjust depending on the situation!
Is the image going on to the web? Then output in the sRGB colour space to ensure maximum compatibility among web browsers.
Are the files heading to a client? Save it in the common Adobe RGB (1998) colour space.
Do you want the widest colour space possible? Use ProPhoto RGB.
Basically there are different colour spaces that work best for different situations, and when you shoot RAW you can export a single image in multiple spaces! Sweet!
9. Have an Efficient Workflow
It’s easier to work through large batches of images when you’re using a workflow centric program like Lightroom or Aperture. They’re designed to easily process groups of RAW images. Photoshop is not meant for that kind of thing, it’s built to handle one image at a time.
In order to take full advantage of all the benefits of Lightroom and Aperture you should be shooting RAW!
10. It’s the Pro Option
Professionals should be providing their clients with the highest quality possible. Issues like banding and blown h
ighlights are big deals when you’re offering your clients printed products. Achieving proper colour balance, and choosing the right colour space for the situation are critical as well.
By shooting RAW you take control, and are able to manage these problems to create the best results possible.
Now that some point and shoots are capable of shooting RAW, hobbyists and amateurs can also take advantage of this pro level option, and get better files and prints! Good deal.
Downsides and Solutions
Now, there are always pros and cons to every option, and RAW does have a few downsides. We’ll chat about those, as well as some potential soluations!
NEED TO BE PROCESSED
A common argument against shooting RAW is that because the files need to be processed, it takes more time to shoot RAW than JPEG. If you don’t do any processing to your JPEGs that might be true.
However, most photographers do some level of processing to their JPEGs so already the argument is getting flimsy.
Then, when you add in the fact that adjustments like white balancing, and recovering highlights and shadows are way faster with RAW files, and it actually begins to looks like processing RAW can be faster than JPEG!!
Then, with RAW, you can easily export to JPEG, as well as convert to various sizes (like web res) at the same time. If you really wanted you could even shoot RAW + JPEG simultaneously!
RAW gives you way more options, and can be processed just as fast, if not faster, than JPEG.
TAKES UP MORE SPACE
Since RAW files have more uncompressed information they can be 2-3 times larger than JPEG files. This is definitely a concern for many shooters, especially those who create a lot of images.
But over the past few years, the cost of hard drives has really dropped, and they’re incredibly affordable!
Let’s consider a 3TB hard drive.
A 3TB drive costs about $129
If a large JPEG file is about 8MB, you’ll fit 375,000 images on the drive, at $0.000344/image
If a RAW file is about 30MB, you’ll fit 100,000 images on the drive, at $0.00129/image
Obviously you can store fewer RAW files, but the number of images that you can cheaply store is so large for both formats that it’s not really an issue! It’s also probably a good idea to not place so many images on a single hard drive. Don’t put all your photographic eggs in one basket!
Memory cards are the same deal. They’re constantly dropping in price. Remember when a 2GB card was over $200?? Nowadays you can hardly even buy one that small, and 4GB is as cheap as $15. Madness!
Yes, RAW files are bigger and take up more space. But that’s because they’re of higher quality. Go with high quality for the extra $0.00121/image.
SLOWS THE CAMERA DOWN
RAW files are larger than JPEGs, so they’ll fill up the buffer of your camera faster. The camera will still shoot the same frames per second, regardless of whether it is RAW or JPEG, but you may have to wait for the camera to write to the memory card if the buffer fills up.
If shooting fast sequences if critical for you, and you want to shoot RAW, you can purchase faster memory cards, or a more expensive camera with a larger buffer.
IN A PROPRIETARY FORMAT
RAW files are often recorded in a proprietary format, which means that the camera manufacturers haven’t officially disclosed how the raw data can be converted. Companies like Adobe either need to license software to decode the RAW files or reverse engineer how the files should be converted. (For Canon cameras the RAW format looks like .CR2 and for Nikon it’s .NEF).
The problem here is that you can’t be certain that in 5, 10 or 20 years you’ll be able to easily open that RAW file if you don’t have the proper software to decode it!
A new open source RAW format has been developed in order to overcome this obstacle. It was developed by Adobe and is known as DNG (Digital Negative). Using a program like Lightroom, you can convert your proprietary RAW files into the open source DNG format. It’s an extra step, but it will ensure your files are readable far into the future!
Already the Leica M9 shoots in the DNG format, so look for more camera manufacturers to support this open source format in the future!
Wrap It UP!
Hopefully this look at RAW and it’s benefits has cleared things up a bit! Suggestions that RAW takes too long, or is too much work, don’t really hold water anymore.
These days, it’s super duper easy (and fast!) to process RAW files, and you’ll be able to get the absolute best quality out of those images that you put so much time, effort and love into!
UPDATE: Due to the overwhelming response to this blog post, and the questions many readers have had, we have created a followup blog post called 12 Answers To Your Burning Questions About Raw. Go check it out!
Fill flash used in this shot. Model: Maria Mazurova.
When I was out shooting the other day, it occurred to me that I still use a bunch of timeless rules of thumb I learned from various sources along the way; many so ingrained I don’t even realize I’m using them. I thought it might be fun to do a review.
A few years ago, I read an article in Popular Photography (that I can no longer find on their site) listing the ones I knew, and some I didn’t. Taken from my notes:
1. Sunny 16:
Bright, sunny day at f/16, shutter speed is 1/ISO. Extrapolated, f/22 at the beach, f/11 on cloudy-bright days.
3. Avoiding Camera Shake:
Shutter: 1/focal length of the lens
4. No 18% Grey Card Handy (if you can’t trust the in-camera light meter):
Hold palm up facing the light, take a reading an open up one stop. (Skin tones vary.)
5. Depth Of Field:
Focus 1/3 of the way to maximize depth of field on a deep subject. The smaller the aperture, the shorter the focal length and the greater the distance, the greater the depth of field.
6. Largest Print With Digital:
Divide the vertical and horizontal pixel counts by 200. For critical applications, use 250.
7. Exposure:
Digital/transparency: expose for highlights and let the shadows take care of themselves.
Negative: overexpose 1 stop
8. Fill-flash:
Set flash’s ISO to twice your ISO, meter the scene, select f-stop, set autoflash to same f-stop. The resulting 2:1 flash-fill ratio will produce filled shadows 1 stop darker than the main subject.
9. Flash Range:
Double the distance, four times the ISO.
10. Megapixel Multiplier:
Increase the megapixels by 4 to double the resolution in a digital camera (to account for both vertical and horizontal).
11. Stopping Action:
Shutter speed 2 stops faster than the action moving toward or away from you, if perpendicular to the lens. For action moving at a 45-degree angle to the lens, use 1 stop faster.
12. Sunset:
Meter the area directly above the sun (without sun in frame). Down 1 f-stop to look like 1/2-hour later. Did I miss any? What’s your favorite rule of thumb? Let’s see if we can start the “definitive” collection right here.
It was publicly announced on 17 September 2012, one day before the start of the photokina trade show. It was released in late November 2012 with a suggested retail price of US$2,099.00 (body only).[4][5][6]
The 6D is offered as a body only or in a package with an EF 24-105mm f/4L IS USM zoom lens; at introduction, the suggested retail price was US$2,899.00.[4]
The EOS 6D is the first Canon DSLR to feature GPS functions and built in Wi-Fi capabilities, which geotag images and allow files to be uploaded directly to Facebook, YouTube, or Canon Image Gateway; transferred to external devices; or sent to be printed on a Wi-Fi-enabled Canon printer. The Wi-Fi capabilities also allow remote control and viewing via many smartphones.[7]
Weighing 770 grams (27 oz), the 6D is also Canon’s smallest and lightest full-frame DSLR; comparable to the APS-C sensor 60D. The camera also features an ISO setting range from 50 to 102,400 which can be selected automatically or adjusted manually, an 11-point autofocus system, and an anti-glare 3.0 inches (76 mm) LED screen.[8] The center autofocus point has a sensitivity of −3 EV.
The new BG-E13 battery grip that was made to be used with the 6D allows the use of six AA cells or one to two LP-E6 batteries.[9] The 6D has a maximum burst frame rate of 4.5 frames per second.[8] Like all Canon DSLR full-frame cameras, the 6D does not feature a built in flash due to the design of the viewfinder.[10]
In photography, stopping down refers to increasing the numerical f-stop number (for example, going from f/2 to f/4), which decreases the size (diameter) of the aperture of a lens, resulting in reducing the amount of light entering the iris of a lens.[1][2]:112
Reducing the aperture size increases the depth of field of the image. In the case of film cameras, this allows less light to reach the film plane – to achieve the same exposure after stopping down, it is necessary to compensate for the reduced light by either increasing the exposure time, or using a photographic film with a higher speed. In the case of digital cameras, stopping down the aperture allows less light to reach the image sensor – to achieve the same exposure, it is necessary to compensate for the reduced light by either increasing the exposure time, or increasing the signal gain of the sensor by increasing the camera’s ISO setting. Alternatively, more light can be added to the scene by increasing the amount of light illuminating the scene, such as by using or increasing the strength of electronic flash or other light sources.[3]
As a lens is stopped down from its maximum (widest) aperture, most lens aberrations (spherical aberration, coma and astigmatism) are decreased, but lens diffraction increases. The effect is that for most lenses, the balance between the decreasing aberrations and the increasing diffraction effects of stopping down the lens means that lenses have an optimum aperture for best results, often about three stops closed down from maximum aperture, so for a lens with a maximum aperture of ƒ/2.8, ƒ/8 would be the optimum aperture.[2]:180
To get the best out of the built-in flash on digital single lens reflex camera such as a Canon Digital Rebel, use Manual mode.
Why manual mode?
The built-in flash on Digital Rebel cameras is for fill only when used in Creative, Aperture Priority (AV) and Shutter Priority (TV) modes. In those modes, the exposure is set for the background and the flash fires to lighten close shadows and provide fill for close subjects.
AV mode is especially frustrating with flash, because you would be using flash in a dim environment. AV mode will result in a long exposure time that you cannot handhold!
But do not despair. Most DSLR flashes are made to be used in Manual mode, providing more control to balance the flash with ambient light. This produces more natural looking photos.
Using the built-in flash in a small room
In a small room, where the dominant light source is the flash, set the Aperture for the depth of field that you want and the shutter speed for something reasonable that can be hand-held. Then set the ISO for an underexposed picture.
When you take the shot, the flash fires to provide the light needed to bring up the exposure to the middle needle. The middle needle is what the camera thinks is a good exposure.
Let’s say you set f/8, 1/60th, at ISO 400 and the exposure meter reads one stop underexposed. When you take the picture, the flash will increase the light by one stop (to take the exposure from -1 to zero, or middle needle).
Leave all your settings the same but change the ISO to 200. Your exposure meter reads two stops underexposed. When you take the picture the flash will increase the light by two stops (to take the exposure from -2 to zero).
You could also change your aperture and shutter speed as well as ISO to fine tune your under exposure and resulting flash output.
Flash output power
Typically you want one stop underexposed for light fill flash; two stops underexposed for a more normal point-and-shoot looking flash. At three stops or more underexposed, the flash will be powerful and start to take over the exposure from ambient light.
Using the built-in flash in a large room
When taking flash pictures in a large place, the flash generally doesn’t reach the background. Now you have two exposures to set. The first one is for the background, called ambient light exposure. The second one, known as flash exposure, is for the foreground.
The key is to recognize that, by camera design or program, these two exposures are related. The relation is that however much the background is underexposed, the camera will assign that light output to the flash for lighting the foreground. The result is that the background is underexposed and fades from importance, while the foreground is properly exposed and stands out.
In Manual mode when you set the aperture, shutter and ISO combination, you are setting the exposure for the background. If you set that background exposure to be underexposed by one stop, the camera (through its design or program) will know to fire the flash at one stop of output light to bring the foreground exposure up one stop to middle needle, or what the camera meter thinks is good exposure.
Remember, this is for a large space and the flash only reaches the foreground. The flash has no effect on the background.
Alternately, if you set the background exposure to be underexposed by two stops, the camera will know to fire the flash at two stops of output light to bring the foreground exposure up two stops to middle needle. In this case, you get a background underexposed by two stops (that looks great for a sunset) and a good exposure on the foreground (great for a person standing in front of that sunset!).
Tips for using a Digital Rebel flash
Flash exposure compensation. Remember the example where it was suggested that you set f/8, 1/60th, at ISO 400 and the exposure meter read one stop under exposed? The background would be one stop under exposed and your foreground subject would receive one stop of extra light from the flash.What if you wanted your background exposure to stay at one stop underexposed but wanted to change your foreground subject to receive two stops of light? Set the flash exposure compensation to +1. The foreground will get one stop of light from the one stop under exposed and another one stop of light from the flash exposure compensation for a total of two stops.
When you set the camera for overexposure in manual camera mode, the flash will just fire at minimum output. It will add a little light to the foreground, but not much.
If you set the underexposure to 16 stops underexposed, your flash will not explode. If the camera calls for more output than the flash is capable, it will just fire at maximum output. You will end up with an under exposed picture because the flash couldn’t add enough light.
A word about external flashes
A hot shoe mounted external flash is much more powerful and versatile than a built-in flash. One of the best things about almost all external flashes is that you can attach a diffuser to the flash head to soften the light. Even better, you can point the flash at the wall or ceiling to bounce the flash for a more diffused even light that makes your subject look great.
Using a DSLR flash effectively, whether built-in or external, takes some practice. But do not discount flash use. It is a powerful photography tool!
Directed by David Mackenzie. With Chris Pine, Ben Foster, Jeff Bridges, Gil Birmingham. A divorced father and his ex-con older brother resort to a desperate scheme in order to save their family’s ranch in West Texas.
Directed by Todd Phillips. With Jonah Hill, Miles Teller, Steve Lantz, Gregg Weiner. Based on the true story of two young men, David Packouz and Efraim Diveroli, who won a $300 million contract from the Pentagon to arm America’s allies in Afghanistan.
Directed by Gary Ross. With Matthew McConaughey, Gugu Mbatha-Raw, Mahershala Ali, Keri Russell. A disillusioned Confederate army deserter returns to Mississippi and leads a militia of fellow deserters, runaway slaves, and women in an uprising against the corrupt local Confederate government.
IMP is an open source project. Though GIMP has been around for several years I would suggest you treat it with the same caution you would with any other open source software. If you wish to try is out you can download the Mac , Linux and Windows installer from the GIMP website.It is relatively easy to correct white balance in GIMP using the Levels tool and a couple of other features to fine tune the result.AdsStart Download – View PDFwww.fromdoctopdf.comConvert From Doc to PDF, PDF to Doc Simply With The Free On-line App!Start Downloadwww.snapmyscreen.com1.Click Here to Download 2.Get Your Free Software 3.Enjoy!Download Nowmediaplayer10.comPlay Any Video With MediaPlayer10. Free To Install & Use Forever!Color BalancingPhoto CorrectionEditor PhotoColor CorrectionLightroom PhotographyModern digital cameras are remarkably clever and are able to select the best settings for most situations to ensure that the photos you take are as high quality as possible. However, in some cases they may have problems in selecting the correct white balance setting.Keeping things simple, the white balance of a digital camera affects how colors appear in photos. Most light appears white to the human eye, but in reality, different types of light, such as sunlight and tungsten light, have slightly different colors and digital cameras are sensitive to this. The result is that if a camera has its white balance set incorrectly for the type of light it is capturing, the resulting photo will have an unnatural color cast. You can see that in the left hand photo on this page, that has a warm yellow cast. The photo on the right shows it after the corrections that are demonstrated on the following pages.Serious photographers will proclaim that you should always shoot in RAW format because you are able to easily change the white balance of a photo during processing.If you want the best photos possible, then RAW is the way to go, but if you’re a less serious photographer, the necessity to also undertake the other steps in processing can make RAW more complicated and time consuming. That’s because when you shoot JPEGs, your camera automatically undertakes a lot of these processing steps for you, such as sharpening and noise reduction.Manually sharpening and reducing noise using GIMP and other image editors is relatively straight forward, however most users do not consider it so easy to correct the white balance of JPEGs. In the following few pages, I’ll show how a few simple features in GIMP will help you to correct white balance to achieve impressive results. These steps will also help you to understand how the Levels tool and Color Balance and Hue-Saturation features operate.

Did I miss any? What’s your favorite rule of thumb? Let’s see if we can start the “definitive” collection right here.


Directed by David Mackenzie. With Chris Pine, Ben Foster, Jeff Bridges, Gil Birmingham. A divorced father and his ex-con older brother resort to a desperate scheme in order to save their family’s ranch in West Texas.
Directed by Todd Phillips. With Jonah Hill, Miles Teller, Steve Lantz, Gregg Weiner. Based on the true story of two young men, David Packouz and Efraim Diveroli, who won a $300 million contract from the Pentagon to arm America’s allies in Afghanistan.
Directed by Gary Ross. With Matthew McConaughey, Gugu Mbatha-Raw, Mahershala Ali, Keri Russell. A disillusioned Confederate army deserter returns to Mississippi and leads a militia of fellow deserters, runaway slaves, and women in an uprising against the corrupt local Confederate government.