Astronomy
Messier 25
Skywatcher Star Adventurer Mini (SAM) Review | Phil Hart
Watch “Astrophotography P3: Guiding Your Telescope” on YouTube
Watch “Photographing the Moon with a DSLR and a Telescope” on YouTube
Shooting with Modified DSLR Cameras – Sky & Telescope
Expanding the spectral response of your camera opens up many new imaging opportunities.
By Hap Griffin in the July 2013 issue of Sky & Telescope
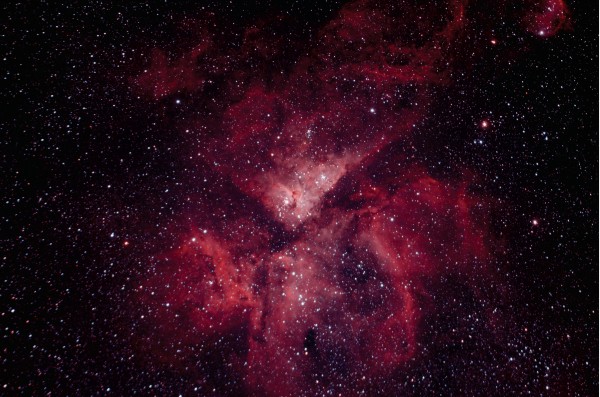
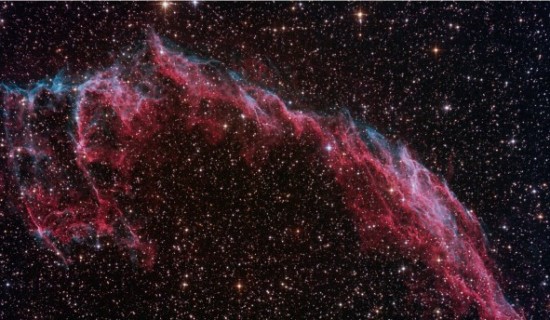
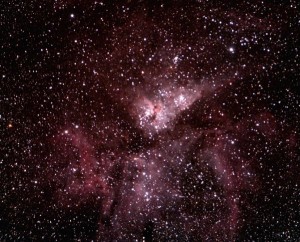
As digital single-lens reflex cameras (DSLRs) have overtaken the photographic world, tinkering with their performance has also become increasingly popular. Author Hap Griffin demonstrates how replacing the internal filter over your DSLR’s sensor can increase your camera’s sensitivity to wavelengths important in astronomy, particularly deep-red light where ionized hydrogen gas fluoresces. A modified DSLR is able to record much fainter reddish filaments in nebulae such as Eta Carina (above) than are detectable using a stock camera (below).
Fernando Gomez
If you’ve been admiring the glorious images of galaxies, nebulae, comets, and landscape-skyscape pairings produced in recent years, no doubt you’ve noticed that more and more of the photos have been captured with a modified digital single-lens reflex (DSLR) camera. Regular DSLRs have taken over the photography world, so what is “wrong” with the stock models that inspire some users to perform major surgery on a perfectly good camera?
Fernando Gomez
To answer this question, let’s examine the main purpose of these cameras. DSLRs are designed to mimic the human eye’s response to light, like their analog predecessor, color film. Our eyes are sensitive to a narrow region of the electromagnetic spectrum, from violet to deep red. DSLRs are designed to mimic this response to produce an image that closely reproduces what we see in everyday life.
But the CMOS detectors used in these cameras are sensitive to a much wider range of the electromagnetic spectrum than is visible to the human eye, from ultraviolet (UV) to infrared (IR) wavelengths. If this information were included in a typical snapshot, the image would look unnatural — foliage appears much brighter in infrared light than in visible wavelengths, and that would then distort the color balance of the resulting image. To compensate for this difference, camera manufacturers use glass filters placed just over the detector that block this unwanted light, in order to better match the human eye’s color response.
The filters in DSLR cameras are excellent for producing photographs of people, places, and other earthbound subjects, but one problem quickly arises when using these cameras for astrophotography. Many astronomical objects emit at wavelengths that are blocked by these stock filters. In particular, vast clouds of ionized hydrogen gas fluoresce in the deep red region of the spectrum at the hydrogen-alpha (Hα) wavelength of 656.3 nanometers. In all but one specialized DSLR model, the light at the wavelength of Hα light is cut to less than 20% by the internal filter, rendering invisible all but the brightest nebulae that permeate our galaxy in photographs.
To circumvent this issue, mechanically inclined amateurs often remove a camera’s internal filter or replace it with one better suited for astronomy. This greatly expands sensitivity to Hα and other wavelengths. Directions for replacing your camera’s filters yourself can be found online, though this is not something you should attempt yourself if you’re inexperienced with microelectronics. It only takes one slip or static charge to completely destroy a DSLR camera! Also be aware that opening your camera body voids your factory warranty. For those who would rather not take a chance themselves, a few enterprising individuals (including myself) perform this service with a variety of options that can greatly increase the versatility of your DSLR camera. Let’s take a closer look at what each of these options can offer.
Choosing Your Modification
There are three main options to consider when modifying your DSLR for astrophotography. The first is to completely remove the internal blocking filter consisting of a thin pane of glass mounted in front of the imaging chip. But while this opens up the camera’s full range of spectral sensitivity, it also creates a few problems.
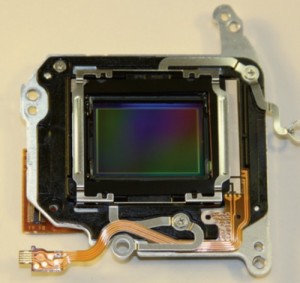
The heart of every DSLR camera is its CMOS imaging sensor; shown here is the array from a Canon EOS T2i. All manufacturers install a blocking filter directly in front of this chip to eliminate unwanted wavelengths that are mostly beyond the range of human vision.
Hap Griffin
The filter’s glass increases the focal point of a converging light beam by 1/3 the thickness of the glass used.Removing the filter completely changes the effective optical distance between a lens and the sensor, which can prevent some camera lenses from focusing on distant subjects. Additionally, the camera’s autofocus mechanisms and its optical viewfinder are no longer calibrated to the CMOS detector’s focal point.
For a camera dedicated solely to astronomical photography through a telescope, this isn’t a problem — telescopes focus well past the infinity point, and critical focus on astronomical subjects is performed using live-focus mode, or with the aid of an external computer and specialized software. But without any IR blocking, infrared light will throw out the color balance of your photos. Additionally, refractive optics cause infrared wavelengths to focus at a slightly different point than visible light, making star images appear bloated due to the out-of-focus IR view. Every telescope, whether it’s a Newtonian reflector, Schmidt-Cassegrain, or Ritchey-Chrétien, requires additional corrective optics to produce pinpoint star images across a large detector, so none is completely immune to this problem. An additional filter must then be used in the optical path to block this IR light but still allow the important Hα wavelength to pass.
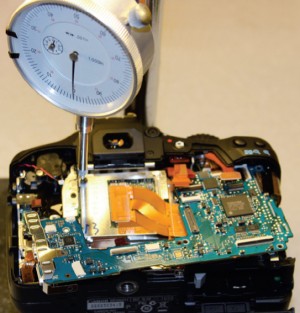
Removing the blocking filter within your DSLR camera requires disassembling the entire body, which also voids any warranty. Imagers who desire greater sensitivity but are not mechanically inclined can send their cameras to a specialist such as the author, who can replace the internal filter with a selection of alternatives.
Hap Griffin
A second solution is to replace the camera’s stock filter with one of clear glass of the same thickness, allowing all wavelengths to come to focus. This retains the camera’s autofocus capabilities and allows IR and UV light to be recorded along with visible light and Hα. There’s still the drawback of unnatural color response in daylight photography, as well as unfocused IR light bloating star images. These problems can be addressed using an additional filter in the optical path.
A third option is to replace the camera’s internal filter with one that still blocks UV and IR light, yet allows the light from Hα to be recorded virtually unimpeded. This allows you to still use all of your camera lenses and take daytime imagery. Although your color balance will be slightly off , you can easily fix this by recording a custom white balance setting in your camera. Instructions on how to accomplish this are included in every DSLR camera manual. To use a custom white balance, you must use the camera in one of its program or manual modes. Alternatively, an external color-correction lens filter such as the X-Nite CC1 available from MaxMax (www.maxmax.com), or the Astronomik OWB (Original White Balance) clip-in filter (www.astronomik.com), will allow the camera to be used in the fully automatic mode, just as it was before modification.
Shooting with a Full-Spectrum Camera
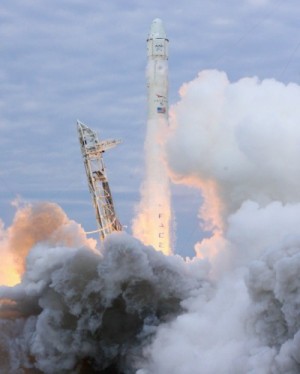
The author used the same modified EOS 40D camera with the addition of an Astronomik OWB clip-in filter to capture accurate colors of the launch of the SpaceX Dragon supply module on its way to the International Space Station in March 2013.
As mentioned previously, a modified camera can be more versatile than your stock camera. A full-spectrum modified camera (when the internal filter is replaced with clear glass) is suitable for astronomical imaging, infrared photography, and regular daylight photography with the addition of various removable filters to attenuate the camera’s spectral response.
I often use a Canon EOS 40D DSLR with a fused-silica Astrodon full-spectrum modification for all of my daylight photography, including rocket launches at Kennedy Space Center. To achieve a natural color balance in daylight with this modification, I also use the Astronomik OWB clip-in filter. I can then use the same camera for astrophotography with the addition of a slightly different Astronomik clip-in filter. It should be noted that this filter series is only available for Canon cameras, and Canon EF-S lenses will not work using the clip-in system.
Specialized Imaging
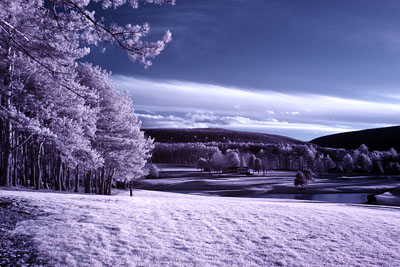
Since the spectral response of a full-spectrum modified DSLR is similar to that of a CCD camera, you can also use the camera for even more specialized photography, including narrowband imaging or IR photography. As opposed to full-color photography, narrowband, IR, and UV photography use special filters to isolate particular regions of the spectrum that are of interest. Infrared photography reveals the natural world around us in a wavelength range completely invisible to the human eye, which can be quite beautiful and artistic. UV photography also has specialized uses, particularly for forensic investigators.
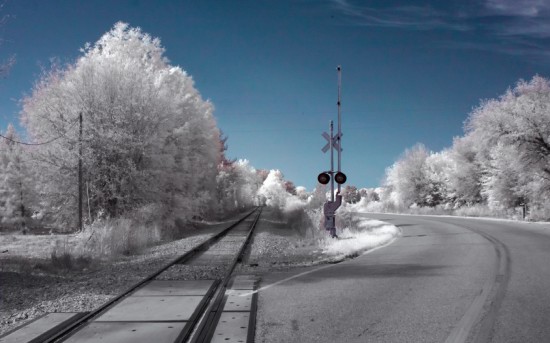
Cameras with a full spectrum modification can image in a variety of different wavelengths with the addition of various replaceable filters used in the optical path. This photo shows the distorted colors of a typical earthly scene when photographed with a modified Canon EOS 40D and a Massa 720-nanometer IR-pass filter in front of the lens.
Hap Griffin
In astrophotography, the narrow spectral region where Hα predominates is also mostly free of light pollution from manmade sources and even moonlight, allowing you to shoot from urban locations and when a bright Moon washes out most other deep-sky subjects. Astronomik also offers a series of clip-in Canon filters that isolate many regions of the spectrum to take advantage of all these opportunities.
When imaging through these narrow specialized filters, be aware that your DSLR sensor uses an array of red, green, and blue filters (known as a Bayer matrix), with each pixel being sensitive to only one of these primary colors. This divides your detector into an array with 25% of the pixels having a red filter, 50% green, and 25% blue; the camera’s electronics interpolate this information to create your color image. Therefore, light through an Hα filter will only register on the red pixels. Similarly, UV-pass filters used with your modified DSLR will record UV light on the blue pixels. Pixels of other colors will show only noise, so in processing you’ll need to use only the pertinent color pixels for the narrowband filter in use. Most dedicated astronomical processing software for DSLR astrophotography, such as ImagesPlus (www.mlunsold.com) and MaxIm DL (www.cyanogen.com), has the ability to isolate these channels before color conversion.
Just as digital SLRs have revolutionized photography, modifying your camera greatly expands the possibilities of subject matter. And while there is some risk involved, more and more imagers are exploring the enhanced capabilities this change offers. The usefulness and versatility of this high-quality tool to image the heavens and the world around us continues to grow.
Source: Shooting with Modified DSLR Cameras – Sky & Telescope
Modified Canon 1000D for Full Spectrum – YouTube
Astronomik Clear Glass Modification for Canon DSLRs – Astro Imaging and Infrared Photography – by Gary Honis
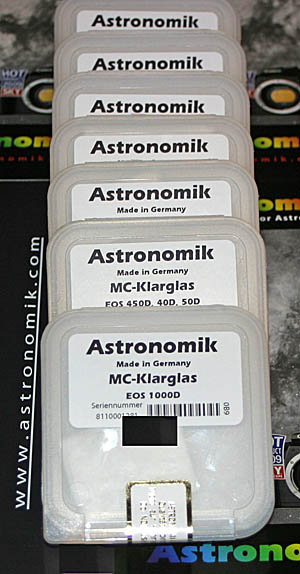 Astronomik Clear Glass Modification for Canon DSLRs
The Full Spectrum modification is available for the Canon models listed HERE.
After extensive testing, the Astronomik DSLR Clear Glass replacement has been found to provide a perfect solution for conversion of Canon DSLR models to “Full Spectrum” imaging capability. A Full Spectrum modification converts a DSLR camera for both astro-imaging and daytime infrared photography. The camera’s autofocus feature and optical viewfinder will continue to work as in the original un-modified camera. A full spectrum conversion with the high quality Astronomik optically polished mulit-coated clear glass eliminates blocking of Ultraviolet (UV) and Infrared (IR) light from the CMOS imaging chip. The camera can then be used to image all wavelengths of light from UV to visible to IR by selecting appropriate external filters. External filters for many applications are now widely available as screw-on camera lens filters, 2″ filters and other sizes available for CCD astro imaging devices and also as clip-in filters that can be placed inside the camera body.
Experienced astrophotographers, Eric Vesting and Gerd Neumann, founders of Astronomik have brought this new exciting innovation to market for DSLR astro imagers, along with Astronomik’s reputation for the highest quality filter standards at reasonable prices for the amateur astronomer.
Imaging possible with a Full Spectrum modification:
1. Astro Imaging: A Full Spectrum modified camera can be used for astro imaging, without any external filters, if the telescope system being used is “reflector” based and contains no lenses. Mirror systems focus all wavelengths of light to the same point; the lenses in refractor telescopes do not. Even the highest quality APO refractors usually require the use of an IR block filter to block infrared wavelengths that do not focus at the same point as visible light. Adding an external UV/IR filter to the optical train, such as the Astronomik UV/IR clip-in filter or Astronomik Luminance (IR/UV) – 2″ Mounted or the Baader 2″ UV/IR filter among others, can be used for astro imaging with optical systems that do include lenses. Clip-in filters can be used with Canon camera lenses as long as they are not the EF-S type. Clip-in light pollution filters have become very popular with those imaging in areas of light pollution. An ultraviolet pass filter can be used with a Full Spectrum camera to image cloud features on Venus and Jupiter. Other specialized filters such as the Astronomik Planet IR Pro 807 Filter can be used for enhanced lunar and planetary imaging. Simple spectroscopy of bright stars can be done with a Full Spectrum DSLR camera.
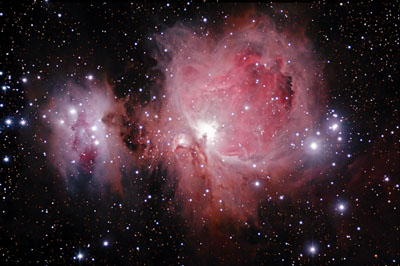
Example – M42:
2. Normal (terrestrial) Photography: A Full Spectrum modified camera can be used for normal imaging, as before modification by adding an external color correcting filter. A color correcting filter returns any modified camera to its original state of color balance and sharp focus because it restores the camera to the original transmission characteristics of the pre-modified camera. One such filter is the Astronomik OWB (Original White Balance) Filter, available in many sizes, including a clip-in version available from me:
http://www.astronomik.com/en/photographic-filters/owb-ccd-filter.html
I sell a 58mm lens thread-on UV/IR and also a 58mm Color Correcting filter.
A Full Spectrum camera, without adding an external color correcting filter, can be used with the Canon DSLR’s “Custom White Balance” (CWB) feature to get the color balance close, and even closer using image processing software, but since infrared light is not being blocked, images will not be as sharp as with the non-modified camera. That is why use of a color correcting filter is preferred.
Another option for color correction is to use a UV/IR filter. If an external UV/IR filter such as the Astronomik UV/IR clip-in filter is used with the Full Spectrum camera, the Canon DSLR’s “Custom White Balance” (CWB) feature can be used correct color balance for normal daytime photography. Contact me if you need the filter.
3. Infrared Photography: A Full Spectrum modified camera can be used for infrared photography by adding an external infrared pass filter such as the popular Hoya R72. The part of the spectrum seen by the imaging chip is referred to as near-infrared as opposed to far-infrared. An infrared filter allows infrared (IR) light to pass through to the imaging chip while blocking all or most of the visible light spectrum. The resulting infrared images have a “dreamlike” appearance in which blue sky is very dark, atmospheric haze disappears, vegetation such as trees and grass glow brightly and eyes appear black. Post-processing techniques such as false color processing are quite often used for displaying the infrared images. Non-modified cameras or those modified instead with the Baader UV/IR filter are not capable of producing infrared images of the same quality because infrared light is blocked inside the camera.
Astronomik’s complete line of filters for astro imaging can be seen HERE. All Astronomik filter transmission curves are HERE.
The DSLR clear glass replacement is based on Astronomik’s popular “Astronomik MC-Clear” filter as detailed HERE.
Transmission Curve for the Astronomik MC-Clear filter can be seen HERE.
The clear glass replacement is optically polished and multi-coated to maximize transmission and avoid ghosting. Both original Canon filters, Low-pass filter #1 and Low-pass filter #2, as shown below are removed from the camera and the single Astronomik clear glass is placed in the Low-pass filter #1 position.
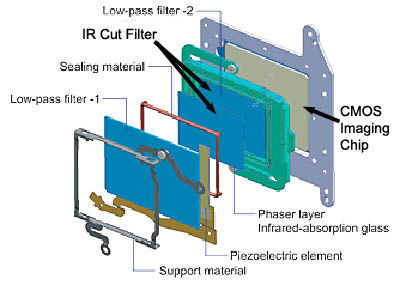
Since the original filter with the piezoelectric cleaning element is removed, the “auto sensor cleaning” function of the camera is disabled. The “manual sensor cleaning” function can still be used to clean the replacement Astronomik clear glass. With the Full Spectrum modification, the CMOS imaging chip is still protected from dust by the installed Astronomik MC Clear Glass replacement
The Astronomik clear filter replacement does not by itself return the modified camera to correct Auto Focus operation without adjusting the position of the CMOS imaging chip assembly. During camera modification, measurement is made of the existing shims or torx screws used by Canon, calculations are made for making replacement shims or adjusting the torx screws in order to maintain correct autofocus operation. A detailed procedure for modifying the Canon DSLR models begins HERE.
Full Spectrum DSLR Modifications
Would you like to be able to use your Canon DSLR for not only normal daylight photography, but also astronomical photography AND IR photography? With a “Full Spectrum” modification, your DSLR becomes a Triple-Use camera, optimized for your current application with external or clip-in filters.
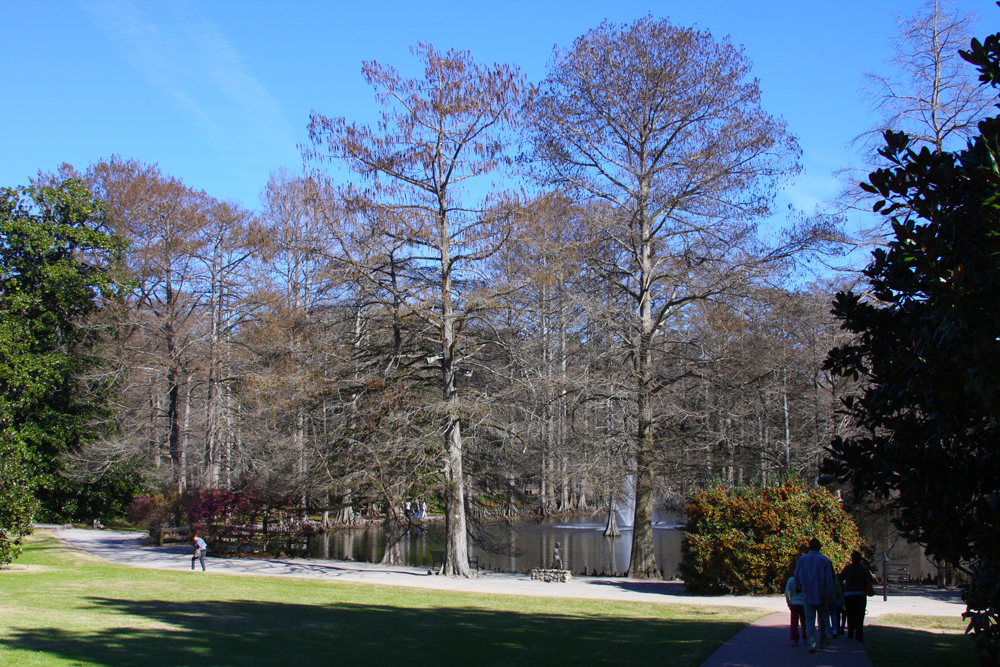 |
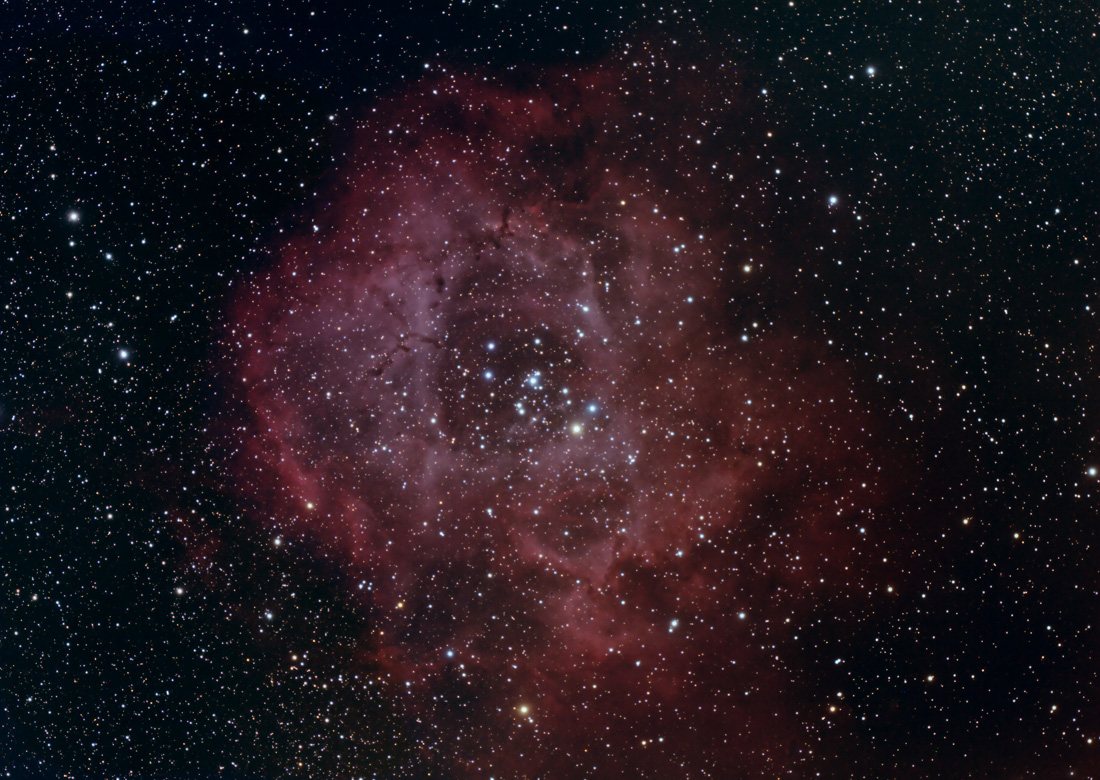 |
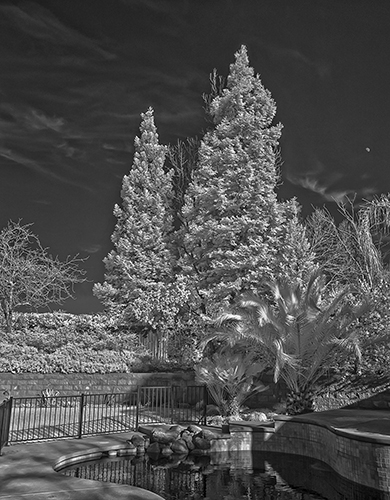 |
| Normal Photography With Astronomik OWB Clip-In Filter | Astrophotography with Astronomik L Clip-In Filter | IR Photography with Astronomik Pro-Planet 742 Clip-In Filter |
The New Astrodon Full Spectrum Option 2 modifications are available NOW!
Examples of IR photography with a Full Spectrum modified camera can be seen HERE.
Available Modification Options:
| Canon Camera | Option 2 (Full Spectrum) |
| Digital Rebel 300D | No |
| Digital Rebel 350XT | No |
| Digital Rebel 400D/XTi | Yes |
| Digital Rebel 450D/XSi | Yes |
| Digital Rebel 1000D/XS | Yes |
| Digital Rebel 500D/T1i | Yes |
| Digital Rebel 550D/T2i | Yes |
| Digital Rebel 600D/T3i | Yes |
| Digital Rebel 650D/T4i | Yes |
| Digital Rebel 700D/T5i | Yes |
| Digital Rebel 1100D/T3 | Yes |
| Digital Rebel 1200D/T5 | Yes |
| 5D | No |
| 5D Mk II | No |
| 7D | Yes |
| 6D | No |
| 10D | No |
| 20D | No |
| 30D | No |
| 40D | Yes |
| 50D | Yes |
| 60D | Yes |
Full Spectrum Modification Details:
Stock Canon DSLR’s built in the last several years contain two filters between the lens and the imaging sensor…an IR filter with the main purpose of blocking IR light and establishing the camera’s color balance, and a section of glass used for the “dust cleaner” function that also blocks some IR light. In order to open up the sensor’s full spectrum capabilities, BOTH of these filters must be removed. However, these filters also slow the light down in its path between the lens and the sensor, so when they are removed, the light will not come to focus properly on the front surface of the sensor. To remedy this, we replace the two filters with one single clear filter that has the exact equivalent optical thickness of the combined two removed filters. This restores the proper lens to sensor distance and keeps the camera’s auto-focus in calibration. There are other clear glass filters on the market, but they do not accurately replicate the original optical distance and the sensor position much be altered to return the auto-focus to calibration. This is a tedious operation requiring great precision. Only the Astrodon AD40Clear filter has the exact thickness and refractive index required to keep your auto-focus calibrated WITHOUT adjusting the stock sensor position. This makes it much easier for the do-it-yourself modifier.
In the stock camera, the two filters present four optical surfaces (not counting the lens and the sensor itself) that the light must pass through. Each surface can cause reflections which become apparent with bright off-axis stars in astrophotography. With the Astrodon Full Spectrum modification, the two existing filters are replaced by one, presenting only two surfaces…each of which is coated with the famous Astrodon hard oxide anti-reflection coating. The clear filter is not made of ordinary float glass, but strai-free fused silica for maximum performance.
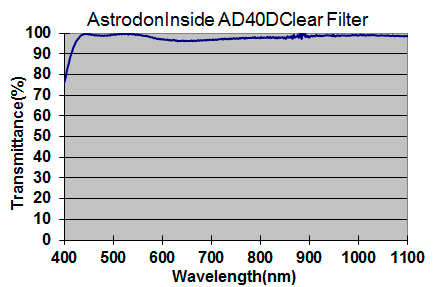
The AD40Clear filter presents greater than 95% transmission from 430 nm (UV) to 1100 nm (IR). This provides a camera that can be used for multiple purposes and optimized for each purpose by external or clip-in filters.
For instance, for normal daylight or indoor photography the spectrum must be restricted to that of visible light with a response curve that closely replicates that of the original stock filters. An external lens mounted filter such as the X-Nite CC1 could be used. This would require a separate filter for each lens in your bag, and possibly multiple sizes to fit your different lenses. A more economic and convenient solution would be a single clip-in original white balance filter such as the Astronomik OWB which clips into the front of the lens opening in the camera and works with all Canon EF lenses you may have (the EF-S lenses will not work with clip-in filters). A custom white balance cannot be used to color correct the full spectrum modified camera for normal use since the spectral response is TOO wide for a custom white balance to work…an actual optical correction filter must be used. Because the full spectrum modification removes the “anti-aliasing low pass filter” used for the dust cleaner function, images are of the highest level of detail that your camera is capable of capturing, but the automatic dust cleaning function will no longer be available.
For astronomical purposes, the extended UV and IR response must be limited, while preserving all of the wavelengths important for astronomical targets. This is because telescopes and lenses are not corrected for such a wide spectrum. They are optimized to accurately focus visible light and light with much shorter or longer wavelengths will be out of focus, causing “star bloating”. Systems that contain refractive elements are particularly bad about this problem, known as “chromatic abberation”. Even expensive APO refractors are not well corrected into the IR spectrum. A standard astronomical UV/IR blocking filter does the job nicely. Examples would be the Baader 2″ UV/IR blocker that could be put anywhere in the imaging chain. A clip-in filter such as the Astronomik Lcould also be used and would be a good solution for wide-field photography using normal camera lenses. In light polluted areas, the Astronomik CLS-CCD would be a good choice for reducing the effects of urban light pollution. SInce the camera is sensitive to the entire spectrum, narrowband filters such as Hydrogen-alpha, S2, O3, etc. can be used to good effect. Some astrophotographers are now experimenting with UV and IR imaging and the full spectrum modification provides a perfect platform for this work.
IR photography is becoming very popular and the full spectrum modification provides a camera that is wide open for experimenting with this mode. By using an external lens mounted or clip-in IR filter that passes infrared light but blocks visible light, the world appears vastly different photographically. The sky darkens and clouds become visible with much more contrast. Foliage appears in shades of white. Various processing techniques can be used to create other-worldly colored images.
All of this is now possible with a single camera!
Option 2 – Full Spectrum – IR Filter Replacement with Astrodon Clear Filter – $320.00 plus return shipping of customer’s choice
By replacing both the IR filter and the front filter used for the dust cleaner function with an Astrodon clear filter of the proper thickness, the optical viewfinder calibration and autofocus with normal lenses is retained. External or clip-in filters are used to customize the camera’s response for the use at hand…astronomical, normal photography, or IR imaging. In refractive astronomical optical systems (lenses, refractors, SCT’s with refractive corrector plates, or any telescope with an integral or external focal reducer), an external IR block filter must be inserted in the imaging chain such as a Baader UV/IR Block or Astronomik L Clip-In Filter. For normal daylight use with camera lenses, an external IR blocking and color correcting filter must be used such as the X-Nite CC1 filter or the Astronomik OWB Clip-In filter. For IR photography, a lens mounted IR filter or an Astronomik Pro 742 IR Clip-In filter may be used. Thus, with this modification and external filters, the camera becomes a triple-use device…astronomical, daylight and IR all in one!
For those who want to do the modification on their own, I offer the Astrodon AD40Clear filter by itself…
PLEASE NOTE: When doing your own camera modifications, you void any remaining warranty on your camera and you take full responsibility for any damage done during the modification. I will be happy to answer questions via e-mail but cannot be held responsible for any damages. If you do not feel comfortable working on microelectronics and expensive and fragile CMOS sensors, I offer full modification service using quality Astrodon Inside filters.
Various web sites include instructions for modifying Canon DSLR’s. Please be aware that the AD40Clear filter replaces BOTH of the stock glass filters. It should be mounted into the plastic IR filter holder in place of the stock IR filter. The front dust cleaning filter should be removed and the camera’s menu setting for automatic dust cleaning should be set to “disable”. When the AD40Clearreplaces BOTH stock filters, the position of the sensor platform does NOT have to be altered. In models with adjustable sensor platforms, be sure to carefully measure the height above the metal camera chassis of the sensor platform at all three adjustment screws with a dial micrometer or other instrument before the modification and return the sensor platform to the same position after modification. It is critical that the platform be returned EXACTLY to its original position at all three adjustment screw locations or the focus and/or sensor collimation will suffer. The adjustment can be done by counting fractions of a turn of each screw required to bottom out the adjustment and then adjusting the screws out by that same amount upon re-assembly, but I have found that method to be unreliable. A dial-micrometer provides a much finer adjustment measurement accurate to within 0.001″.
Lunar Calendar
I thought you’d like this Pin on Pinterest… http://pin.it/K0PI5zN
Messier 22 cluster
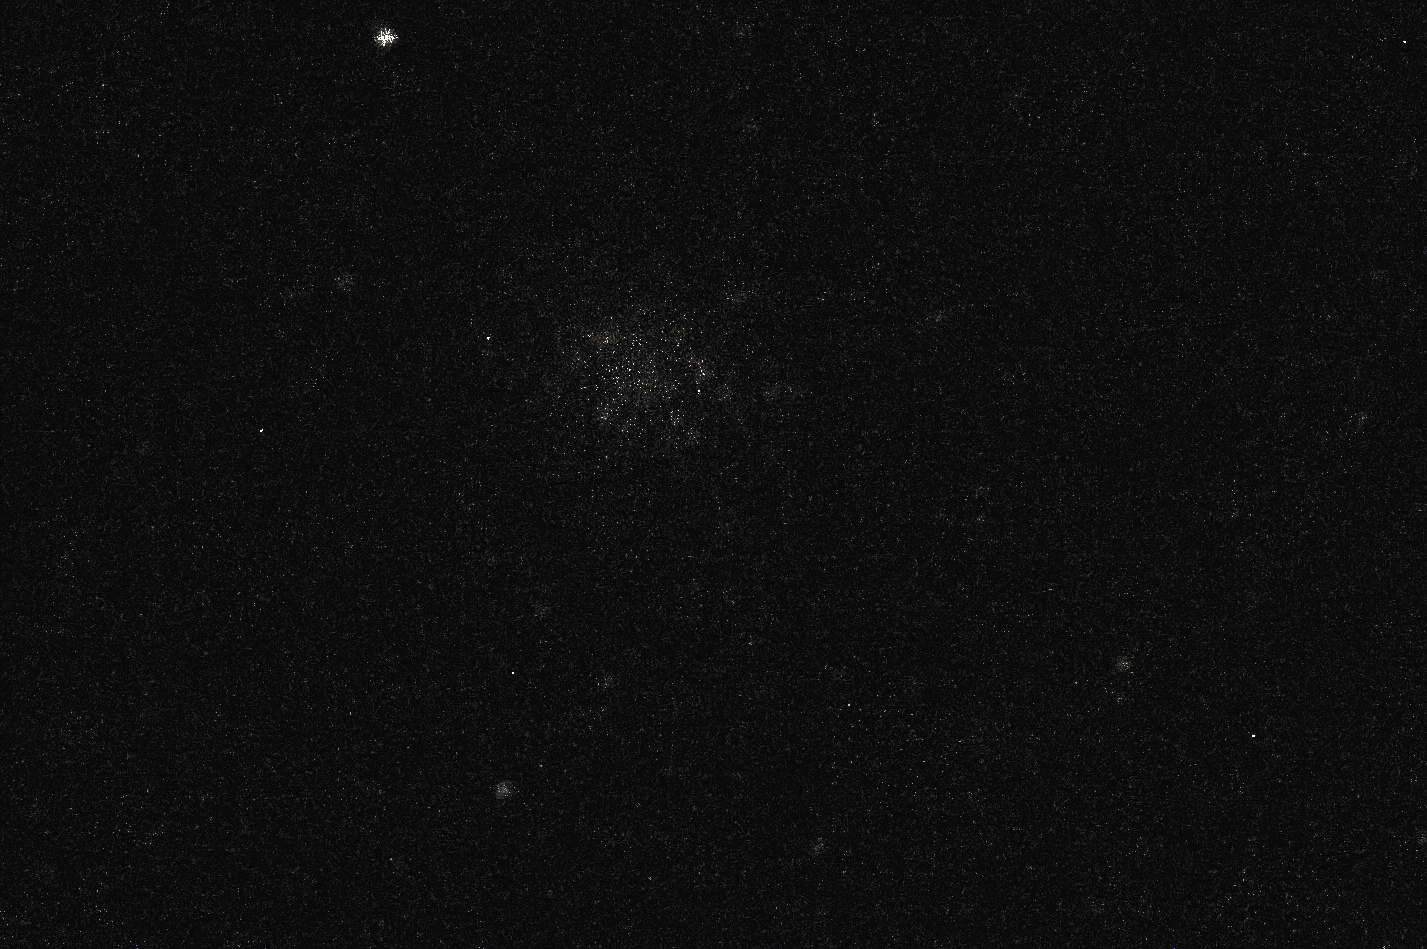
Messier 22 (NGC 6656) cluster photographed in Velestovo, Macedonia on 27-28.08.2016. Obtained by stacking of 277 light, 20 dark and 20 flat frames in DeepSky Stackerer. Photograph is captured with Canon 1100d attached to f/4 astrograph telescope with 200mm aperture, by using 0.5 sec shutter speed and ISO 6400. The cluster is at distance of 10.000 light years from earth, has 5.09 visual magnitude and have apparent size of 32 arcmin. It is located in the Sagitarius Constelation.
